A Zesty Cherry Pistachio Cheesecake Delight That’ll Steal the Show
Let me tell you a little secret: this Lemon-Lime Cherry Pistachio Cheesecake is the reason my neighbors started showing up unannounced on dessert nights. Seriously! The first time I made it, I thought I’d nailed it—but I had no idea how wildly it would be loved. Tangy lemon and lime swirl through creamy cheesecake, crowned with sweet-tart cherries and crunchy pistachios. It’s like a flavor party in your mouth, and everyone’s invited. If you’ve ever wanted a dessert that tastes as stunning as it looks—well, wow.
Where This Zesty Cherry Pistachio Cheesecake Delight Comes From
Cheesecake has ancient roots—Greeks served it to athletes during the first Olympic Games! But this version? Pure modern magic. I combined citrusy brightness (a nod to summer backyard gatherings), classic American cherry pie filling (hello, nostalgia!), and Middle Eastern-inspired pistachios (because texture matters!). It’s not traditional, but that’s what makes it special. I tested this recipe through three bake-offs, two cracked cheesecakes, and one very confused cat who thought the pistachios were toys. Now? It’s my go-to for impressing without stressing.
Why You’ll Absolutely Love This Recipe
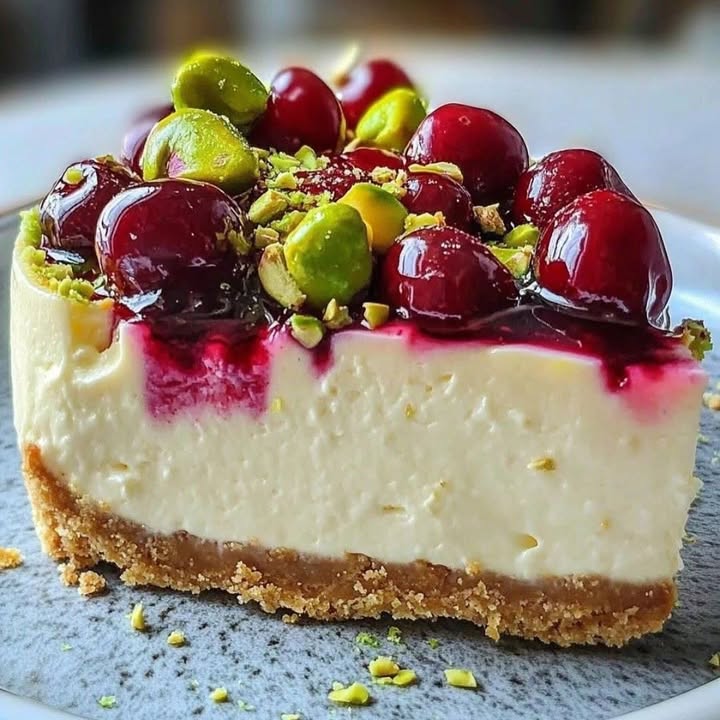
First, the flavor balance is perfect—zesty, creamy, fruity, and nutty all in one bite. Second, it’s easier than it looks! The crust is foolproof, the filling is smooth as silk, and the topping? Just spoon and sprinkle. Plus, it makes your kitchen smell like a fancy bakery. My kids beg for it, my friends ask for the recipe, and I get to feel like a dessert wizard. It’s also stunning on a plate—ruby red cherries against pale green pistachios over ivory cheesecake? Yes, please!
Perfect Occasions for This Zesty Cherry Pistachio Cheesecake Delight
This cheesecake shines at:
- Summer BBQs (citrus cuts through grilled meats)
- Birthday parties (it’s a showstopper without being fussy)
- Bridal or baby showers (elegant but not overly sweet)
- Weekend brunch (serve with coffee or sparkling water)
- Just-because Tuesdays (you deserve it!)
Ingredients You’ll Need
For the Crust:
- 1 cup graham cracker crumbs
- ¼ cup granulated sugar
- ¼ cup unsalted butter, melted
For the Cheesecake Filling:
- 3 (8-ounce) packages cream cheese, softened
- 1 cup granulated sugar
- ¼ cup sour cream
- ¼ cup heavy cream
- 3 large eggs
- 1 tablespoon lemon zest
- 1 tablespoon lime zest
- ¼ cup fresh lemon juice
- ¼ cup fresh lime juice
- 1 teaspoon vanilla extract
For the Topping:
- 1 cup fresh or canned cherry pie filling
- ¼ cup chopped pistachios
- Fresh mint leaves for garnish (optional)
Easy Ingredient Swaps
Don’t have something on hand? No worries:
- Graham crackers: Use shortbread cookies or digestive biscuits.
- Heavy cream: Substitute full-fat coconut milk for a dairy-free twist.
- Fresh citrus: In a pinch, bottled juice works—but zest must be fresh for best flavor.
- Pistachios: Swap with slivered almonds or toasted coconut flakes.
- Cherry pie filling: Use blueberry, raspberry, or mixed berry instead.
How to Make This Zesty Cherry Pistachio Cheesecake Delight
Step 1: Make the Crust
In a bowl, mix graham cracker crumbs, sugar, and melted butter until it looks like wet sand. Press firmly into the bottom (and slightly up the sides) of a 9-inch springform pan. I use the bottom of a measuring cup—it packs evenly and gives that perfect crisp base. Bake at 325°F for 10 minutes, then let it cool while you make the filling. Pro tip: Don’t skip pre-baking—this keeps your crust from getting soggy!
Step 2: Beat the Cream Cheese Smoothly
Beat softened cream cheese and sugar in a large bowl until completely smooth—no lumps! Scrape the sides often. This step is crucial for a silky texture. Then add sour cream, heavy cream, vanilla, and both zests. Mix just until combined. The citrus oils in the zest will start releasing that fresh, bright aroma—it’s like sunshine in your kitchen.
Step 3: Add Eggs Gently
Add eggs one at a time, mixing on low speed just until each disappears into the batter. Overmixing here traps air, which can cause cracks later. Once eggs are in, stir in lemon and lime juice. The batter will thin slightly but stay creamy and glossy. Chef’s tip: Room-temperature ingredients blend better and prevent lumps—trust me, I learned this after a lumpy cheesecake disaster!
Step 4: Bake with a Water Bath
Pour filling over the cooled crust. Place the springform pan in a larger roasting pan. Fill the roasting pan with hot water until it reaches halfway up the sides of the springform. This water bath keeps the oven humid and gentle, preventing cracks. Bake at 325°F for 60–70 minutes until edges are set but center still jiggles slightly. That gentle wobble? That’s your cue.
Step 5: Cool Slowly and Chill Completely
Turn off the oven, crack the door open 2 inches, and let the cheesecake cool inside for 1 hour. This slow cooldown prevents sudden temperature shocks that cause cracks. Then remove, run a knife around the edge (to release tension), and refrigerate uncovered for at least 4 hours—or better yet, overnight. Patience pays off with perfect slices!
Step 6: Add the Cherry-Pistachio Crown
Once chilled, spread cherry pie filling evenly over the top. Scatter chopped pistachios all over—they add crunch and that gorgeous green pop. Garnish with mint leaves if you’re feeling fancy. Slice with a hot, clean knife for picture-perfect pieces.
Timing Breakdown
- Prep time: 30 minutes
- Bake time: 65 minutes
- Cooling in oven: 60 minutes
- Chilling time: 4+ hours (overnight best)
- Total time: About 6 hours (mostly hands-off!)
Chef’s Secret for Flawless Citrus Cheesecake
Always zest your lemons and limes before juicing! The zest is packed with essential oils that carry 80% of the flavor. Once juiced, the skin gets slippery and hard to zest. Also, strain your citrus juice through a fine mesh sieve to catch any bitter white pith or seeds. These tiny steps make your Zesty Cherry Pistachio Cheesecake Delight taste bright, clean, and restaurant-worthy.
Fun Fact About This Dessert
Pistachios were once so rare and expensive in the U.S. that they were dyed red to mask stains from traditional harvesting methods! Thankfully, today’s California-grown pistachios are naturally vibrant green—and perfect for topping desserts like this one. And cherries? They’re one of the few fruits that grow true to seed, meaning the tree you plant from a pit actually becomes the same variety. Nature’s magic!
Necessary Equipment
- 9-inch springform pan
- Large roasting pan (for water bath)
- Electric hand or stand mixer
- Mixing bowls (medium and large)
- Zester or fine grater
- Rubber spatula
- Measuring cups and spoons
How to Store This Cheesecake
This Zesty Cherry Pistachio Cheesecake Delight keeps beautifully in the fridge. Store it covered with plastic wrap or in an airtight container. It stays fresh and creamy for up to 5 days. Just note: the pistachios may soften over time. If you want them crunchy, add them right before serving.
Not eating it all at once? Slice it first, then wrap individual pieces in parchment and foil. They’ll stay perfect for quick dessert cravings. I often freeze a slice for “me time” after bedtime!
Can you freeze the whole cheesecake? Yes! Freeze without the topping for up to 2 months. Thaw overnight in the fridge, then add cherries and pistachios fresh. Freezing with cherry topping can make the crust soggy, so hold off until serving.
Tips to Make It Even Better
- Use full-fat cream cheese—it gives the richest texture.
- Toast your pistachios lightly in a dry pan for extra nuttiness.
- If using canned cherry filling, drain excess syrup to avoid a runny top.
- For extra lemon-lime punch, add ½ teaspoon of citrus extract.
Presentation Ideas That Wow
- Serve on white plates to highlight the red and green colors.
- Drizzle with a little cherry syrup from the can for artistic flair.
- Pair each slice with a dollop of whipped cream or Greek yogurt.
- Add edible gold flakes for a luxe bridal shower look.
- Arrange fresh cherries and lime wheels around the plate.
Healthier Twists on This Favorite
Want a lighter version without losing flavor? Try these smart swaps:
1. Low-Sugar Citrus Cheesecake
Replace granulated sugar with ¾ cup monk fruit sweetener or erythritol. Use a sugar-free cherry compote made with chia seeds and fresh cherries. Keeps it sweet but cuts refined sugar completely.
2. Gluten-Free Crust Option
Swap graham crackers with almond flour, melted coconut oil, and a touch of maple syrup. Press and bake just like the original. Great for gluten-sensitive guests!
3. Vegan Zesty Cheesecake
Use soaked cashews + coconut cream + lemon juice as the base. Add agar-agar to set. Top with cherry compote and toasted pistachios. Surprisingly creamy and dairy-free!
4. Protein-Packed Version
Blend ½ cup vanilla protein powder into the filling (reduce sugar slightly). Use Greek yogurt instead of sour cream. Perfect for post-workout dessert lovers.
5. No-Bake Citrus Delight
Mix cream cheese with sweetened condensed milk, citrus zest, and juice. Pour over crust and chill 6 hours. Top with cherries and pistachios. Ideal for hot summer days!
6. Mini Cheesecake Jars
Layer crust, filling, and topping in small mason jars. Bake in a water bath or chill if no-bake style. Adorable for parties and easy portion control!
Common Mistakes to Avoid
Mistake 1: Cold Ingredients Cause Lumps
Cream cheese straight from the fridge won’t blend smoothly. You’ll end up with a gritty, uneven batter. Always let cream cheese, eggs, sour cream, and heavy cream sit at room temperature for 30–60 minutes before mixing. Your cheesecake will be velvety, not lumpy. Pro tip: Speed it up by microwaving cream cheese (unwrapped) in 10-second bursts—don’t melt it, just soften!
Mistake 2: Skipping the Water Bath
Without a water bath, your cheesecake bakes too fast on the outside, leading to cracks, dry edges, and uneven texture. The steam from the hot water creates gentle, even heat. Use a roasting pan, wrap your springform in foil to prevent leaks, and fill with boiling water right before baking.
Mistake 3: Overmixing the Batter
Beating the batter too long after adding eggs whips in too much air. That air expands in the oven, then collapses as it cools—hello, cracks! Mix on low speed and stop as soon as ingredients are combined. Gentle = perfect.
Mistake 4: Cutting Into It Too Soon
Slicing a warm or under-chilled cheesecake is a mess. You’ll lose clean layers and smooth texture. Always chill at least 4 hours, but overnight is best. Bonus: flavors meld and deepen, making it even tastier the next day!
Mistake 5: Adding Topping Too Early
Putting cherries and pistachios on before chilling makes the crust soggy and nuts soft. Wait until just before serving. If you must prep ahead, store topping separately and add it at the last minute.
Frequently Asked Questions
Can I use bottled lemon and lime juice?
You can, but your Zesty Cherry Pistachio Cheesecake Delight won’t taste as bright or fresh. Bottled juice often has preservatives and a flat flavor. Fresh juice gives that vibrant tang that balances the sweet cherries and rich cream cheese. If you must use bottled, add extra zest to compensate—but really, squeeze your own!
Why did my cheesecake crack on top?
Cracks usually come from overmixing, skipping the water bath, or cooling too fast. When air gets trapped or the center shrinks rapidly, cracks form. Don’t panic! The topping hides most flaws. For next time, mix gently, use a water bath, and cool slowly in the turned-off oven.
Can I make this recipe ahead of time?
Absolutely—and I highly recommend it! Cheesecake tastes best after a full day of chilling. Make it 1–2 days ahead, keep it covered in the fridge, and add the cherry-pistachio topping just before serving. It’s a stress-free dessert for busy hosts!
What’s the best way to slice cheesecake cleanly?
Use a long, sharp knife dipped in hot water, wiped dry, then sliced through the cake. Repeat between cuts. This melts through the creamy layers without dragging or crumbling. For extra clean edges, chill the whole cake well—cold = firm = perfect slices.
Can I use frozen cherries for the topping?
Yes, but thaw and drain them first, or cook them down with a little sugar and cornstarch to make a thick compote. Frozen cherries release a lot of water, which can make your topping runny. A quick simmer on the stove solves that!
Do I have to use a springform pan?
It’s strongly recommended. The removable sides make it easy to release the cheesecake without breaking it. If you don’t have one, line a regular cake pan with parchment paper, leaving overhang to lift it out—but it’s riskier and less reliable.
How do I prevent water from leaking into the pan?
Wrap the outside of your springform pan tightly in two layers of heavy-duty aluminum foil. Make sure there are no gaps or holes at the bottom. Some bakers even use slow-cooker liners for extra protection. Better safe than soggy!
Can I use lime or lemon alone instead of both?
Yes! You can go all-lemon (double the lemon zest and juice) or all-lime for a more tropical twist. But using both gives a complex, balanced zing that’s hard to beat. Think of it as citrus harmony!
Why is my crust crumbling when I slice?
That usually means not enough butter or it wasn’t pressed firmly. The butter binds the crumbs—use the full ¼ cup and pack the crust tightly with a flat-bottomed cup. Also, let it cool completely before adding filling so it sets properly.
Can I add more pistachios inside the cheesecake?
You can fold 2–3 tablespoons into the batter, but go easy—too many can make it dense. I prefer keeping them on top for crunch and visual pop. If you love nuts, sprinkle extra on the side of each slice before serving!
Final Thoughts
This Zesty Cherry Pistachio Cheesecake Delight isn’t just dessert—it’s a mood booster, a conversation starter, and a delicious way to show love. It’s fancy enough for company but simple enough for a weeknight treat. And once you’ve made it, you’ll understand why I keep a springform pan permanently on my counter. So grab those lemons, limes, cherries, and pistachios—and get ready for your new signature dish. Your future self (and your guests) will thank you!
Zesty Cherry Pistachio Cheesecake Delight
Ingredients
Equipment
Method
- Preheat oven to 325°F (163°C).
- In a bowl, mix graham cracker crumbs, sugar, and melted butter until it resembles wet sand.
- Press the mixture firmly into the bottom of a 9-inch springform pan and bake for 10 minutes, then let cool.
- Beat softened cream cheese and sugar in a large bowl until smooth, scraping the sides often.
- Add sour cream, heavy cream, vanilla, lemon zest, and lime zest, mixing until just combined.
- Add eggs one at a time, mixing on low speed, and then stir in lemon and lime juice.
- Pour filling over the cooled crust and place the springform pan in a larger roasting pan.
- Fill the roasting pan with hot water until it reaches halfway up the sides of the springform pan.
- Bake for 60–70 minutes until edges are set but the center jiggles slightly.
- Turn off the oven, crack the door open 2 inches, and let the cheesecake cool for 1 hour.
- Run a knife around the edge and refrigerate uncovered for at least 4 hours, preferably overnight.
- Spread cherry pie filling evenly over the top and scatter with chopped pistachios before serving.