A Chocolate Cherry Dream Roll Recipe That Feels Like Magic
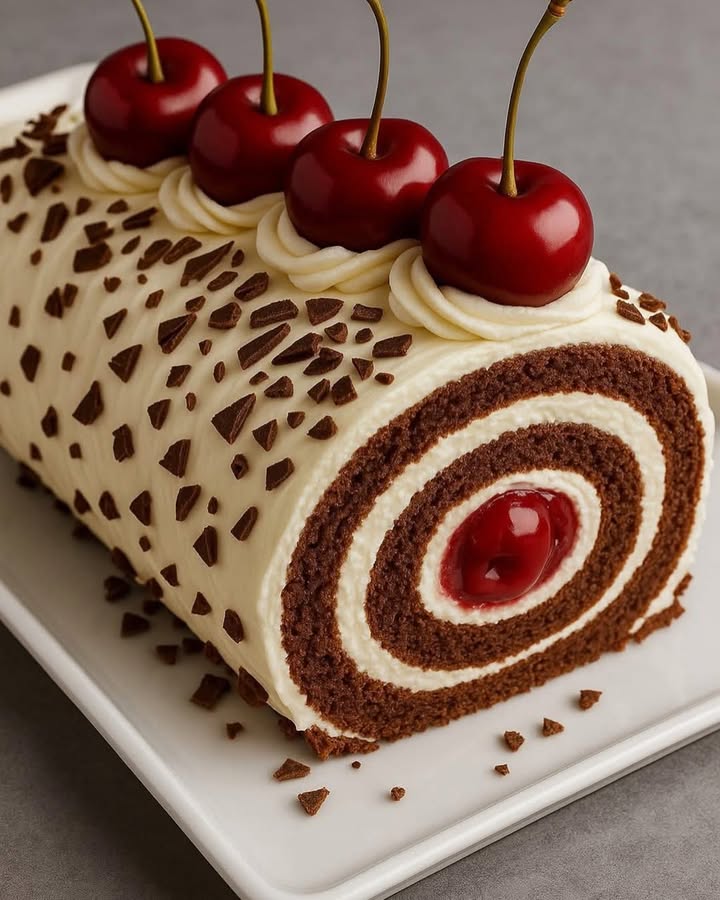
Let me tell you about the day my kitchen turned into a dessert wonderland. I was testing this roll—just a simple sheet of chocolate cake, whipped cream, and cherries—and when I sliced it open? That spiral! Deep red cherries nestled in clouds of cream, wrapped in tender chocolate cake… My 8-year-old niece gasped and said, “Auntie, it looks like a dream!” And honestly? She nailed it. This Chocolate Cherry Dream Roll Recipe isn’t just dessert—it’s edible joy. Velvety, fruity, light, and oh-so-pretty, it’s the kind of treat that steals the show without you breaking a sweat.
The Sweet Story Behind the Chocolate Cherry Dream Roll
While not a centuries-old classic, this roll is a modern love letter to Germany’s famous Black Forest cake—Schwarzwälder Kirschtorte. Traditionally layered with chocolate sponge, whipped cream, and kirsch-soaked cherries, it’s a celebration staple in German homes. But not everyone has time for layering cake and soaking fruit overnight! So clever home bakers (like yours truly!) reimagined it as a jelly roll: same soul, half the fuss. My version skips the alcohol (perfect for kids!) and uses fresh cherries for that juicy pop. It’s tradition with a wink—and a swirl!
Why You’ll Fall in Love with This Chocolate Cherry Dream Roll Recipe
Three words: fast, fancy, foolproof. In under an hour (plus chilling), you get a dessert that looks like it came from a patisserie. The cake is tender, not dense. The cream is light as air. And those cherries? They add just the right tang to balance the rich chocolate. Plus, it’s naturally impressive—no piping bags or fancy molds needed. Just roll, chill, slice, and watch eyes light up. It’s also surprisingly light compared to layered cakes, making it perfect for summer parties or cozy winter gatherings.
Perfect Moments for Your Chocolate Cherry Dream Roll
- Birthday celebrations (especially if someone loves chocolate AND fruit!)
- Valentine’s Day dessert—romantic, red, and decadent
- Summer potlucks (it holds up well and looks stunning)
- Holiday dinners when you want something elegant but easy
- “Just because” baking—because you deserve joy on a Tuesday!
Ingredients You’ll Need
For the Chocolate Cake:
- ¾ cup all-purpose wheat flour
- ¼ cup unsweetened cocoa powder (pure, not Dutch-processed)
- 1 teaspoon baking powder
- ¼ teaspoon salt
- 4 large eggs, room temperature
- ¾ cup granulated sugar
- 1 teaspoon vanilla extract
- 2 tablespoons whole milk
For the Filling:
- 1 cup heavy whipping cream, cold
- ¼ cup powdered sugar (sugar glas)
- 1 teaspoon vanilla extract
- 1 cup pitted fresh or jarred cherries (drained if jarred)
For Decoration:
- ½ cup whipped cream (from extra or reserved)
- Fresh cherries, halved and pitted
- Chocolate shavings or chips
- Extra powdered sugar for dusting
Easy Swaps & Substitutions
- Flour: Swap 1:1 with gluten-free all-purpose blend if needed.
- Cocoa: Dutch-processed works, but flavor will be milder.
- Milk: Any milk works—almond, oat, or even water in a pinch.
- Cherries: Use thawed frozen cherries or high-quality jarred (like Morello). Drain well!
- Cream: Coconut cream (chilled) for a dairy-free version (texture will differ slightly).
How to Make Your Chocolate Cherry Dream Roll Step by Step
Step 1: Prep and Preheat
Start by preheating your oven to 350°F (177°C). Line a 10×15-inch (25×38 cm) jelly roll pan with parchment paper, then lightly grease it. This size is key—it ensures your cake is thin enough to roll without cracking. I always double-check my pan size; using a smaller one makes the cake too thick and prone to breaking. Pro tip: Dust a clean kitchen towel generously with powdered sugar now—it’ll cradle your warm cake for the first roll.
Step 2: Whip That Cake Batter
In a large bowl, beat the eggs and sugar with a hand mixer for a full 5 minutes until pale, thick, and ribbony. You should see trails that hold shape briefly. Add the vanilla and milk, then gently fold in the sifted dry ingredients (flour, cocoa, baking powder, salt) until just combined. Don’t overmix! The batter should be smooth, glossy, and flow like heavy cream. Overmixing develops gluten and makes the cake tough—nobody wants a chewy roll!
Step 3: Bake Until Perfectly Springy
Pour the batter evenly into your prepared pan and smooth the top. Bake for 10–12 minutes. The cake is done when it springs back lightly when touched in the center and the edges just start to pull away. It should look matte, not glossy. Underbaking = soggy roll. Overbaking = cracks. Set a timer! I peek at 10 minutes—every oven varies.
Step 4: Roll It Warm (Yes, Really!)
As soon as it comes out, run a knife around the edges, then flip the cake onto your powdered sugar-dusted towel. Carefully peel off the parchment. Starting from the short end, gently roll the cake up inside the towel while it’s still warm. Let it cool completely on a wire rack. This “memory roll” keeps it flexible for the final filling. Skipping this step is the #1 reason rolls crack later!
Step 5: Whip Cream & Add Cherries
Once the cake is cool, unroll it gently. In a chilled bowl, whip the cold cream with powdered sugar and vanilla until soft peaks form—don’t overwhip or it’ll turn grainy. Spread the cream evenly over the cake, leaving a ½-inch border. Dot generously with cherries. I like to press them lightly into the cream so they don’t shift during rolling.
Step 6: Roll, Chill, and Set
Using the towel to help, roll the cake back up tightly but gently. Wrap it snugly in plastic wrap and refrigerate for at least 1 hour (or up to 24 hours). Chilling firms up the cream and lets the roll hold its shape beautifully. This waiting time is torture—but trust me, it’s worth it. The spiral will be clean and dreamy!
Step 7: Decorate Like a Pro
Unwrap your roll and place it seam-side down on a serving platter. Pipe or spread a thin layer of whipped cream over the top. Arrange fresh cherry halves along the center, then sprinkle with chocolate shavings. Dust lightly with powdered sugar. For that “wow” slice, dip your knife in hot water and wipe clean between cuts. Serve chilled—it’s heaven on a plate!
Timing at a Glance
- Prep time: 30 minutes
- Bake time: 12 minutes
- Chill time: 1 hour (minimum)
- Total time: 1 hour 42 minutes
- Servings: 10 generous slices
- Difficulty: Average (but feels advanced!)
Chef’s Secret for the Perfect Roll
Here’s my golden trick: **use room-temperature eggs and whip them long enough**. Cold eggs won’t trap air properly, and under-whipped batter = flat cake. Those 5 minutes of whipping create the airy structure that makes rolling possible. Also, don’t skip the warm roll in the towel—it’s non-negotiable for crack-free results!
Fun Fact About This Dreamy Dessert
Did you know? Real Black Forest cake from Germany must contain kirsch (cherry brandy) by law! But this family-friendly version swaps it for fresh cherries, making it perfect for all ages. Plus, the spiral design mimics the swirling mists of Germany’s actual Black Forest region—how poetic is that?
Necessary Equipment
- 10×15-inch jelly roll pan
- Parchment paper
- Hand mixer or stand mixer
- Sifter or fine mesh strainer
- Clean kitchen towel
- Plastic wrap
- Offset spatula or butter knife
- Cooling rack
How to Store Your Chocolate Cherry Dream Roll
Store your finished roll, covered loosely with plastic wrap or in an airtight container, in the refrigerator for up to 3 days. The cream filling needs to stay cold for food safety and texture. After 24 hours, the cake absorbs a bit of moisture from the cream and cherries, making it even more tender—some say it’s better on day two!
If you’ve made it ahead (great move!), freeze it before adding the final decorations. Wrap the unfrosted roll tightly in plastic, then foil, and freeze for up to 1 month. Thaw overnight in the fridge, then decorate and serve. Freezing after decorating causes the cream to weep and cherries to bleed color.
Never leave it out at room temperature for more than 2 hours. Dairy + warmth = not your friend. If your kitchen is hot, reduce that time to 1 hour. Better safe than sorry when cream’s involved!
Extra Tips for Rolling Success
- Sift dry ingredients twice for extra-light cake.
- Use a serrated knife for cleaner slices.
- Pat cherries dry with a paper towel to prevent soggy filling.
- Add 1 tablespoon cornstarch to whipped cream for extra stability.
- For glossy cherries, toss them in 1 tsp apricot jam (warmed).
Ways to Wow with Presentation
- Serve on a slate board with chocolate drizzle underneath.
- Top with edible gold flakes for a luxe touch.
- Arrange sliced almonds around the base for crunch.
- Place on a bed of mint leaves for color contrast.
- Dust with cocoa powder instead of powdered sugar for a moody look.
6 Healthier Twists on This Classic Roll
1. Whole Wheat Wonder
Swap half the all-purpose flour for whole wheat pastry flour. It adds fiber and a nutty depth without weighing down the cake. Pair with Greek yogurt whipped into the cream for extra protein.
2. Sugar-Smart Version
Use a monk fruit-erythritol blend in place of sugar in the cake and filling. Reduce cocoa slightly to balance bitterness. Sweet cherries (like Bing) help offset reduced sweetness.
3. Dairy-Free Dream
Use canned coconut cream (chilled overnight) for filling. For the cake, replace milk with almond milk and use dairy-free chocolate chips. It’s rich, tropical, and still rolls beautifully.
4. Protein-Packed Roll
Add 2 tablespoons unflavored collagen or chocolate whey to the dry ingredients. Boost the cream with ¼ cup Greek yogurt. Keeps you full longer without sacrificing fluffiness.
5. Low-Carb Chocolate Swirl
Use almond flour and cocoa in a 2:1 ratio for the cake base. Sweeten with allulose—it caramelizes like sugar! Fill with lightly sweetened mascarpone and fresh cherries (in moderation).
6. Vegan Cherry Bliss
Make the cake with flax eggs (1 tbsp ground flax + 3 tbsp water per egg) and plant milk. Whip chilled coconut cream with maple syrup. Use jarred cherries in juice (not syrup) to keep it refined-sugar-free.
Common Mistakes to Avoid
Mistake 1: Skipping the Warm Roll
Many bakers think, “I’ll just fill it cold—it’ll be fine!” But warm cake is flexible; cold cake is brittle. Rolling it while warm (inside the towel) sets its “memory” so it won’t crack during the final roll. Pro tip: Don’t rush the cooling—let it cool completely in the towel before unrolling to fill.
Mistake 2: Overbaking the Cake
A dry cake = guaranteed cracks. This thin sheet bakes fast—10 to 12 minutes is all it needs. Overbaking evaporates moisture, making it stiff. Always check early. The cake should feel springy, not firm, and a toothpick should come out with moist crumbs (not wet batter, not dry).
Mistake 3: Overwhipping the Cream
Whipped cream should be soft and spreadable, not stiff like butter. Overwhipped cream becomes grainy and can tear the delicate cake when rolled. Whip on medium speed just until peaks hold their shape but droop slightly at the tip. If you go too far, fold in 1 tablespoon of cold milk to loosen it.
Mistake 4: Using Wet Cherries
Jarred or thawed cherries release juice. If you don’t pat them dry, that liquid seeps into the cake and cream, making the roll soggy and hard to slice. Always drain well and blot with paper towels. Bonus: Toss them in 1 teaspoon cornstarch to absorb extra moisture.
Mistake 5: Rolling Too Tightly or Too Loosely
Roll it like a sleeping bag—snug but not strangled. Too tight, and the filling squirts out the ends; too loose, and it won’t hold its spiral shape. Use the towel or parchment to guide you, applying even pressure from the short end. A gentle touch wins every time!
Frequently Asked Questions
Can I make this roll ahead of time?
Absolutely! Assemble and chill it up to 24 hours before serving. In fact, it slices cleaner and tastes more cohesive after resting. Just wait to add the final decorations (fresh cherries, chocolate shavings) until right before serving to keep everything fresh and vibrant.
Why did my cake crack when I rolled it?
Most likely, you skipped the warm roll step or overbaked the cake. Warm rolling creates flexibility, while overbaking removes moisture needed for bending. Also, ensure your cake layer isn’t too thin—spread batter evenly in the pan so it’s uniform. A crack isn’t the end of the world—just cover it with extra cream!
Can I use frozen cherries?
Yes! Thaw them completely, drain well, and pat dry with paper towels. Frozen cherries work great and are often more affordable year-round. Just avoid cherry pie filling—it’s too sweet and syrupy, which makes the roll soggy.
Is this the same as a Black Forest cake?
It’s inspired by it! Traditional Black Forest cake has layers of chocolate sponge, whipped cream, and kirsch-soaked cherries, often with chocolate curls. This roll simplifies the concept into a jelly roll format—same flavors, easier execution, and no alcohol, making it family-friendly.
What if my whipped cream deflates?
Whipped cream holds best when ingredients and tools are cold. Chill your bowl and beaters for 10 minutes before starting. Whip just until soft peaks form. Adding 1 teaspoon of powdered sugar stabilizer or cornstarch helps it last longer in the fridge without weeping.
Can I use store-bought whipped cream?
You can, but it won’t hold up as well. Canned whipped cream is too airy and melts quickly. For best results, make your own—it’s faster than you think and tastes infinitely better. Plus, you control the sweetness!
How do I get clean slices?
Use a sharp serrated knife. Dip it in hot water, wipe dry, then slice smoothly in one motion. Clean the blade between cuts. Chilling the roll for at least 1 hour firms everything up, making slicing neat and easy.
Can I add alcohol like kirsch?
Sure! For an adult version, toss the cherries in 1–2 tablespoons of kirsch or cherry brandy before adding to the filling. Let them soak 10 minutes, then drain lightly. Skip this for kids or gatherings where alcohol isn’t appropriate.
What kind of cocoa powder should I use?
Use natural unsweetened cocoa powder (like Hershey’s). Dutch-processed cocoa is darker and less acidic, which can affect rise and flavor. Natural cocoa gives that classic, bright chocolate taste that pairs perfectly with cherries.
Can I freeze this dessert?
Yes—but only before decorating. Wrap the unfrosted, chilled roll tightly in plastic and foil. Freeze up to 1 month. Thaw overnight in the fridge, then decorate and serve. Freezing after decorating causes condensation and ruins the cream’s texture.
Your New Go-To Showstopper Dessert
This Chocolate Cherry Dream Roll isn’t just dessert—it’s your secret weapon for looking like a baking genius with minimal effort. It’s got drama, flavor, and heart. Every time I serve it, someone asks for the recipe. And now, you’ve got it—tested, tweaked, and loved in my own kitchen. So go ahead: whip up that batter, roll with confidence, and slice into something truly magical. Your dream dessert is waiting!
Chocolate Cherry Dream Roll Recipe
Ingredients
Equipment
Method
- Preheat your oven to 350°F (177°C) and line a 10x15-inch jelly roll pan with parchment paper, lightly greasing it.
- Beat the eggs and sugar in a large bowl with a hand mixer for 5 minutes until thick and ribbony.
- Add vanilla and milk, then gently fold in sifted dry ingredients until just combined.
- Pour the batter into the prepared pan and bake for 10–12 minutes, until the cake springs back when touched.
- Run a knife around the edges and flip the cake onto a powdered sugar-dusted towel, peeling off the parchment paper.
- Roll the warm cake in the towel from the short end and let it cool on a wire rack.
- Unroll the cooled cake gently and whip the cream with powdered sugar and vanilla until soft peaks form.
- Spread the whipped cream evenly over the cake, leaving a ½-inch border, and dot generously with cherries.
- Roll the cake back up tightly using the towel, wrap in plastic, and refrigerate for at least 1 hour.
- Unwrap, place seam-side down on a platter, and decorate with whipped cream, cherries, and chocolate shavings before serving.