A Slice of Comfort: Discover the Magic of Comforting Matera Cake Delight
There’s something magical about cakes that bring people together, isn’t there? Last Sunday, I baked this Comforting Matera Cake Delight for my family, and let me tell you—it was a hit! The soft, spongy texture of the cake paired with the creamy golden pastry cream made everyone pause mid-bite to savor it. Whether you’re enjoying it with coffee, tea, or even as a sweet treat for your kids, this recipe is bound to become your go-to dessert.
The Story Behind This Sweet Tradition
This cake has its roots in Italian baking traditions, where simplicity meets elegance. The custard filling, also known as crema pasticcera, is a classic element in many Italian desserts. Growing up, my grandma used to make something similar during family gatherings. Her secret? A touch of vanilla essence that gave the custard an irresistible aroma. I’ve adapted her recipe slightly by adding more milk to the batter for extra moisture, making it lighter and perfect for modern tastes.
Why You’ll Fall in Love with This Recipe
What makes this Comforting Matera Cake Delight so special? First, it’s beginner-friendly—no fancy techniques required. Second, it’s budget-friendly, using pantry staples like flour, sugar, eggs, and butter. Third, the combination of flavors is pure comfort. The buttery cake contrasts beautifully with the silky custard, creating layers of taste and texture. Plus, who doesn’t love a dessert that looks impressive but takes minimal effort?
When to Serve This Irresistible Treat
This cake shines on cozy afternoons when you need a pick-me-up. It’s perfect for birthday parties, baby showers, or even casual get-togethers. I once brought it to a potluck, and everyone kept asking for seconds (and the recipe!). If you’re looking for a dessert that feels homemade yet elegant, this is it.
Ingredients You’ll Need
- For the cake:
- 250 g of wheat flour
- 200 g of sugar
- 100 g of butter or margarine
- 3 eggs
- 120 ml of milk
- 1 teaspoon of baking powder
- 1 teaspoon of vanilla essence
- For the custard:
- 250 ml of milk
- 2 egg yolks
- 50 g of sugar
- 20 g of cornstarch
- 1 teaspoon of vanilla essence
Substitutions for Every Kitchen
If you don’t have all the ingredients, no worries! Swap butter with oil for a dairy-free version. Use almond or coconut milk instead of regular milk if you prefer plant-based options. For the custard, arrowroot powder works just as well as cornstarch. And if vanilla essence isn’t available, a splash of lemon zest adds brightness.
Step 1: Making the Golden Pastry Cream
Start by heating the milk with vanilla essence until warm but not boiling. In a separate bowl, whisk the egg yolks with sugar until pale yellow. Add the cornstarch and mix until smooth. Slowly pour the hot milk into the yolk mixture while stirring constantly to avoid curdling. Return the mixture to the stove and cook over low heat, stirring continuously until it thickens into a glossy custard. Let it cool completely before using.
Pro tip: Place plastic wrap directly on the surface of the custard while cooling to prevent a skin from forming.
Step 2: Preparing the Cake Batter
In a large bowl, beat the softened butter with sugar until light and fluffy. Crack in the eggs one at a time, mixing well after each addition. Stir in the vanilla essence for that signature aroma. Gradually add the flour mixed with baking powder, alternating with the milk, until you achieve a soft, velvety batter. The consistency should remind you of whipped cream—smooth and airy.
Chef’s tip: Make sure your butter is at room temperature for easier blending.
Step 3: Baking the Cake
Pour the batter into a greased and floured cake pan. Tap it gently on the counter to release any air bubbles. Bake at 180°C (350°F) for 35-40 minutes. To check if it’s done, insert a toothpick into the center—if it comes out clean, you’re good to go. Let the cake cool completely before decorating.
Pro tip: Don’t rush the cooling process; a warm cake will cause the custard to melt and lose its shape.
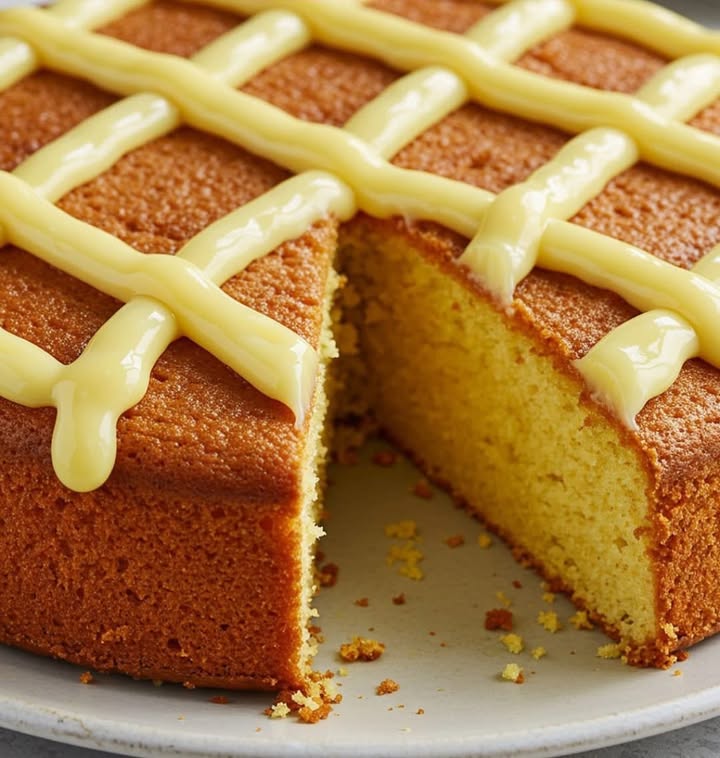
Step 4: Decorating with Style
Once the cake is cool, spoon the chilled custard into a piping bag fitted with a star nozzle. Create beautiful swirls or lines across the top of the cake. Feel free to get creative—you can even sprinkle some powdered sugar or grated chocolate for extra flair!
Timing Breakdown
- Preparation Time: 20 minutes
- Cooking Time: 40 minutes
- Resting/Cooling Time: 30 minutes
- Total Time: About 1 hour and 30 minutes
A Secret from My Kitchen
To make the custard extra rich, I sometimes stir in a tablespoon of unsalted butter right after taking it off the heat. This little trick gives it a luxurious sheen and silkier texture.
An Interesting Fact About Custard
Did you know that custard dates back to medieval Europe? Originally, it was served as a savory dish before becoming the sweet delight we know today. Vanilla, often used in custards, was once considered so precious that only royalty could afford it!
Essential Equipment
- Mixing bowls
- Whisk and spatula
- Piping bag with nozzle
- Cake pan (round or square)
- Oven
How to Store Your Cake
Store the cake in an airtight container at room temperature for up to two days. After that, refrigerate it to extend its shelf life. Keep in mind that refrigeration might dry out the cake slightly, so bring it back to room temperature before serving.
If you live in a humid climate, storing it in the fridge is safer. Just cover it tightly with plastic wrap to lock in moisture.
Freezing is another option. Wrap individual slices in parchment paper, then place them in a freezer-safe bag. They’ll stay fresh for up to three months.
Tips and Advice
- Sift the flour and baking powder together to ensure a lump-free batter.
- Use room-temperature eggs for better emulsification.
- Don’t overmix the batter; stop as soon as everything is combined.
Presentation Ideas
- Dust with cocoa powder for a rustic look.
- Add fresh berries on top for a pop of color.
- Drizzle honey or caramel sauce for added sweetness.
Healthier Alternatives
Here are six ways to tweak this recipe for a healthier twist:
- Whole Wheat Flour: Substitute half the wheat flour with whole wheat for added fiber.
- Less Sugar: Reduce the sugar by 25% without compromising flavor.
- Yogurt Base: Replace some of the milk with Greek yogurt for tanginess and protein.
- Egg Whites Only: Use egg whites instead of whole eggs to cut down on cholesterol.
- Coconut Milk Custard: Try coconut milk for a dairy-free, tropical twist.
- Fruit Swirls: Blend mashed bananas or applesauce into the batter for natural sweetness.
Mistake 1: Overbeating the Batter
Overbeating leads to a dense cake because too much gluten develops. To avoid this, mix the batter just until the ingredients come together. Remember, lumps are okay—they’ll disappear during baking.
Practical tip: Fold in the flour gently using a spatula rather than a mixer.
Mistake 2: Skipping the Cooling Step
Rushing to decorate a warm cake causes the custard to melt and ruin the presentation. Patience pays off here—let both the cake and custard cool completely before assembling.
Practical tip: Chill the custard in the fridge while the cake bakes.
Mistake 3: Underbaking the Cake
An underbaked cake will collapse and taste raw in the middle. Always test with a toothpick and look for visual cues like a golden-brown top.
Practical tip: Rotate the pan halfway through baking for even cooking.
FAQ Section
Can I use self-rising flour instead of all-purpose flour?
Yes, you can! Self-rising flour already contains baking powder, so omit the additional baking powder called for in the recipe.
How do I fix a lumpy custard?
If your custack turns out lumpy, strain it through a fine mesh sieve while still warm. This will remove any clumps and give you a smoother consistency.
Can I freeze the finished cake?
Absolutely! Wrap the cake tightly in plastic wrap and aluminum foil before freezing. Thaw overnight in the fridge before serving.
What if I don’t have a piping bag?
No problem! Simply spread the custard evenly over the cake with a spatula or spoon. It won’t be as decorative, but it’ll taste just as good.
Is this cake suitable for vegans?
With a few tweaks, yes! Use plant-based milk, vegan butter, and replace the eggs with flaxseed meal mixed with water.
Can I add fruit to the cake batter?
Definitely! Blueberries or diced apples work wonderfully. Toss them in flour first to prevent sinking.
Why did my cake sink in the middle?
This usually happens due to underbaking or opening the oven door too early. Avoid checking the cake frequently during the first 25 minutes of baking.
How long does the custard last?
Stored in an airtight container in the fridge, the custard will keep for up to three days.
Can I make this recipe gluten-free?
Swap the wheat flour with a gluten-free flour blend, and ensure your baking powder is gluten-free too.
What other flavors pair well with vanilla?
Lemon zest, almond extract, or a pinch of cinnamon complement vanilla beautifully.
Final Thoughts
Baking the Comforting Matera Cake Delight is like wrapping yourself in a warm hug. Its simplicity, versatility, and crowd-pleasing taste make it a must-try. So grab your apron, gather your ingredients, and let’s create a dessert that brings smiles to every face around the table. Happy baking!
Comforting Matera Cake Delight
Ingredients
Equipment
Method
- Heat the milk with vanilla essence until warm but not boiling.
- In a separate bowl, whisk the egg yolks with sugar until pale yellow, then add cornstarch and mix until smooth.
- Slowly pour the hot milk into the yolk mixture while stirring constantly to avoid curdling.
- Return the mixture to the stove and cook over low heat, stirring continuously until it thickens into a glossy custard, then let it cool completely.
- Beat the softened butter with sugar until light and fluffy in a large bowl.
- Crack in the eggs one at a time, mixing well after each addition, and stir in the vanilla essence.
- Gradually add the flour mixed with baking powder, alternating with the milk, until you achieve a soft batter.
- Pour the batter into a greased and floured cake pan and bake at 180°C (350°F) for 35-40 minutes.
- Let the cake cool completely before decorating.
- Spoon the chilled custard into a piping bag and decorate the top of the cake.