Have you ever taken a bite of something so soft, so light, it felt like a cloud had wandered into your kitchen? That’s the magic of the Deliciously Simple Airy Snail Cake—a sweet, nutty, spiral-shaped delight that’s as fun to make as it is to eat. I first tried it at a weekend brunch with my cousin Lena, who learned it from her German grandmother. One bite, and I was hooked. Now, I make it every Sunday for my kids, and they call it “Mama’s cloud cake.” It’s buttery, fragrant with lemon and cinnamon, and studded with nutty goodness that makes every slice feel like a little hug.
Where Did the Airy Snail Cake Come From?
This charming treat has roots in Central European baking traditions, especially in Germany and Austria, where “Schnecken” (snail-shaped pastries) are a beloved weekend ritual. The classic version often uses poppy seeds or nuts, but the Deliciously Simple Airy Snail Cake elevates it with a pillowy yeast dough and a rich hazelnut-pecan filling. My version? It’s a love letter to my grandma’s kitchen—she’d never measure anything, but somehow, it always worked. I’ve tamed her wild magic into a recipe that’s reliable, yet still full of heart.
Why You’ll Fall in Love with This Airy Snail Cake
It’s soft like a whisper, fragrant with vanilla and lemon, and packed with a sweet, spiced nut filling that’s just the right amount of indulgent. The dough is easy to work with—even if you’ve never baked with yeast before. Plus, it fills your home with the kind of aroma that makes everyone wander into the kitchen asking, “What’s that amazing smell?” And let’s be honest: who doesn’t love pulling apart a warm, swirled cake with their fingers?
Perfect Moments for This Deliciously Simple Airy Snail Cake
Make it for a lazy Sunday breakfast with coffee. Surprise your book club with a slice that sparks conversation. Pack it for a picnic—it travels beautifully. It’s also a showstopper at holiday brunches or as a sweet gesture for a new neighbor. Honestly, any day that ends with “I need a little joy” is the right day for this cake.
Ingredients for Your Airy Snail Cake
For the dough
- 500 g wheat flour type 405 (or all-purpose flour)
- 70 g sugar
- 1 packet (about 8 g) Bourbon vanilla sugar
- 1 pinch of salt
- 1 teaspoon finely grated untreated lemon peel
- 200 ml lukewarm milk
- 1 cube fresh yeast (approx. 21 g)
- 1 egg (size M)
- 60 g soft butter
For the filling
- 100 g pecan kernels
- 200 g ground hazelnuts
- 150 ml milk
- 100 g sugar
- 1 teaspoon cinnamon
- 1 pinch of salt
For the glaze
- 3 tablespoons powdered sugar
- 1 tablespoon lemon juice
Easy Substitutions for Your Airy Snail Cake
No fresh yeast? Use 7 g (1 packet) of active dry yeast instead—just mix it with the warm milk and a pinch of sugar, let it foam for 5 minutes, then proceed. Don’t have pecans? Swap them for walnuts or almonds. All-purpose flour works perfectly if you can’t find type 405. Dairy-free? Use oat or almond milk and vegan butter—this cake stays tender and flavorful. And if you’re out of vanilla sugar, use 1 teaspoon vanilla extract in the dough.
How to Make the Deliciously Simple Airy Snail Cake
Step 1
Start by warming the milk until it’s just comfortably warm—like bathwater, not hot. In a big mixing bowl, whisk together the flour, sugar, vanilla sugar, salt, and lemon zest. Make a well in the center. Crumble the fresh yeast into that well, then add about 25 ml of the warm milk and stir it gently with a spoon to dissolve the yeast. Now, grab a little flour from the edges and mix it into the yeast—it should look like a thick, bubbly paste. Cover the bowl with a clean kitchen towel and let it sit for 5 minutes. You’ll see little bubbles forming—that’s your yeast waking up!
Pro tip: If your kitchen is chilly, place the bowl near a warm oven or on top of the fridge to help the yeast activate faster.
Step 2
Now, pour in the rest of the warm milk, add the soft butter and the whole egg, and start mixing. Use your hand mixer with dough hooks or a stand mixer on medium speed. Knead for at least 3 minutes until the dough is smooth, elastic, and pulls away from the sides of the bowl. It should feel soft and slightly tacky, but not sticky. Cover it again and let it rise in a warm, draft-free spot for 30–40 minutes. It won’t double in size, but it’ll puff up noticeably and feel airy to the touch.
Chef’s tip: Don’t skip the kneading time—this builds the gluten that gives your cake its signature “airy” texture.
Step 3
While the dough rises, make the filling. Roughly chop the pecans—they should be small but still have some texture. Mix them with the ground hazelnuts in a bowl. In a small saucepan, heat the milk, sugar, cinnamon, and pinch of salt until it just starts to simmer. Remove from heat and let it cool for 5 minutes—just enough so it won’t cook the nuts. Stir the warm milk mixture into the nuts until it forms a thick, spreadable paste. It should smell like autumn and taste like comfort. Once the dough has risen, punch it down and roll it out on a lightly floured surface into a rectangle about 65 x 45 cm. Spread the nut filling evenly over the entire surface, right to the edges. Then, starting from the long side, roll it up tightly like a sleeping bag. Pinch the seam to seal, then coil the log into a snail shape in a greased springform pan (24–26 cm). Let it rest for 15 minutes while you preheat the oven to 180°C (350°F).
Pro tip: Use a ruler or tape measure if you’re unsure about the size—getting the rectangle right ensures even layers and a perfect spiral.
Step 4
Bake the cake for 35–40 minutes, or until it’s golden brown and sounds hollow when tapped on the bottom. Let it cool in the pan for 10 minutes, then transfer to a wire rack. While it’s still warm, mix the powdered sugar and lemon juice into a smooth glaze and drizzle it over the top. The glaze will soak in slightly and add a bright, sweet finish that balances the rich filling beautifully.
Timing at a Glance
- Prep time: 25 minutes
- Rising time: 45 minutes (including 5 + 30–40 + 15 minutes)
- Baking time: 35–40 minutes
- Cooling & glazing: 15 minutes
- Total time: About 2 hours
Chef’s Secret for the Fluffiest Cake
My secret? Let the rolled cake rest for 15 minutes before baking. This short second rise relaxes the gluten and lets the yeast work one last time, giving you that melt-in-your-mouth crumb. Also, don’t overbake—pull it out when the top is golden but the center still feels soft. It keeps cooking from residual heat.
Fun Fact About the Airy Snail Cake
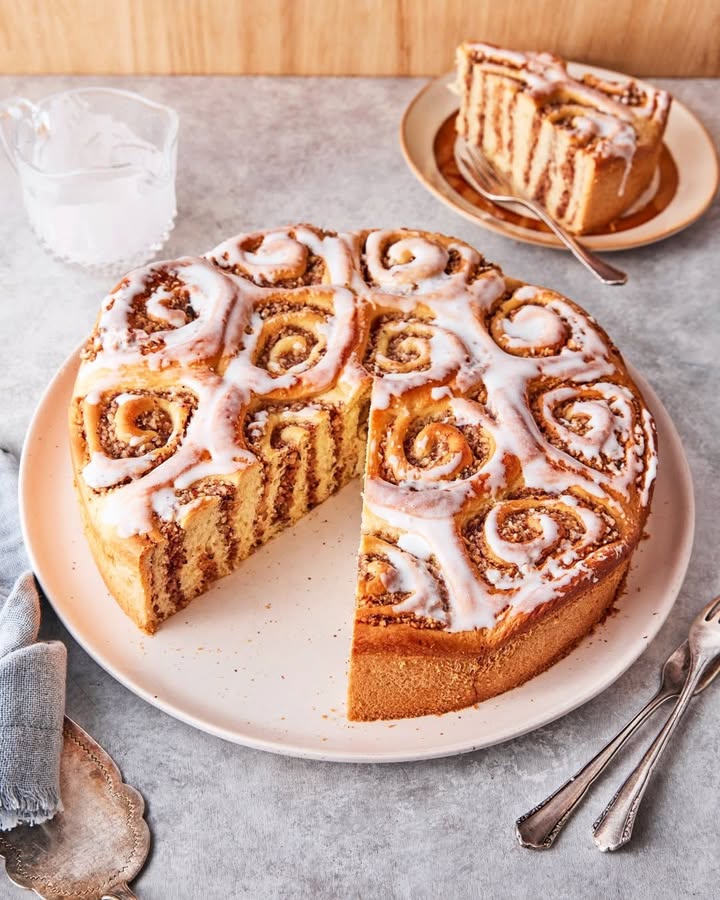
The “snail” shape isn’t just cute—it’s clever! Coiling the dough creates layers that separate slightly when baked, making each slice easy to pull apart. In German bakeries, these are often sold as “Nusszopf” or “Nussschnecken,” and they’re traditionally served with a dollop of whipped cream or a cup of strong coffee. My kids love dipping their pieces in warm milk—old-school comfort that never gets old.
What You’ll Need to Make This Cake
- Large mixing bowl
- Hand mixer or stand mixer with dough hooks
- Rolling pin
- 24–26 cm springform pan
- Small saucepan
- Measuring cups and spoons
- Pastry brush (optional, for buttering the pan)
- Wire cooling rack
How to Store Your Airy Snail Cake
Store the cake at room temperature in an airtight container for up to 3 days. The glaze may soften slightly, but the flavor deepens—which many people actually prefer! Keep it away from direct sunlight or heat sources to prevent the nuts from turning rancid.
If you want to keep it longer, wrap individual slices tightly in plastic wrap and freeze them for up to 2 months. Thaw at room temperature for 1–2 hours, or warm gently in the oven at 150°C (300°F) for 8–10 minutes. It’ll taste almost fresh-baked!
Do not refrigerate this cake—the cold air dries out the delicate crumb and mutes the flavors. If you’ve already cut into it, press a piece of parchment paper directly onto the cut surface before sealing the container to keep it moist.
Top Tips for the Best Airy Snail Cake
- Use room-temperature butter and egg—they incorporate better into the dough.
- Grate your lemon zest before juicing the lemon, so you’re ready for the glaze later.
- If the dough feels too sticky while rolling, dust lightly with flour—but don’t overdo it, or the cake will be dense.
- Toast the hazelnuts lightly before grinding for extra depth (cool them first!).
- Let the cake cool slightly before glazing—too hot, and the glaze will melt away; too cool, and it won’t absorb.
How to Serve Your Airy Snail Cake Like a Pro
- Slice it thick and serve on a vintage cake stand with a doily.
- Pair with a scoop of vanilla ice cream for dessert.
- Drizzle extra glaze in a zigzag pattern for a bakery-style finish.
- Sprinkle with chopped toasted pecans just before serving for crunch.
- Accompany with a cup of spiced chai or strong espresso.
- For parties, cut into bite-sized pieces and arrange on a platter with fresh berries.
6 Healthier Twists on the Airy Snail Cake
Want to lighten things up without losing flavor? Try these easy variations:
- Whole Wheat Wonder: Swap half the all-purpose flour for whole wheat pastry flour. The cake stays tender but gains fiber and a nutty depth.
- Maple-Sweetened Filling: Replace the sugar in the filling with pure maple syrup. Reduce the milk slightly to keep the paste thick.
- Gluten-Free Joy: Use a 1:1 gluten-free flour blend and add 1 teaspoon xanthan gum. The texture is slightly denser but still delicious.
- Coconut Dream: Add 50 g unsweetened shredded coconut to the filling and use coconut oil instead of butter. Tropical and tasty!
- Apple Cinnamon Swirl: Mix 100 g grated apple into the filling. It adds moisture and natural sweetness—plus extra cinnamon warmth.
- Seed Power Version: Replace half the nuts with sunflower and pumpkin seeds for a protein boost and earthy flavor.
Common Mistakes to Avoid
Mistake 1: Using Milk That’s Too Hot
Yeast is a living thing—and it dies if the milk is too hot. If your milk is above 43°C (110°F), it can kill the yeast, and your dough won’t rise. Always test the milk on your wrist—it should feel warm, not hot. If you’re unsure, use a thermometer or let it cool for a few minutes after heating. A dead yeast means a dense, flat cake instead of that dreamy airy texture we’re after.
Mistake 2: Over-Flouring the Work Surface
It’s tempting to add lots of flour when rolling out sticky dough, but too much turns your tender cake into a brick. Use just enough to prevent sticking—about 1–2 tablespoons total. If the dough feels tacky but doesn’t leave residue on your fingers, you’re good. Remember: a slightly sticky dough bakes into a soft, moist cake.
Mistake 3: Skipping the Second Rise
That 15-minute rest after shaping isn’t optional—it’s what gives the cake its lift and lightness. Without it, the dough bakes tight and dense. Set a timer, pour yourself a cup of tea, and let the magic happen. Your patience will be rewarded with layers that practically float off the fork.
Mistake 4: Overbaking the Cake
This isn’t a dry loaf—it’s a moist, tender cake. Overbaking dries it out and makes the nuts bitter. Start checking at 35 minutes. The top should be golden, and a skewer inserted near the center should come out with a few moist crumbs (not wet batter). If the top browns too fast, loosely tent with foil.
Mistake 5: Making the Filling Too Runny
If your nut paste is thin, it’ll leak out during baking and burn on the pan. Make sure the milk-sugar mixture cools slightly before mixing with nuts, and don’t add extra liquid. The paste should hold its shape when scooped—it’s more like thick cookie dough than a sauce.
Frequently Asked Questions
Can I make this cake with dry yeast instead of fresh?
Absolutely! Use 7 grams (1 standard packet) of active dry yeast. Dissolve it in the lukewarm milk with a pinch of sugar, let it sit for 5–10 minutes until frothy, then proceed as directed. It works just as well and is easier to find in many places. Just make sure your yeast isn’t expired—old yeast won’t activate properly, and your cake won’t rise.
Why is my cake dense instead of airy?
A dense cake usually means the yeast didn’t activate fully, the dough was over-floured, or it was over-kneaded. Make sure your milk is warm but not hot, measure flour correctly (spoon it into the cup, don’t scoop!), and knead just until smooth. Also, don’t skip the rising times—yeast needs time to work its magic and create those air pockets that make the cake so light.
Can I prepare the dough the night before?
Yes! After the first rise, punch down the dough, cover it tightly with plastic wrap, and refrigerate overnight. The next morning, let it sit at room temperature for 30 minutes, then roll, fill, and shape as usual. The slow cold rise actually enhances the flavor, giving the cake a subtle tang and even softer texture. Just remember to let the shaped cake rest for 15 minutes before baking.
How do I know when the cake is done baking?
The cake should be deep golden brown on top and feel firm but springy to the touch. Insert a toothpick or skewer near the center—it should come out with a few moist crumbs, not wet batter. If you’re using a dark pan, it may bake faster, so start checking at 30 minutes. The internal temperature should be around 90°C (195°F) if you use a thermometer.
Can I use other nuts in the filling?
Definitely! Walnuts, almonds, or even pistachios work beautifully. Just keep the total nut weight the same (300 g total: 100 g chopped + 200 g ground). Toasting them lightly before using adds a wonderful depth of flavor. Just be sure to cool them completely before mixing into the filling, or they’ll make the paste too oily.
Why do I need to use untreated lemon?
Untreated (or organic) lemons haven’t been waxed or sprayed with pesticides, so the zest is safe to eat. Regular lemons often have a waxy coating that can taste bitter or chemical-like. If you can’t find untreated, scrub the lemon well with hot water and a brush, or skip the zest and add ½ teaspoon lemon extract to the dough instead.
Can I make this without a springform pan?
Yes! Use a 9-inch round cake pan or even a 9×13-inch baking dish. If using a square pan, shape the rolled log into an “S” or figure-eight to fit. The baking time may vary slightly, so keep an eye on it. Just make sure the pan is well-greased so the cake doesn’t stick when you turn it out.
Is the glaze necessary?
Not strictly—but it adds a lovely sweet-tart finish that cuts through the richness of the nuts. If you prefer it plain, dust the top with powdered sugar instead. Or drizzle with melted chocolate for a decadent twist. The cake is delicious either way, but the glaze does give it that “finished” bakery look.
Can I double the recipe?
Yes, but bake it in two separate pans. Don’t try to double it in one pan—it won’t cook evenly. The dough and filling both scale perfectly, so you can make two cakes and freeze one for later. Just remember to use two 9-inch pans and adjust the baking time slightly if your oven runs hot.
How do I prevent the filling from leaking out?
Make sure your nut paste is thick—like playdough—and spread it evenly, leaving a 1 cm border at the far edge of the rectangle. When you roll it up, pinch that seam well so it seals. Also, don’t overfill; 300 g of filling is just right for this size. If a little leaks, it’s okay—it caramelizes into a tasty crust on the pan!
Final Thoughts
The Deliciously Simple Airy Snail Cake is more than just a recipe—it’s a moment of calm in a busy week, a way to say “I care” without saying a word. It’s the kind of treat that brings people to the table, makes kids smile, and turns ordinary mornings into something special. Don’t worry about perfection. Even if your spiral isn’t Instagram-perfect, the flavor will win every time. So roll up your sleeves, warm your kitchen, and bake a little joy. You’ve got this—and your future self (and your family) will thank you.
Deliciously Simple Airy Snail Cake
Ingredients
Equipment
Method
- Warm the milk until it's comfortably warm and set aside.
- In a big mixing bowl, whisk together the flour, sugar, vanilla sugar, salt, and lemon peel.
- Make a well in the center, crumble the fresh yeast into it, and add about 25 ml of warm milk to dissolve the yeast.
- Mix in a little flour to form a thick, bubbly paste and cover the bowl to let it sit for 5 minutes.
- Pour in the rest of the warm milk, add butter and egg, and mix until combined.
- Knead for at least 3 minutes until smooth and elastic, then cover and let rise for 30–40 minutes.
- For the filling, chop pecans and mix with ground hazelnuts in a bowl.
- Heat the milk, sugar, cinnamon, and a pinch of salt in a saucepan until simmering, then cool for 5 minutes.
- Combine the warm milk mixture with the nut mixture to form a thick paste.
- After the dough has risen, punch it down and roll it into a rectangle about 65 x 45 cm.
- Spread the nut filling evenly over the dough, then roll it tightly from the long side.
- Pinch the seam to seal, coil the log into a snail shape in a greased springform pan, and let rest for 15 minutes.
- Preheat the oven to 180°C (350°F).
- Bake for 35–40 minutes until golden brown and hollow-sounding when tapped.
- Let cool for 10 minutes, then transfer to a wire rack.
- Mix powdered sugar and lemon juice to make a glaze and drizzle it over the warm cake.