A Cake That Melts Hearts (and Doesn’t Need Flour!)
Picture this: it’s a warm Sunday afternoon, my kids are bouncing off the walls, and I promised dessert—but I’m out of flour. Panic? Nope. Instead, I grabbed my trusty block of white chocolate and some cream cheese, whipped up this Decadent Flourless White Chocolate Cheesecake, and watched jaws drop at the dinner table. No flour, no gluten, no stress—just pure, creamy magic. If you love white chocolate and cheesecake but hate complicated recipes, this is your new best friend.
Where Did This Dreamy Flourless White Chocolate Cheesecake Come From?
Cheesecake dates back to ancient Greece—yes, really! But the modern flourless version? That’s a genius twist from clever home bakers who wanted richness without the carbs or gluten. Over time, swapping regular chocolate for white chocolate added a luxurious, velvety sweetness that’s perfect for special moments (or just Tuesday nights when you need a treat). I first tried a version like this at a tiny café in Barcelona, and I’ve been tinkering with the recipe ever since. Mine’s simpler, softer, and, if I do say so myself, even more elegant.
Why You’ll Fall in Love With This Recipe
This Decadent Flourless White Chocolate Cheesecake is everything you want in dessert: **soft, creamy, rich, and gluten-free**—without tasting “healthy.” It’s got the indulgence of white chocolate with the tangy smoothness of cream cheese, all wrapped in a cloud-like texture. Plus, it’s shockingly easy. No fancy equipment. No flour. No oven drama. Just six ingredients (plus berries and sugar for that wow factor), and you’re golden. And if your crowd includes gluten-sensitive friends? They’ll feel seen—and spoiled.
When to Serve This White Chocolate Cheesecake
Make this for birthdays, bridal showers, or “just because” weekends. It’s fancy enough for dinner parties but simple enough for a weeknight craving. I served it at my daughter’s graduation party, and three aunts asked for the recipe before the candles were even blown out. It also freezes beautifully, so bake it ahead for holiday gatherings. Bonus: it looks like you spent hours in the kitchen—even if you didn’t.
Ingredients You’ll Need
- 1 cup egg whites (about 6 large eggs)
- 450 g cream cheese (I use Philadelphia—it’s reliably creamy)
- 250 g good-quality white chocolate, grated or melted
- 2 teaspoons vanilla extract
- Fresh blackberries (or “brazamoras,” as my abuela calls them)
- Pearl or coarse sugar for sprinkling
- Aerosol oil or butter for greasing the mold
Easy Substitutes (Because Life Happens)
No aerosol oil? Use softened butter or coconut oil to grease the pan. Out of fresh blackberries? Try raspberries, strawberries, or even a drizzle of raspberry coulis. Vegan? Swap the cream cheese for a plant-based version and use egg-white replacer (though texture may vary slightly). And if you only have dark chocolate? Go for it—but it won’t be the same dreamy, milky dessert this recipe celebrates.
How to Make Your Decadent Flourless White Chocolate Cheesecake
Step 1: Warm Up the Oven and Add Moisture (Optional but Smart)
Preheat your oven to 150°C (300°F). If you’ve got a baking tray handy, place it on the bottom rack and fill it with hot water. This creates a gentle steam bath that keeps your cheesecake from cracking—trust me, it’s a game-changer. The humid environment mimics a water bath without the hassle of wrapping your pan in foil. Your cake will bake evenly and stay silky smooth.
Step 2: Whip Those Egg Whites Like You Mean It
In a clean, dry bowl, beat your egg whites until they form stiff, glossy peaks—this is what we call “snow” in kitchen lingo. Don’t rush! Make sure your bowl has zero grease or yolk residue, or your whites won’t fluff up. Once done, set them aside like a treasure. These airy whites are what give your cake lift and that melt-in-your-mouth softness. Pro tip: Add a pinch of cream of tartar if you’re worried about stability.
Step 3: Soften That Cream Cheese Until It’s Dreamy
Let your cream cheese sit out for 30 minutes, or zap it in the microwave for 15 seconds if you’re in a hurry. Beat it with a hand mixer or stand mixer until it’s completely smooth and lump-free. You want it to feel like cool silk under your spatula. Any lumps now mean lumps later—and we’re aiming for cloud-level smoothness.
Step 4: Swirl in Vanilla and White Chocolate
Add the vanilla extract and your melted (or finely grated) white chocolate to the cream cheese. Mix on low speed until everything’s fully blended. The mixture will turn pale ivory, glossy, and smell like a high-end bakery. If you grated the chocolate, make sure it melts into the warmth of the cheese—no crunchy bits! A smooth base is key to that creamy, flourless texture we love.
Step 5: Fold in the Egg Whites—Gently!
Now comes the delicate part. Add the whipped egg whites in three batches, using a spatula to fold them in with wide, sweeping motions—from the bottom up. Don’t stir! Folding keeps the air in, which gives your cake its lightness. Stop as soon as no white streaks remain. Overmixing = dense cake. We want elegance, not a brick.
Step 6: Prep the Pan and Pour
Lightly grease a 20–22 cm (8–9 inch) springform pan with aerosol oil or butter. Pour the batter in smoothly—it should look like soft mousse, pale and shimmering. Tap the pan gently on the counter to release any big air bubbles. This helps the surface stay smooth as it bakes.
Step 7: Bake Until Just Set
Slide the pan into the oven and bake for about 60 minutes. The edges should look set, but the center should still jiggle slightly when you nudge the pan—like a gentle belly laugh. That slight wobble means it’ll finish setting as it cools. Chef’s tip: Don’t open the oven door during the first 45 minutes! Sudden temperature changes cause cracks.
Step 8: Cool and Chill—Patience Pays Off
Let the cheesecake cool completely at room temperature—this takes about 2 hours. Then, cover it loosely and refrigerate for at least 1 hour, but ideally overnight. Why? Chilling transforms it from “pretty good” to “holy wow.” The flavors meld, the texture firms up without losing creaminess, and it slices like a dream.
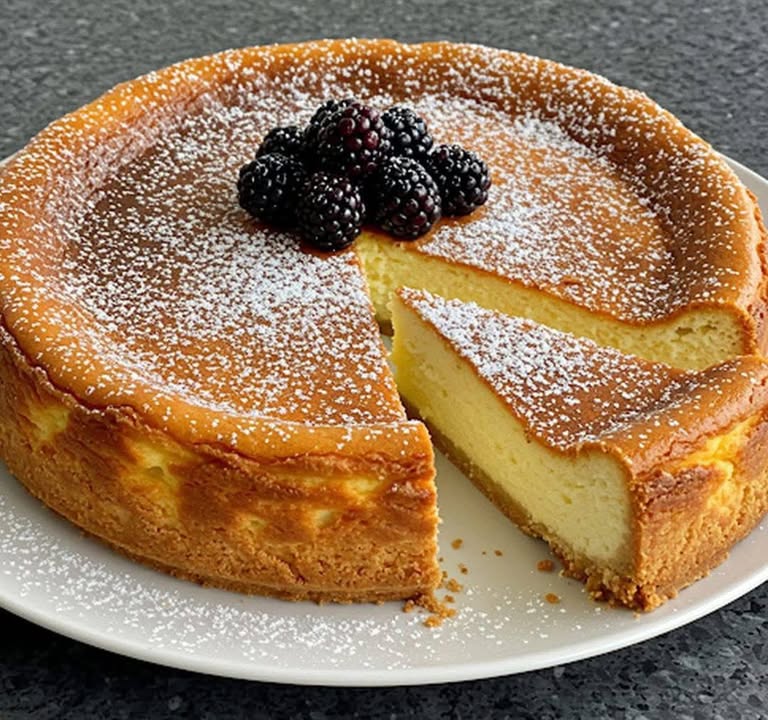
Step 9: Unmold, Decorate, and Wow Everyone
Run a thin knife around the edge, release the springform, and transfer your masterpiece to a serving plate. Top with fresh blackberries and a generous sprinkle of coarse sugar—it adds sparkle and a tiny crunch. Serve chilled, and watch your guests’ eyes widen with the first bite.
Timing Made Simple
- Prep time: 20 minutes
- Bake time: 60 minutes
- Cooling time: 2 hours (room temp)
- Chilling time: 1 hour minimum (overnight recommended)
- Total time: About 3 hours 20 minutes (mostly hands-off!)
Chef’s Secret Trick
Always use **high-quality white chocolate**—look for one with real cocoa butter and vanilla, not “white confectionery coating.” Cheap versions contain hydrogenated oils that leave a waxy aftertaste and don’t melt smoothly. I swear by Valrhona or Lindt. It makes all the difference in flavor and texture!
Fun Fact About This Cheesecake
Did you know? White chocolate isn’t technically chocolate—it contains no cocoa solids, only cocoa butter, sugar, and milk. That’s why it pairs so beautifully with cream cheese: both are rich, mild, and luxurious. Together, they create a dessert that feels fancy but tastes like comfort.
Equipment You’ll Need
- 20–22 cm (8–9 inch) springform pan
- Electric hand mixer or stand mixer
- Spatula
- Baking tray (for water, optional)
- Measuring cups and spoons
- Kitchen scale (recommended for accuracy)
How to Store Your Flourless White Chocolate Cheesecake
Keep it covered in the refrigerator for up to 5 days. Use an airtight container or wrap the springform pan tightly in plastic wrap. The cold environment keeps the texture perfect—creamy, not runny.
Want to freeze it? Slice it first, then wrap individual pieces in parchment paper and place them in a freezer bag. It’ll stay fresh for up to 2 months. Thaw overnight in the fridge before serving—never at room temperature, or it may “sweat.”
Never store it near strong-smelling foods like onions or fish! Cream cheese absorbs odors like a sponge. Your dessert should taste like white chocolate heaven—not last night’s leftovers.
Tips to Make It Even Better
- Bring all ingredients to room temperature before starting.
- Use a scale for precise measurements—it avoids soggy or dry results.
- Don’t skip the chilling time. Seriously. It’s not optional.
- For extra elegance, brush the berries with a little warmed apricot jam for shine.
Stunning Ways to Present It
- Arrange blackberries in a spiral on top.
- Drizzle with melted dark chocolate for contrast.
- Serve on gold-rimmed plates for a luxe feel.
- Add edible flowers for spring gatherings.
- Dust with edible gold powder for celebrations.
- Pair with a dollop of crème fraîche on the side.
6 Healthier or Fun Variations to Try
Love this base recipe? Here are six twists to keep things exciting:
- Raspberry Swirl Version: Swirl ¼ cup raspberry puree into the batter before baking. Tart + sweet = magic.
- Coconut Dream: Add ½ cup toasted coconut flakes to the batter and top with coconut whipped cream.
- Lemon Zest Boost: Add 1 tablespoon lemon zest to cut the sweetness and brighten the flavor.
- Matcha Infusion: Whisk 1 tsp matcha powder into the melted white chocolate for a green tea twist.
- Protein-Powered: Blend in 2 scoops of vanilla protein powder (adjust whites slightly if too thick).
- Keto-Friendly: Use sugar-free white chocolate and a keto-approved sweetener in the cheese base.
Common Mistakes to Avoid
Mistake 1: Skipping the Room-Temperature Ingredients
Cold cream cheese and eggs don’t blend smoothly. You’ll end up with lumps or a dense texture. Always let your cream cheese and egg whites warm up before mixing. If you forget, microwave the cheese in 10-second bursts—but never cook it. Room temp = seamless blending.
Mistake 2: Overmixing the Egg Whites
Folding gently is everything. If you stir like you’re making pancake batter, you’ll deflate those precious air bubbles. The result? A flat, heavy cake instead of a light, airy one. Use a spatula, not a whisk, and fold with love—not force.
Mistake 3: Baking at Too High a Temperature
High heat causes the outside to cook too fast while the inside stays raw—or worse, makes the top crack. Stick to 150°C (300°F). Low and slow is the golden rule for flawless cheesecakes. A water bath helps, but even without it, gentle heat works wonders.
Mistake 4: Unmolding Too Soon
Rushing to unmold leads to collapse or sticking. Always chill overnight if possible. The cold firms up the structure so it holds its shape beautifully. If you’re in a hurry, at least give it 4 hours in the fridge—your patience will be rewarded.
Mistake 5: Using Low-Quality White Chocolate
Cheap white chocolate often contains palm oil or artificial flavors. It won’t melt smoothly and leaves a greasy aftertaste. Splurge on real white chocolate with cocoa butter as the first ingredient. Your taste buds (and guests) will thank you.
Frequently Asked Questions
Is this cake really gluten-free?
Yes! There’s no flour, no crumbs, no hidden gluten. Just egg whites, cream cheese, white chocolate, and vanilla. Always double-check your ingredient labels (especially vanilla extract and chocolate) to ensure they’re certified gluten-free if you have celiac disease.
Can I make it without egg whites?
Egg whites provide structure and lift. Without them, the cake won’t set properly. If you must avoid eggs, try an aquafaba substitute (chickpea brine), but results may vary—this recipe relies on the airiness of real egg whites.
Why did my cheesecake crack?
Cracks usually happen from sudden temperature changes or overbaking. Avoid opening the oven door early, and bake low and slow. The optional water tray also helps. If it cracks anyway, cover it with berries—it’ll still taste amazing!
Can I use dark or milk chocolate instead?
Absolutely! But it won’t be a white chocolate cheesecake anymore. Dark chocolate adds bitterness; milk chocolate is sweeter. Adjust vanilla or sugar if needed. Still delicious—but different.
How do I know when it’s done baking?
The edges should look set, and the center should jiggle slightly—like gelatin, not soup. It will firm up as it cools. If the whole thing wobbles like water, it needs more time.
Can I use a regular cake pan instead of springform?
It’s risky. Springform pans release cleanly. If you must use a regular pan, line it with parchment and grease well—but unmolding might be messy. Springform is worth the investment!
What if I don’t have vanilla extract?
Vanilla enhances the white chocolate flavor. If you’re out, try a pinch of almond extract (use half the amount) or skip it—but the flavor won’t be as rounded. Never use vanilla “essence”—it’s artificial and harsh.
Can I make it dairy-free?
Yes, with dairy-free cream cheese and white chocolate (look for vegan brands like Milkadamia or Pascha). Results vary by brand, so test a small batch first. Texture might be softer.
Why use egg whites only?
Egg yolks add richness but also density. Whites give lift without heaviness—perfect for a light, airy texture. Plus, it’s a great way to use leftover whites from other recipes!
How far ahead can I make this?
Up to 3 days in the fridge or 2 months in the freezer. In fact, it tastes better the next day! Flavors deepen, and the texture becomes even smoother. Just add berries right before serving for freshness.
Final Thoughts
This Decadent Flourless White Chocolate Cheesecake is proof that simple can be spectacular. No flour, no fuss, just pure indulgence in every bite. Whether you’re baking for a crowd or sneaking a slice after bedtime, it delivers elegance with zero stress. So grab that white chocolate, whip those egg whites, and get ready for your new go-to dessert. And when someone asks, “Did you really make this?”—just smile and say, “All in a day’s work.”
Decadent Flourless White Chocolate Cheesecake
Ingredients
Equipment
Method
- Preheat your oven to 150°C (300°F) and prepare a baking tray with hot water on the bottom rack for steam.
- In a clean, dry bowl, beat the egg whites until stiff, glossy peaks form.
- Soften the cream cheese and beat until smooth and lump-free.
- Mix in the vanilla extract and melted/grated white chocolate until fully blended.
- Gently fold the whipped egg whites into the cream cheese mixture in three batches.
- Lightly grease a 20–22 cm springform pan and pour in the batter.
- Bake for about 60 minutes until the edges are set, but the center jiggles slightly.
- Allow the cheesecake to cool completely at room temperature for about 2 hours before refrigerating for at least 1 hour (overnight recommended).
- Run a knife around the edge, release the springform, and top with fresh blackberries and coarse sugar before serving.