Let me tell you about the day my best friend Sarah showed up at my door with a cake box in hand, eyes sparkling like she’d just discovered edible gold. “You HAVE to try this,” she said, unveiling a stunning dessert that looked like something from a fancy bakery window. One bite later, I was hooked: creamy, rich, dreamy layers of chocolate, cheesecake, and mousse, crowned with juicy berries that cut through the sweetness like a summer breeze. That’s the magic of the Decadent Triple Chocolate Mousse Delight—and today, I’m sharing my tried-and-true version that’s wowed everyone from birthday kids to picky in-laws.
The Story Behind This Decadent Triple Chocolate Mousse Delight
This recipe didn’t pop out of thin air—it’s the love child of classic American cheesecake, European mousse technique, and that universal craving for anything chocolate. While traditional mousse cakes hail from France (think airy, elegant desserts served in Parisian patisseries), the triple-layer twist is a modern twist that home bakers like us have perfected over decades. I first attempted it five years ago for my daughter’s birthday. Back then, it collapsed halfway through slicing—but I learned! Now, after at least a dozen test runs (and lots of happy taste-testers), I’ve nailed a version that’s foolproof, fridge-friendly, and photo-worthy every time.
Why You’ll Absolutely Love This Decadent Triple Chocolate Mousse Delight
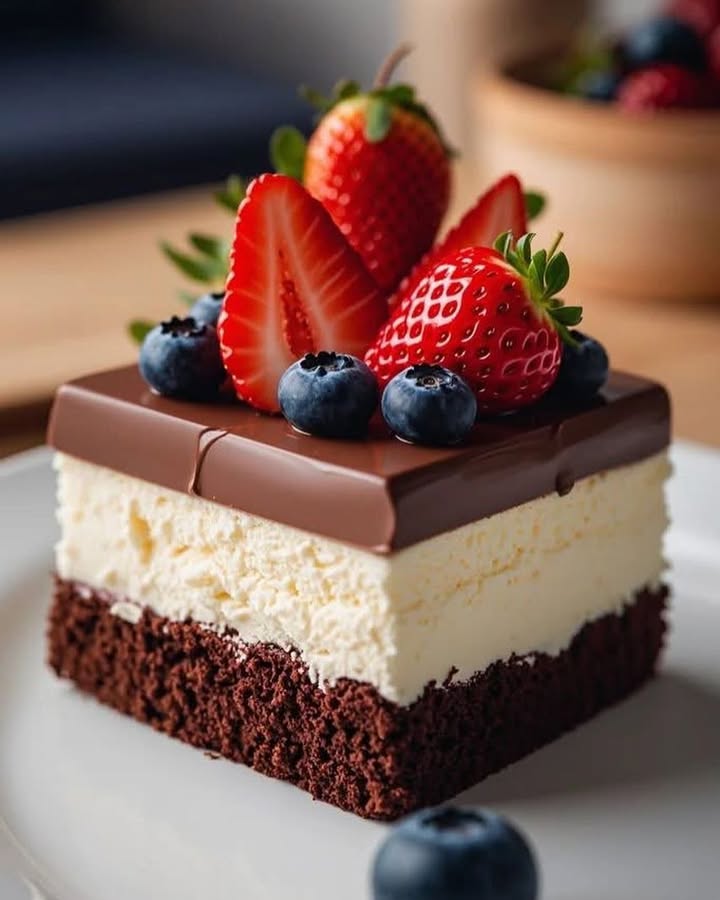
It’s luxurious without being fussy. The base is buttery and crumbly, the middle layer is velvety cheesecake with just the right tang, and the top? Cloud-like chocolate mousse that melts on your tongue. Bonus: the fresh strawberries and blueberries add brightness and color, balancing the richness. Plus, you don’t need fancy piping skills or a blowtorch—just a few bowls, a whisk, and patience (well, mostly patience while it chills!). It’s the kind of dessert that makes people ask, “Did you really make this?” while wiping chocolate off their chins with pure joy.
Perfect Moments for Your Decadent Triple Chocolate Mousse Delight
- Birthday celebrations (especially chocolate lovers!)
- Anniversary dinners at home
- Impressing last-minute dinner guests
- Valentine’s Day—romantic and indulgent
- Special Sunday desserts when the family gathers
Ingredients You’ll Need
For the Base:
- 1 ½ cups crushed graham crackers (about 10 full sheets)
- 5 tablespoons unsalted butter, melted
For the Baked Cheesecake Layer:
- 2 packages (8 oz or 226 g each) full-fat cream cheese, softened
- ½ cup granulated sugar
- 2 large eggs, at room temperature
- ¼ cup sour cream
For the Unbaked Mousse Layer:
- 1 cup mascarpone cheese, chilled
- 1 cup heavy whipping cream, cold
- ¼ cup granulated sugar
To Decorate:
- Fresh strawberries and blueberries
- Strawberry sauce or coulis (store-bought or homemade)
- Optional: chocolate ganache for drizzling
Easy Ingredient Swaps
No graham crackers? Use digestive biscuits or even Oreo crumbs (scrape off the filling first if you want a neutral base). Dairy-free? Swap butter for coconut oil and use plant-based cream cheese and mascarpone (just check they’re firm, not runny). For a lighter touch, you can replace half the mascarpone with Greek yogurt—but keep it cold so the mousse sets properly. And if you’re avoiding refined sugar, try coconut sugar in the base and cheesecake layer, though it may darken the color slightly.
Step-by-Step Preparation
Step 1: Create the Cookie Crust
In a medium bowl, stir together your crushed graham crackers and melted butter until the crumbs look like wet sand—every piece should glisten with butter. Press this mixture firmly into the bottom of a 7- or 8-inch springform pan. Use the bottom of a glass or measuring cup to compact it evenly—this prevents crumbling later! Pop it into the fridge for at least 15 minutes while you prep the next layer. Pro tip: Chill the crust before baking to keep it crisp and prevent butter leakage.
Step 2: Bake the Cheesecake Layer
Preheat your oven to 160°C (325°F). In a large bowl, beat the softened cream cheese and sugar until smooth—no lumps! Add the eggs one at a time, mixing just until blended (overmixing adds air, which causes cracks). Fold in the sour cream until creamy and glossy. Pour this pale, velvety batter over your chilled crust. Bake for 30 minutes—it should look set around the edges but slightly wobbly in the center, like a gentle jiggle. Let it cool completely at room temperature, then chill for 1 hour. Chef’s tip: Place a shallow pan of water on the oven rack below to create steam—this keeps the cheesecake moist and crack-free.
Step 3: Whip Up the Mousse Layer
While your cheesecake chills, make the mousse. First, whip the cold heavy cream and sugar until stiff peaks form—this takes 3–4 minutes with a hand mixer. In another bowl, gently whisk the cold mascarpone until smooth (don’t overwork it or it’ll get grainy). Fold the whipped cream into the mascarpone in two batches, using a spatula and gentle strokes to keep it airy. Once fully combined, it should be light, fluffy, and hold its shape. Carefully spread this cloud-like layer over your cooled cheesecake. Smooth the top with an offset spatula or the back of a spoon. Refrigerate for at least 4 hours—or better yet, overnight. This gives the layers time to marry and firm up perfectly.
Step 4: Decorate with Fruits and Sauces
Just before serving, remove the cake from the springform pan. Drizzle with strawberry coulis or glossy chocolate ganache—the red and deep brown create a gorgeous contrast. Arrange fresh strawberries (halved or whole) and plump blueberries on top in a loose, artistic pattern. The colors pop against the pale mousse, and the scent of ripe berries fills the air. Slice with a warm knife for clean cuts, and watch your guests’ eyes widen with delight.
Timing Breakdown
- Prep time: 30 minutes
- Cook time: 30 minutes
- Chilling time: 5 hours minimum (preferably overnight)
- Total time: About 6 hours (mostly hands-off!)
Chef’s Secret for the Perfect Set
Always use cold ingredients for the mousse layer—especially the mascarpone and cream. Warm dairy won’t whip properly, and your mousse could turn soupy. Also, never skip the full chilling time. That 4-hour wait (or overnight rest) is what transforms soft layers into a sliceable masterpiece. Trust me—I’ve rushed it before, and the mousse slid right off the plate. Not a proud moment!
Fun Fact You’ll Love
Did you know mascarpone was originally made in Italy as a way to use up extra cream? It’s technically a fresh cheese, not aged or fermented, which is why it’s so creamy and mild. That’s what makes it perfect for mousse—it blends smoothly without overpowering the chocolate or cheesecake flavors.
Necessary Equipment
- 7- or 8-inch springform pan
- Hand mixer or stand mixer
- Mixing bowls (medium and large)
- Spatula
- Measuring cups and spoons
- Offset spatula (optional but helpful for smoothing)
- Plastic wrap (to cover while chilling)
How to Store Your Decadent Triple Chocolate Mousse Delight
Keep your cake covered tightly with plastic wrap or in an airtight cake carrier in the fridge. It stays fresh and firm for up to 4 days. The crust may soften slightly over time, but the flavor actually deepens, making day-two slices even more decadent.
Freezing is totally possible! Wrap the whole cake (without fruit topping) in two layers of plastic wrap, then aluminum foil. Freeze for up to 2 months. To serve, thaw overnight in the fridge, then add fresh berries and sauce just before presenting.
Never store this cake at room temperature for more than 2 hours—especially in warm weather. The mousse and cheesecake contain dairy that can spoil quickly. If you’re serving at a party, keep it on a chilled stand or return it to the fridge between slices.
Extra Tips to Make It Shine
- Bring cream cheese to room temperature before mixing—it blends smoother.
- Use full-fat dairy for best texture; low-fat versions can make the mousse weepy.
- Strawberry coulis? Blend fresh strawberries with 1 tbsp sugar and a squeeze of lemon, then strain.
- For extra chocolate depth, add 2 tbsp cocoa powder to the cheesecake layer.
Stunning Presentation Ideas
- Arrange berries in a spiral pattern on top
- Drizzle ganache in zigzags using a spoon
- Place mint leaves between berries for a pop of green
- Serve individual slices on gold-rimmed plates for elegance
- Dust with edible gold flakes for celebrations
- Add a few chocolate shavings around the base
Healthier Twists on This Decadent Classic
Want to enjoy this dessert with a lighter touch? Here are six delicious variations that keep the joy without all the guilt:
- Yogurt Swirl Version: Replace half the mascarpone with full-fat Greek yogurt. It adds protein and a slight tang, cutting the sweetness while keeping the texture creamy.
- Dark Chocolate Boost: Use 70% dark chocolate in the ganache and add melted dark chocolate to the mousse. Higher cocoa content means more antioxidants and less sugar.
- Almond Crust Base: Swap graham crackers for crushed almonds, oats, and a touch of maple syrup. It’s gluten-free, nutty, and adds fiber.
- Coconut Dream: Use coconut cream instead of heavy cream and add shredded coconut to the crust. Top with toasted coconut flakes and mango slices for a tropical vibe.
- Berry-Packed Layers: Fold raspberry puree into the mousse layer for a fruity twist. The tartness balances the richness beautifully.
- Avocado Mousse Trick: Blend ½ ripe avocado into the mousse mixture—it adds creaminess and healthy fats without changing the flavor. Just keep it well-chilled!
Common Mistakes to Avoid
Mistake 1: Using Cold Cream Cheese
When cream cheese is straight from the fridge, it stays lumpy no matter how much you beat it. Those little white clumps ruin the smooth texture of your cheesecake layer. Always let it sit on the counter for 30–60 minutes before mixing. If you’re in a hurry, cut it into cubes—it softens faster. A smooth batter = a silky, dreamy layer that melts in your mouth.
Mistake 2: Overmixing the Mousse
It’s tempting to keep whipping that mascarpone and cream, but too much action deflates the air you’ve worked so hard to build. The result? A dense, pudding-like top instead of a light, airy cloud. Fold gently with a spatula using wide, sweeping motions from the bottom up. Stop as soon as no streaks remain—you want volume, not stiffness.
Mistake 3: Skipping the Chill Time
Rushing to serve? Don’t! If you slice into the cake before it’s fully set, the mousse will slide off, and the layers will blur together. That 4-hour (or overnight) chill isn’t optional—it’s what gives structure. Plan ahead: make it the night before your event, and wake up to a ready-to-decorate masterpiece.
Mistake 4: Pressing the Crust Too Loosely
A crumbly base that falls apart when you cut the first slice is heartbreaking. Press that graham cracker mix firmly into the pan—use the bottom of a glass to really pack it down. You should barely be able to press a finger into it. This creates a sturdy foundation that holds up to creamy layers above.
Mistake 5: Adding Fruit Too Early
Top your cake with berries hours in advance, and they’ll weep juice into the mousse, making it soggy and dull-looking. Always add fresh fruit and coulis right before serving. That way, the berries stay bright, plump, and visually stunning—and your mousse stays pristine.
Frequently Asked Questions
Can I make this cake gluten-free?
Yes! Use gluten-free graham crackers or certified gluten-free cookies for the base. Most cream cheese, sour cream, mascarpone, and heavy cream are naturally gluten-free, but always check labels to be safe. Your guests with gluten sensitivities will thank you—and never guess it’s “diet” dessert.
How do I get clean slices every time?
Run your knife under hot water, wipe it dry, then slice. Repeat between each cut. The warm blade glides through the layers without dragging or smearing. It takes 10 extra seconds but makes your plating look professional and neat—perfect for Instagram or impressing your mother-in-law.
Can I use milk chocolate instead of dark?
Absolutely! If you prefer sweeter, milder chocolate, milk chocolate works fine in the ganache or even swirled into the mousse. Just know that dark chocolate gives a richer, more complex flavor that balances the sweetness of the fruit and base. Try a mix: 2/3 dark, 1/3 milk for the best of both worlds.
What if my mousse won’t set?
This usually happens when ingredients are too warm or the cake wasn’t chilled long enough. Double-check that your cream was cold and whipped to stiff peaks before folding. If it’s still soft after 4 hours, pop it back in the fridge for another 2–3 hours. If all else fails, serve it as a trifle in glasses—it’s still delicious!
Can I make this in individual servings?
Yes! Use ramekins or mason jars. Layer the crust, then cheesecake, then mousse in each one. Adjust baking time for the cheesecake layer to 15–20 minutes. Chill as directed. Individual portions are cute, easy to serve, and perfect for portion control (ha! as if anyone stops at one).
Is this recipe suitable for vegetarians?
Yes, as long as you use vegetarian-friendly gelatin-free ingredients—which most dairy products are. Just double-check your cream cheese and sour cream labels to confirm no animal rennet was used. Many brands (like Philadelphia) are vegetarian-safe.
Can I add alcohol for an adult version?
Definitely! A tablespoon of Grand Marnier, Kahlúa, or Chambord added to the mousse layer gives a sophisticated kick. Just don’t overdo it—too much liquid can prevent setting. Keep it to 1–2 tsp per layer for flavor without compromising texture.
Why did my cheesecake crack?
Overmixing, high oven heat, or rapid cooling can cause cracks. Beat ingredients just until combined, bake at a steady low temperature (160°C), and let the cake cool slowly in the oven with the door ajar. Even if it cracks, the mousse layer hides it—so don’t panic!
Can I use whipped topping instead of real cream?
You can, but the flavor and texture won’t be the same. Real whipped cream gives that rich, melt-in-your-mouth quality. Whipped topping (like Cool Whip) is sweeter, less stable, and can make the mousse too soft. For the best Decadent Triple Chocolate Mousse Delight, stick with heavy cream—it’s worth it.
How far in advance can I make this?
You can prep it up to 2 days ahead—just hold off on adding fruit and sauce until serving. If freezing, it keeps for 2 months. Thaw overnight in the fridge, then decorate. This makes it perfect for stress-free entertaining: bake it Tuesday, serve it Saturday!
Final Thoughts
The Decadent Triple Chocolate Mousse Delight isn’t just dessert—it’s a moment of joy wrapped in chocolate, cream, and berries. Whether you’re celebrating a milestone or just treating yourself after a long week, this cake delivers luxury with minimal effort. I’ve made it for baby showers, breakup recoveries, and “just because” Sundays—and it never fails to bring smiles. So grab your mixer, chill your cream, and get ready to create something truly special. Your kitchen, your rules… and your guests will think you’re a pastry genius.
Decadent Triple Chocolate Mousse Delight
Ingredients
Equipment
Method
- In a medium bowl, stir together crushed graham crackers and melted butter until the mixture resembles wet sand.
- Press this mixture firmly into the bottom of a 7- or 8-inch springform pan and chill for at least 15 minutes.
- Preheat your oven to 160°C (325°F).
- In a large bowl, beat the softened cream cheese and sugar until smooth, then add eggs one at a time mixing until just combined, then fold in sour cream.
- Pour the cheesecake batter over the chilled crust and bake for 30 minutes.
- Let the cheesecake cool completely, then chill for 1 hour.
- While cheesecake chills, whip cold heavy cream and sugar until stiff peaks form in one bowl, and whisk mascarpone until smooth in another bowl.
- Fold the whipped cream into the mascarpone in two batches and spread the mousse layer over the cooled cheesecake.
- Refrigerate for at least 4 hours or preferably overnight.
- Before serving, remove the cake from the springform pan, drizzle with strawberry coulis or chocolate ganache, and arrange fresh strawberries and blueberries on top.