Let me tell you a little secret: the first time I made this cake, my kids thought I’d bought it from a fancy bakery. I laughed so hard I almost spilled the ganache! But honestly, who could blame them? With its deep, velvety crumb, silky layers, and that glossy chocolate coat—it looks like pure magic. And the taste? Oh honey, it’s like your favorite chocolate hug wrapped in elegance. If you’ve been searching for an Irresistible Black Velvet Cake Delight that’s easy enough for a Tuesday but stunning enough for a party, you’ve just hit the jackpot.
The Story Behind the Irresistible Black Velvet Cake Delight
Black Velvet Cake isn’t just chocolate cake with a moody nickname—it’s a dramatic twist on the classic Red Velvet, minus the food coloring and with extra chocolate soul. While Red Velvet got its fame in Southern U.S. bakeries (thanks to that subtle tang and crimson hue), Black Velvet swaps the red dye for rich cocoa and coffee, turning every slice into a midnight dream. I first stumbled on this version during a rainy weekend when I ran out of red food coloring but still wanted that “velvet” magic. What I created by accident has now become my go-to showstopper. Dark, moist, and impossibly smooth—it’s velvet in every sense, just without the blush!
Why You’ll Fall Head Over Heels for This Cake
This Irresistible Black Velvet Cake Delight is everything you want in a dessert: deeply chocolatey but not too sweet, feather-soft yet sturdy enough to stack, and finished with a ganache that gleams like a moonlit pond. The buttermilk (or DIY milk + vinegar) gives it that signature velvet tenderness, while the hot coffee? Don’t worry—it doesn’t make it taste like espresso. Instead, it wakes up the cocoa, making the chocolate flavor sing louder than ever. And that whipped cream filling? Light as a cloud, cool against the rich layers. It’s fancy without being fussy—and that’s my kind of baking.
Perfect Moments to Serve This Showstopper
Need a dessert that steals the spotlight? This cake is your secret weapon. Whip it out for:
- Valentine’s Day (romance never looked this dark and dreamy)
- Birthday parties (kids and adults both gasp when you slice it open)
- Anniversary dinners (paired with a glass of red wine? Perfection)
- Girls’ night in (serve with coffee and let the compliments roll)
- Holiday gatherings (it’s a stunning alternative to fruitcake or pie)
And hey—if you just had a rough day and need a treat? That counts too. Trust me, your future self will thank you.
Ingredients You’ll Need
For the Cake:
- 2 cups all-purpose flour
- 1 cup granulated sugar
- ¾ cup unsweetened cocoa powder
- 1 teaspoon baking soda
- 1 teaspoon baking powder
- ½ teaspoon salt
- 2 large eggs
- 1 cup buttermilk (or 1 cup milk + 1 tablespoon vinegar, let sit 5 minutes)
- ½ cup vegetable oil
- 1 cup hot brewed coffee (not boiling—just hot)
- 1 teaspoon vanilla extract
For the Cream Filling:
- 2 cups very cold heavy whipping cream
- ¼ cup powdered (confectioners’) sugar
- 1 teaspoon vanilla extract
For the Glossy Ganache:
- 200g (about 7 oz) chopped semi-sweet chocolate
- 200ml (about ¾ cup + 2 tbsp) heavy cream
Easy Swaps Without Sacrificing Flavor
No buttermilk? No problem! Mix milk with vinegar or lemon juice—it’ll give you that same tender crumb. Out of vegetable oil? Melted coconut oil or canola oil work just fine. Dairy-free? Use oat or almond milk (plus acid for “buttermilk”) and coconut cream for whipping. For the ganache, dark chocolate or even a mix of dark and milk chocolate adds complexity. Just avoid “chocolate chips” labeled “for baking”—they often contain stabilizers that won’t melt smoothly.
How to Make Your Irresistible Black Velvet Cake Delight
Step 1
Preheat your oven to 175°C (350°F). Grease and line three 6-inch or two 8-inch round cake pans with parchment paper. This step is non-negotiable—trust me, I once skipped the parchment and cried over half a cake stuck in the pan. Don’t be like past me!
Step 2
In a big bowl, whisk together flour, sugar, cocoa powder, baking soda, baking powder, and salt until no lumps remain. In another bowl, beat eggs, buttermilk, oil, and vanilla until smooth and creamy. Pour the wet mix into the dry ingredients and stir gently until just combined. The batter will look thick, but that’s okay—magic is coming.
Step 3
Now, slowly pour in the hot coffee while stirring. The batter will thin out and turn into a glossy, dark river of chocolate promise. Don’t panic—it’s supposed to be liquidy! The coffee enhances the cocoa without adding coffee flavor. Pro tip: Let your coffee cool for 2–3 minutes so it’s hot but not scalding, or it might cook the eggs.
Step 4
Divide the batter evenly among your prepared pans. Tap them gently on the counter to pop air bubbles. Bake for 25–30 minutes, or until a toothpick comes out clean. Let the cakes cool in the pans for 10 minutes, then turn them out onto wire racks to cool completely. Chef’s tip: If you’re in a hurry, pop them in the fridge for 30 minutes—they’ll slice cleaner when cold!
Step 5
While cakes cool, make the filling. In a chilled bowl (seriously, chill it!), beat the cold cream, powdered sugar, and vanilla until stiff peaks form. It should hold its shape when you lift the whisk—soft enough to spread, firm enough to stay put. This cloud-like layer is what gives the cake its “velvet” feel between the dense chocolate layers.
Step 6
For the ganache, heat the cream in a small saucepan until it just begins to simmer (tiny bubbles at the edge—don’t boil!). Pour it over the chopped chocolate in a heatproof bowl. Let it sit for 2 minutes, then stir slowly until smooth and glossy. Let it cool slightly until it thickens enough to coat the back of a spoon—but still pourable.
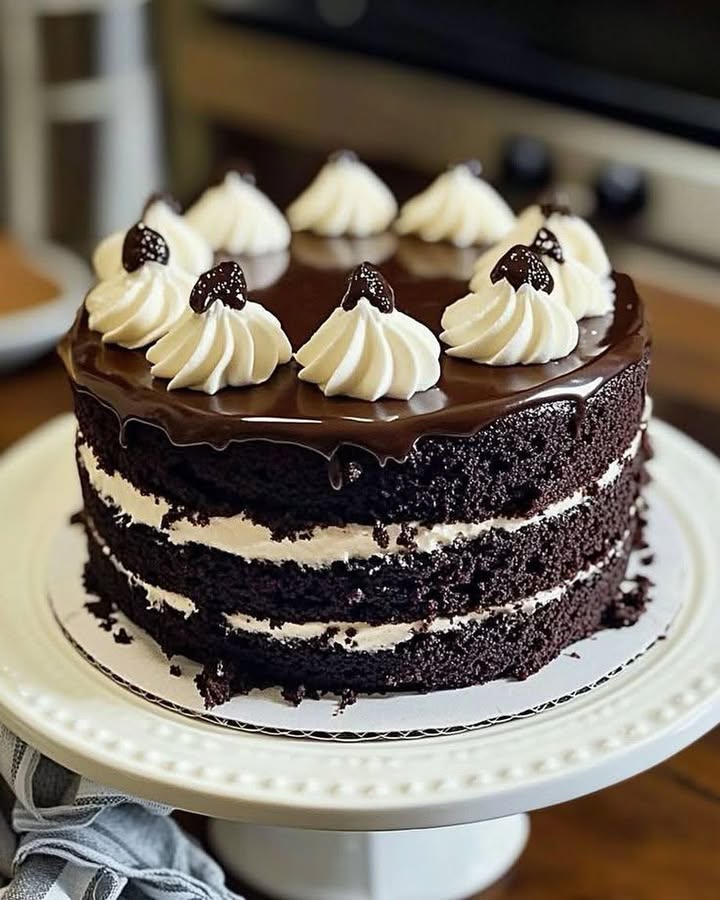
Final Assembly
Place one cake layer on a serving plate. Spread a generous layer of whipped cream over it. Add the second layer, more cream, then the third. Use an offset spatula to smooth the sides lightly—don’t worry about perfection; the ganache will hide everything! Pour the warm ganache over the top, letting it drip down the sides. Once set (about 15 minutes), pipe rosettes or swirls with leftover whipped cream, or just dust with cocoa powder. Slice, serve, and watch eyes light up!
Timing Breakdown
- Prep time: 25 minutes
- Bake time: 30 minutes
- Cooling time: 1–2 hours (or speed it up in the fridge)
- Assembly time: 20 minutes
- Total time: About 2 hours (mostly hands-off!)
Chef’s Secret Trick
For an even deeper black and richer chocolate flavor, use **black cocoa powder** (like the kind used in Oreo cookies) for half of the regular cocoa. It won’t affect texture, but it’ll give your cake that dramatic, almost-black hue that looks incredible under the glossy ganache. Just don’t use it all—you still need regular cocoa for leavening!
Fun Fact About This Cake
The “velvet” in velvet cakes originally referred to the fine, soft crumb achieved by using cocoa (which has less fat than chocolate) and acidic ingredients like buttermilk or vinegar. In the 1800s, “velvet” cakes were considered luxurious—reserved for special occasions because cocoa was expensive. Now? You can make this Irresistible Black Velvet Cake Delight with pantry staples and still feel like royalty.
Tools You’ll Need
- Three 6-inch or two 8-inch round cake pans
- Parchment paper
- Electric mixer (hand or stand)
- Heatproof bowl for ganache
- Offset spatula (or butter knife)
- Cooling rack
- Piping bag with star tip (optional, for rosettes)
How to Store Your Cake Like a Pro
This cake is best enjoyed within 2–3 days, but with proper storage, it stays delicious. Because of the whipped cream filling, it must be refrigerated. Cover it loosely with a cake dome or inverted bowl to protect the ganache from absorbing fridge odors.
If you’re making it ahead, bake and cool the layers, then wrap them tightly in plastic and freeze for up to 1 month. Thaw at room temperature before assembling. Assembled cake? Freeze it whole (without whipped cream rosettes) for up to 2 weeks. Thaw in the fridge overnight, then add fresh whipped cream before serving.
Never leave this cake out at room temperature for more than 2 hours—the dairy in the filling and ganache can spoil. If you’re serving it at a party, keep it chilled until 30 minutes before slicing. That slight chill makes the texture even more luxurious!
Extra Tips for Baking Success
- Use room-temperature eggs—they blend better and give a smoother batter.
- Sift your cocoa powder to avoid lumps in the cake.
- Don’t overmix after adding coffee—just stir until combined.
- If your ganache is too thin, chill it for 10 minutes and stir again.
- For extra stability, add 1 tablespoon of cornstarch to the whipped cream.
Stunning Ways to Present It
- Gold leaf flakes on the ganache for a luxe touch
- Edible glitter or black sprinkles around the base
- Fresh raspberries or blackberries on top for color contrast
- A drizzle of white chocolate over the dark ganache
- Serve on a black cake stand—it makes the colors pop!
Healthier Twists on the Classic
Want to lighten it up without losing that Irresistible Black Velvet Cake Delight magic? Try these smart swaps:
- Whole Wheat Version: Substitute half the all-purpose flour with whole wheat pastry flour. It adds fiber and a nutty depth—but keep it light so the crumb stays tender.
- Reduced Sugar Cake: Cut the sugar to ¾ cup and use dark chocolate (70%+) in the ganache. The coffee and cocoa still shine!
- Coconut Cream Filling: Use chilled full-fat coconut milk (the solid part only) whipped with a touch of maple syrup. Dairy-free and dreamy.
- Avocado Oil Cake: Replace vegetable oil with mild avocado oil—it’s heart-healthy and neutral in flavor.
- Protein-Powered Layers: Add 2 tablespoons of unflavored collagen or chocolate protein powder to the dry mix. Boosts nutrition without changing taste.
- Single-Layer Skillet Cake: Bake in a cast-iron skillet for a rustic, no-fuss version. Top with a spoonful of ganache and fresh fruit.
Common Mistakes to Avoid
Mistake 1: Skipping the Parchment Paper
I learned this the hard way—my cake fused to the pan like they were soulmates. Always line your pans! Even with greasing, the delicate crumb of velvet cake needs that extra insurance. Cut a circle of parchment to fit the bottom, grease the sides, and dust with cocoa (not flour—it’ll leave white streaks). Your cake will slide out like it’s on vacation.
Mistake 2: Using Cold Ingredients
Cold eggs or milk can cause the batter to separate or bake unevenly. Take your eggs and buttermilk out 30 minutes before baking. Warm ingredients emulsify better, giving you a smooth, uniform texture. Pro tip: Place cold eggs in a bowl of warm water for 5 minutes if you’re in a rush!
Mistake 3: Overwhipping the Cream Filling
Whipped cream is a Goldilocks ingredient—too little and it’s runny, too much and it turns grainy or even into butter. Stop whipping the moment stiff peaks hold their shape. If you see little clumps or liquid separating, you’ve gone too far. Chill your bowl and beaters first to slow down the process and give you more control.
Mistake 4: Pouring Ganache on a Warm Cake
If the cake is even slightly warm, the ganache will slide right off or melt into the layers. Always assemble on a completely cooled cake. If you’re impatient (like me), pop the layers in the freezer for 15 minutes—they’ll firm up fast and accept the ganache like a royal cloak.
Mistake 5: Ignoring the Coffee Step
Some folks skip the coffee, thinking “I don’t like coffee.” But it’s not about coffee flavor—it’s about unlocking the chocolate. Without it, your cake tastes flat. Use decaf if you’re sensitive, but don’t omit it. Even instant coffee dissolved in hot water works in a pinch!
Frequently Asked Questions
Can I make this cake gluten-free?
Absolutely! Use a 1:1 gluten-free all-purpose flour blend (like Bob’s Red Mill or King Arthur). Keep everything else the same—the cocoa and buttermilk still create that signature tenderness. Just be sure to whisk the dry ingredients well to avoid grittiness.
How do I get the cake layers perfectly even?
Use a kitchen scale to divide the batter by weight—much more accurate than eyeballing. After baking, if one layer domes up, use a serrated knife to level it while still slightly warm. Save the scraps for cake pops or midnight snacks!
Can I use milk chocolate for the ganache?
You can, but it’ll be much sweeter and softer. Semi-sweet (55–60% cacao) gives the best balance of richness and firmness. For extra depth, mix 70% dark chocolate with a few ounces of milk chocolate—it sets beautifully and has complex flavor.
Why is my cake dry?
Overbaking is the usual culprit. Start checking at 25 minutes—even if the toothpick has a few moist crumbs, it’s done. The cake continues cooking as it cools. Also, ensure you’re measuring flour correctly: spoon it into the cup and level off—don’t scoop!
Can I make this cake in advance?
Yes! Bake and wrap the layers (unfrosted) in plastic, then freeze for up to a month. Assemble the day before serving, but add fresh whipped cream rosettes just before presenting. The ganache actually tastes better after 24 hours—it melds into the cake like velvet.
What if I don’t have round pans?
No problem! Use a 9×13-inch pan and bake for 35–40 minutes. Slice it into squares, spread whipped cream between two layers like a whoopie pie, or just frost the top with ganache for a sheet cake version—still an Irresistible Black Velvet Cake Delight!
Can I color this cake black without food dye?
Yes! Use **black cocoa powder** (available online or in baking stores). It’s alkalized and naturally very dark. Mix it half-and-half with regular cocoa for the best texture and color. Avoid liquid black dye—it can alter the batter’s chemistry.
Why did my ganache split?
That happens when the cream is too hot or you stirred too soon. Let the hot cream sit on the chocolate for a full 2 minutes before stirring. If it looks oily, add a teaspoon of cold cream and stir gently—it usually comes back together.
Can I use this recipe for cupcakes?
Definitely! Fill liners ¾ full and bake at 175°C for 18–22 minutes. Top with a swirl of whipped cream and a drizzle of ganache. They’re adorable and perfect for parties—plus, no slicing required!
Is this cake kid-friendly?
Yes! The coffee taste is undetectable, and kids love the rich chocolate flavor. For an extra fun touch, let them help pipe whipped cream rosettes or sprinkle on edible glitter. Just don’t tell them it’s the same cake that wowed your book club!
Final Thoughts
This Irresistible Black Velvet Cake Delight is more than dessert—it’s a mood, a moment, a memory waiting to happen. Whether you’re baking for love, celebration, or just because Tuesday deserves chocolate too, this cake delivers elegance without effort. So grab your mixing bowl, play your favorite playlist, and let the aroma of cocoa and vanilla fill your kitchen. One slice, and you’ll understand why I keep making it—even when no one’s watching.
Irresistible Black Velvet Cake Delight
Ingredients
Equipment
Method
- Preheat your oven to 175°C (350°F). Grease and line three 6-inch or two 8-inch round cake pans with parchment paper.
- In a big bowl, whisk together flour, sugar, cocoa powder, baking soda, baking powder, and salt until no lumps remain.
- In another bowl, beat eggs, buttermilk, oil, and vanilla until smooth and creamy. Pour the wet mix into the dry ingredients and stir gently until just combined.
- Slowly pour in the hot coffee while stirring. The batter will become glossy and thin.
- Divide the batter evenly among your prepared pans and tap them gently on the counter. Bake for 25–30 minutes, or until a toothpick comes out clean. Let the cakes cool in the pans for 10 minutes, then turn them out onto wire racks.
- While the cakes cool, make the filling by beating the cold cream, powdered sugar, and vanilla until stiff peaks form.
- For the ganache, heat the cream until it just begins to simmer, then pour it over the chopped chocolate. Let it sit for 2 minutes before stirring until smooth.
- Place one cake layer on a serving plate. Spread a layer of whipped cream, add the second layer, and repeat. Pour the ganache over the top and let it set.