Why These Irresistibly Creamy Mini Banana Cheesecakes Are a Must-Try
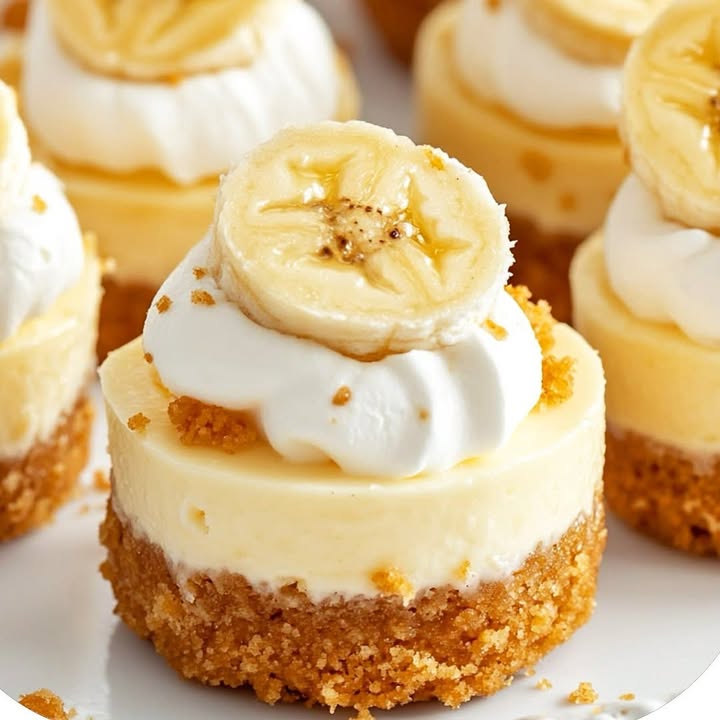
Let me tell you about the time I made these mini banana cheesecakes for my book club. They were gone in under five minutes, and everyone kept asking, “What’s the secret?” Well, the secret is simple: they’re creamy, sweet, and just the right size to satisfy your cravings without going overboard. These Irresistibly Creamy Mini Banana Cheesecakes are a delightful twist on classic cheesecake, combining the tropical sweetness of bananas with a buttery vanilla wafer crust. Whether you’re a seasoned baker or a newbie in the kitchen, this recipe will make you feel like a dessert wizard.
A Little History Behind This Sweet Treat
Cheesecake has been around for centuries, with its origins tracing back to ancient Greece. But let’s be honest—this isn’t your grandma’s cheesecake. The addition of bananas gives it a modern, tropical flair that feels fresh and exciting. I first tried a version of this recipe at a family potluck, but it was way too complicated. So, I simplified it while keeping all the flavor. Now, it’s become my go-to dessert whenever I want to impress guests (or just treat myself).
Why You’ll Love This Recipe
First off, these cheesecakes are ridiculously easy to make. No water baths, no fancy equipment—just mix, chill, and serve. Second, the flavors are spot-on. The creamy banana filling pairs perfectly with the crunchy vanilla wafer crust, creating a texture party in your mouth. Plus, they’re bite-sized, which means you can indulge guilt-free. Whether you’re feeding a crowd or just need a little pick-me-up, these mini banana cheesecakes have got you covered.
Perfect Occasions to Whip Up This Dessert
These Irresistibly Creamy Mini Banana Cheesecakes are perfect for any occasion—or no occasion at all! Serve them at birthday parties, baby showers, or holiday gatherings. They’re also great for casual get-togethers, like game nights or backyard barbecues. Honestly, I’ve even made them just because it’s Tuesday. Sometimes, life needs a little extra sweetness, and these cheesecakes deliver.
Ingredients You’ll Need
Here’s everything you’ll need to make these magical mini desserts:
- Crust:
- 1 cup crushed vanilla wafers
- 3 tablespoons melted butter
- Cheesecake Filling:
- 8 oz cream cheese, softened
- 1/2 cup sweetened condensed milk
- 1/2 cup mashed ripe banana
- 1 teaspoon vanilla extract
- 1 cup whipped topping (like Cool Whip)
- Layering & Garnish:
- 1 banana, thinly sliced
- Extra whipped topping
- Mini vanilla wafers or crushed cookie crumbs for garnish
Substitution Options
Life happens, and sometimes you don’t have all the ingredients on hand. No worries! Here are some swaps you can make:
- Use graham crackers instead of vanilla wafers for the crust.
- If you don’t have sweetened condensed milk, try using plain yogurt mixed with a bit of sugar.
- Swap out Cool Whip for homemade whipped cream if you’re feeling fancy.
- For a dairy-free version, use coconut cream and vegan cream cheese.
Step-by-Step Preparation
Step 1: Make the Crust
Start by crushing those vanilla wafers into fine crumbs. I like to use a food processor, but a zip-top bag and rolling pin work just as well. Mix the crumbs with melted butter until they resemble wet sand—it should hold together when you press it. Spoon the mixture into a muffin tin lined with paper liners or silicone molds. Press down firmly to create a compact crust. This is the foundation of your cheesecake, so make sure it’s nice and sturdy.
Step 2: Prepare the Cheesecake Filling
In a mixing bowl, beat the softened cream cheese until it’s smooth and free of lumps. Add the sweetened condensed milk, mashed banana, and vanilla extract. Mix until the filling is creamy and dreamy. Now, gently fold in the whipped topping. Be careful not to overmix—you want to keep that light, airy texture. Pro tip: Use a ripe banana for maximum sweetness and flavor.
Step 3: Assemble the Cheesecakes
Place one slice of banana on top of each crust. Then, spoon or pipe the cheesecake filling over the slices, filling each cup to the top. Smooth the tops with a spatula for a polished look. Transfer the muffin tin to the refrigerator and let the cheesecakes chill for at least 12 hours. For a firmer texture, pop them in the freezer for 30 minutes before serving.
Step 4: Add the Final Touches
Just before serving, top each cheesecake with a dollop of whipped topping and a mini vanilla wafer or a sprinkle of crushed cookies. This step adds a touch of elegance and makes them Instagram-worthy. Trust me, your guests will be impressed.
Chef’s Tip
To prevent the bananas from browning, brush them with a little lemon juice before layering. It’s a small step that makes a big difference in presentation.
Timing Breakdown
- Prep Time: 20 minutes
- Chilling Time: 12 hours
- Total Time: About 12 hours and 20 minutes
Chef’s Secret
For an extra burst of flavor, add a pinch of cinnamon to the cheesecake filling. It complements the banana beautifully and adds a warm, cozy note.
Extra Info
Did you know bananas are technically berries? Weird, right? But their creamy texture and natural sweetness make them a superstar ingredient in desserts like these mini banana cheesecakes.
Necessary Equipment
You’ll need a few basic tools to bring this recipe to life:
- Muffin tin
- Paper liners or silicone molds
- Mixing bowls
- Whisk or electric mixer
- Spatula
Storage Tips
Once your cheesecakes are set, store them in an airtight container in the refrigerator. They’ll stay fresh for up to 3 days. If you need to store them longer, wrap them individually in plastic wrap and freeze for up to a month. Just thaw in the fridge before serving.
For leftovers, you can stack them in layers separated by parchment paper to save space. Always keep them chilled to maintain their creamy texture.
If you’re transporting them, place them in a cooler with ice packs to keep them cold. Nobody likes a melty cheesecake!
Tips and Advice
Don’t rush the chilling process—it’s crucial for setting the cheesecakes. Also, make sure your cream cheese is fully softened before mixing to avoid lumps. Lastly, taste your banana before adding it to the filling to ensure it’s sweet enough.
Presentation Ideas
Serve these cheesecakes on a tiered dessert stand for a fancy touch. Add a sprig of mint or a dusting of cocoa powder for extra flair. You can also arrange them on a platter with fresh fruit for a colorful display.
Healthier Alternatives
Looking to lighten up this recipe? Here are six variations to try:
- Low-Sugar Option: Use sugar-free sweetened condensed milk and whipped topping.
- Vegan Version: Swap cream cheese for cashew-based cream cheese and use coconut cream instead of Cool Whip.
- Gluten-Free: Use gluten-free vanilla wafers for the crust.
- Protein-Packed: Add a scoop of vanilla protein powder to the filling.
- Fruit Swap: Replace bananas with mango or strawberries for a different flavor profile.
- No-Bake Paleo: Use almond flour mixed with dates for the crust and coconut cream for the filling.
Common Mistakes to Avoid
Mistake 1: Skipping the Chilling Time
I get it—waiting 12 hours feels like forever. But trust me, skipping the chilling time will leave you with a soupy mess. Patience is key here. Pro tip: Prep them the night before so they’re ready to serve the next day.
Mistake 2: Overmixing the Filling
Overmixing can deflate the whipped topping and make the filling dense. Fold it in gently to keep the texture light and airy.
Mistake 3: Using Underripe Bananas
Underripe bananas lack sweetness and can make your cheesecake taste bland. Always use ripe, spotty bananas for the best flavor.
FAQ
Can I use frozen bananas?
Yes, but thaw and drain them first to remove excess moisture. Otherwise, your filling might turn out watery.
How do I prevent the crust from sticking?
Line your muffin tin with paper liners or silicone molds. They’ll peel off easily once the cheesecakes are set.
Can I make these ahead of time?
Absolutely! These cheesecakes can be made up to 2 days in advance and stored in the fridge. Just add the garnishes before serving.
Do I need a mixer?
Not necessarily. A whisk and some elbow grease will do the trick, though a mixer makes the job quicker.
Can I freeze these cheesecakes?
Yes! Wrap them individually and freeze for up to a month. Thaw in the fridge before serving.
What if I don’t have vanilla wafers?
Graham crackers or digestive biscuits work just as well. Adjust the butter amount slightly if needed.
How do I know when they’re set?
They should feel firm to the touch and hold their shape when removed from the liners. If they’re still soft, chill them longer.
Can I use a different fruit?
Sure! Mango, strawberry, or even blueberry would be delicious alternatives.
Why is my filling grainy?
This usually happens if the cream cheese wasn’t softened enough. Microwave it for a few seconds to soften before mixing.
What’s the best way to pipe the filling?
Use a zip-top bag with the corner snipped off. It’s an easy and mess-free way to pipe the filling evenly.
Final Thoughts
These Irresistibly Creamy Mini Banana Cheesecakes are a crowd-pleaser that’s easy to make and fun to share. With their creamy filling, crunchy crust, and tropical twist, they’re sure to become a favorite in your dessert rotation. So grab your ingredients, put on your apron, and get ready to wow everyone with these bite-sized delights.
Irresistibly Creamy Mini Banana Cheesecakes
Ingredients
Equipment
Method
- Crush the vanilla wafers into fine crumbs and mix with melted butter until resembling wet sand.
- Spoon the mixture into a muffin tin lined with paper liners or silicone molds and press firmly to create a crust.
- In a mixing bowl, beat the softened cream cheese until smooth, then add sweetened condensed milk, mashed banana, and vanilla extract; mix until creamy.
- Gently fold in the whipped topping.
- Place one slice of banana on top of each crust and spoon or pipe the cheesecake filling over the slices.
- Chill the assembled cheesecakes in the refrigerator for at least 12 hours or freeze for 30 minutes for a firmer texture.
- Before serving, top each cheesecake with a dollop of whipped topping and a mini vanilla wafer or crushed cookies.