Why This Irresistibly Rich Black Velvet Cake is a Must-Try
Let me tell you about the first time I made this **Irresistibly Rich Black Velvet Cake**. It was for my best friend’s birthday, and I wanted something that felt indulgent but also cozy enough to share with family. The moment I pulled it out of the oven, the house smelled like a warm hug—rich cocoa mingling with hints of vanilla. When I sliced into it, the velvety texture was so dreamy that even my picky-eater nephew asked for seconds. Trust me, this cake isn’t just dessert; it’s an experience.
A Little History of the Black Velvet Cake
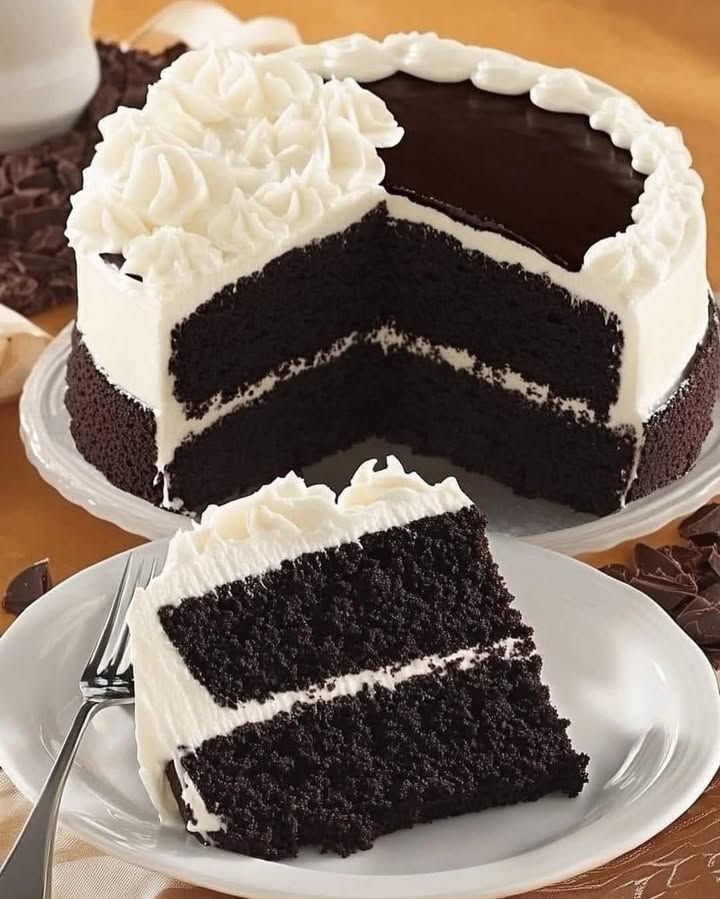
You’ve probably heard of red velvet cake, but black velvet? It’s like its sultry, sophisticated cousin. While red velvet gets its color from food dye, this cake leans on dark cocoa powder for its deep, mysterious hue. The tradition of cocoa-based cakes dates back centuries, but modern bakers have taken it to new heights by focusing on bold flavors and smooth textures. My version keeps things simple yet luxurious, perfect for anyone who loves chocolate but wants something a little different.
Why You’ll Love This Recipe
This **Irresistibly Rich Black Velvet Cake** is all about balance. The cake itself is moist without being too dense, while the glaze adds just the right amount of sweetness. Plus, it’s surprisingly easy to make! Even if you’re not a seasoned baker, this recipe guides you every step of the way. And let’s not forget how versatile it is—you can dress it up for special occasions or enjoy it as a comforting treat at home.
Perfect Occasions for This Cake
Whether it’s a holiday dinner, a birthday party, or just a random Tuesday night craving, this cake fits the bill. I’ve served it at family gatherings, potlucks, and even as a “just because” dessert for my book club. Everyone always raves about how rich and decadent it tastes. If you’re looking to impress guests or simply spoil yourself, this is your go-to recipe.
Ingredients List
Here’s what you’ll need to whip up this masterpiece:
For the Cake:
- 1 3/4 cups all-purpose flour
- 1 1/2 cups of sugar
- 3/4 cup dark cocoa powder
- 1/2 tsp baking soda
- 1 tsp baking powder
- 1 tsp salt
- 2 large eggs
- 1 cup buttermilk
- 1/2 cup vegetable oil
- 2 tsp vanilla extract
- 1 cup of boiling water
For the Glaze:
- 1 cup unsalted butter, softened
- 3 cups of powdered sugar
- 1/2 cup cocoa powder
- 2 tsp vanilla extract
- 4-5 tablespoons of milk or heavy cream
Substitution Options
If you don’t have all the ingredients, no worries! Here are some swaps:
- Buttermilk: Mix 1 tablespoon of lemon juice or vinegar with 1 cup of regular milk and let it sit for 5 minutes.
- Dark Cocoa Powder: Regular cocoa powder works fine, though the color won’t be as intense.
- Vegetable Oil: Canola or melted coconut oil are great alternatives.
- Milk in the Glaze: Use almond milk or oat milk for a dairy-free option.
Step-by-Step Preparation
Step 1: Preheat and Prep
Start by preheating your oven to 350°F (175°C). Grease two 9-inch round pans and lightly dust them with flour. This ensures the cake layers slide out easily later. Pro tip: Line the bottoms with parchment paper for extra insurance against sticking.
Step 2: Mix Dry Ingredients
In a large bowl, whisk together the flour, sugar, cocoa powder, baking soda, baking powder, and salt. As you mix, the dry ingredients will take on a deep, almost-black color thanks to the dark cocoa. The aroma alone will make your mouth water!
Step 3: Combine Wet Ingredients
Add the eggs, buttermilk, oil, and vanilla to the dry mixture. Whisk until smooth—it should feel thick but pourable. Now comes the fun part: slowly stir in the boiling water. The batter will thin out significantly, but don’t worry—that’s exactly how it’s supposed to look.
Step 4: Bake the Cake
Pour the batter evenly into your prepared pans. Pop them in the oven and bake for 30-35 minutes. To check if they’re done, insert a toothpick into the center. If it comes out clean, you’re golden! Let the cakes cool completely before frosting.
Step 5: Make the Glaze
While the cakes cool, beat the softened butter, powdered sugar, cocoa powder, vanilla, and milk until smooth and creamy. Adjust the milk one tablespoon at a time until you reach your desired consistency. Chef’s tip: Chill the glaze briefly before spreading—it firms up slightly and makes decorating easier.
Step 6: Decorate and Serve
Spread the glaze generously over the cooled cake layers, smoothing it out with a spatula. For a professional touch, use a bench scraper to create clean edges. Serve slices with a sprinkle of cocoa powder or fresh berries on top.
Timing Breakdown
- Prep Time: 15 minutes
- Cooking Time: 35 minutes
- Resting/Cooling Time: 1 hour
- Total Time: ~1 hour 50 minutes
Chef’s Secret
To enhance the chocolate flavor, add a pinch of espresso powder to both the cake batter and the glaze. It doesn’t make the cake taste like coffee—it just amplifies the richness of the cocoa.
Extra Info
Did you know that dark cocoa powder has less acidity than regular cocoa? That’s why it pairs so well with buttermilk in this recipe, creating a perfectly balanced crumb.
Necessary Equipment
- Two 9-inch round cake pans
- Whisk and mixing bowls
- Electric mixer (handheld or stand)
- Spatula
- Parchment paper
Storage Tips
Store leftover **Irresistibly Rich Black Velvet Cake** in an airtight container at room temperature for up to 2 days. After that, refrigerate it to extend its life to 5 days. Bring it back to room temp before serving for the best texture.
If you want to freeze the cake, wrap each layer tightly in plastic wrap and then foil. Freeze for up to 3 months. Thaw overnight in the fridge before reassembling and glazing.
Avoid storing the cake near strong-smelling foods, as it can absorb odors. Keep it away from direct sunlight to prevent the glaze from melting.
Tips and Advice
- Use room-temperature eggs for better incorporation into the batter.
- Don’t skip sifting the cocoa powder—it helps distribute the flavor evenly.
- For a glossy finish, brush the cake layers with simple syrup before adding the glaze.
Presentation Ideas
- Garnish with edible gold leaf for a luxe touch.
- Add fresh raspberries or strawberries around the plate.
- Dust powdered sugar through a stencil for decorative patterns.
Healthier Alternatives
Looking to lighten things up? Try these variations:
- Gluten-Free: Swap all-purpose flour for a gluten-free blend.
- Low-Sugar: Replace sugar with a sugar substitute like monk fruit.
- Vegan: Use flax eggs and plant-based milk instead of eggs and buttermilk.
- Oil-Free: Substitute applesauce for the vegetable oil.
- Protein-Packed: Add a scoop of protein powder to the batter.
- Reduced-Fat: Cut the glaze butter in half and increase the milk.
Common Mistakes to Avoid
Mistake 1: Overmixing the Batter
Overmixing can lead to a tough cake. Stir only until the ingredients combine. A few lumps are okay—they’ll disappear during baking.
Mistake 2: Skipping Cooling Time
Rushing to frost a warm cake causes the glaze to melt and slide off. Patience pays off here!
Mistake 3: Using Cold Ingredients
Cold eggs and buttermilk won’t blend smoothly. Take them out of the fridge ahead of time.
Mistake 4: Not Measuring Accurately
Baking is science, so measure carefully. Too much flour can make the cake dry, while too little sugar affects sweetness and structure.
FAQs
Can I use regular cocoa powder?
Yes, but the cake won’t have the same deep color. Dark cocoa gives it that signature “black velvet” look.
How do I prevent the cake from sinking?
Avoid opening the oven door during baking, and ensure your leavening agents (baking soda and powder) aren’t expired.
Can I make this cake in advance?
Absolutely! Bake the layers a day ahead, wrap them tightly, and store them at room temperature until ready to assemble.
What’s the best way to cut neat slices?
Dip your knife in hot water and wipe it clean between cuts for smooth, even slices.
Is there a non-dairy alternative for the glaze?
Swap the butter for vegan margarine and use plant-based milk for a dairy-free version.
Can I double the recipe?
Yes, just be sure to use larger bowls and adjust your pan sizes accordingly.
Why does my glaze taste grainy?
It may need more mixing. Beat it longer to dissolve any lumps in the powdered sugar.
Can I add nuts or chips to the batter?
Of course! Fold in chopped walnuts or chocolate chips after mixing the batter.
How do I fix a runny glaze?
Add more powdered sugar, one tablespoon at a time, until it thickens.
Can I bake this in a square pan?
Yes, but reduce the baking time slightly since the batter will spread thinner.
Final Thoughts
This **Irresistibly Rich Black Velvet Cake** truly lives up to its name. Whether you’re baking for loved ones or treating yourself, it’s a showstopper that delivers on flavor and elegance. So grab your apron, turn on some music, and get ready to create a masterpiece. Happy baking!
Irresistibly Rich Black Velvet Cake
Ingredients
Equipment
Method
- Preheat your oven to 350°F (175°C) and grease two 9-inch round pans, dusting them with flour.
- In a large bowl, whisk together the flour, sugar, cocoa powder, baking soda, baking powder, and salt.
- Add the eggs, buttermilk, oil, and vanilla to the dry mixture and whisk until smooth.
- Slowly stir in the boiling water until the batter is thin and well combined.
- Pour the batter evenly into the prepared pans and bake for 30-35 minutes, checking with a toothpick for doneness.
- Allow the cakes to cool completely before frosting.
- Beat the softened butter, powdered sugar, cocoa powder, vanilla, and milk until smooth and creamy.
- Spread the glaze generously over the cooled cake layers.