Why This Irresistibly Soft Red Velvet Cake Is a Must-Try
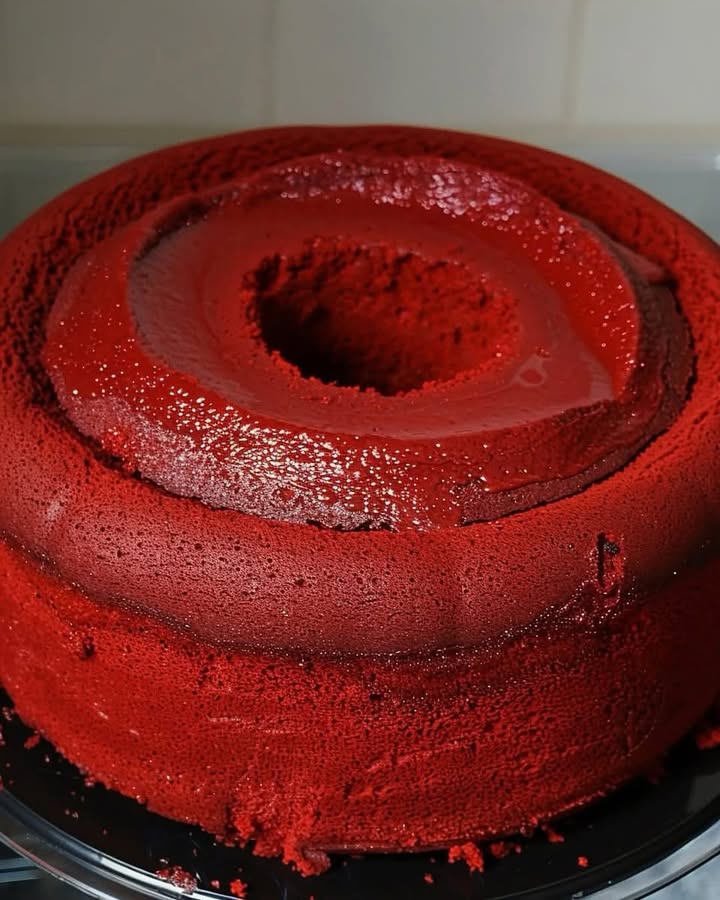
There’s something magical about the first time you see an Irresistibly Soft Red Velvet Cake. That deep, velvety red color grabs your attention, and then that spongy, melt-in-your-mouth texture seals the deal. I remember baking this cake for my best friend’s birthday last year. The moment I pulled it out of the oven, my kitchen smelled like buttery heaven, and the vibrant red hue made everyone at the party stop mid-conversation. It’s not just a cake; it’s an experience. Whether you’re a seasoned baker or a newbie in the kitchen, this recipe is foolproof and oh-so-delicious.
A Little History Behind the Red Velvet Craze
The origins of Red Velvet Cake are as intriguing as its flavor. Some say it started during World War II when bakers used beet juice to enhance the color of their cakes. Others believe it became popular in the 1920s when a famous hotel in New York served it to celebrities. Either way, the cake gained fame in the South, where it became a symbol of Southern hospitality. Today, it’s a timeless classic found at weddings, birthdays, and holiday tables. My version keeps the tradition alive but adds a modern twist with cream cheese glaze, which pairs perfectly with the rich cocoa notes.
Why You’ll Fall in Love With This Recipe
This Irresistibly Soft Red Velvet Cake is everything you want in a dessert: soft, moist, and packed with flavor. The cocoa gives it a subtle chocolate taste, while the vinegar reacts with the baking soda to create that signature lightness. Plus, the cream cheese glaze adds a tangy balance that makes every bite unforgettable. Best of all? It’s easy to make! Even if you’ve never baked a cake before, this recipe will guide you step by step to perfection.
Perfect Occasions to Whip Up This Cake
This cake is a showstopper for any occasion. Serve it at birthday parties, anniversaries, or Valentine’s Day dinners for a romantic touch. I’ve also brought it to potlucks and family gatherings, where it disappears faster than you can blink. If you’re looking to impress someone special or just treat yourself on a random Tuesday, this Irresistibly Soft Red Velvet Cake is your answer.
Ingredients You’ll Need
- 1 cup (3 bars) unsalted butter, softened
- 2 cups granulated sugar
- 6 large eggs, at room temperature
- 2 teaspoons vanilla extract
- 1 tablespoon distilled white vinegar
- 2 cups cake flour, sifted
- 1/4 cup unsweetened cocoa powder
- 1 teaspoon baking soda
- 1/2 teaspoon salt
- 1 cup buttermilk, at room temperature
- 1 ounce (2 tablespoons) red liquid or gel food coloring
Cream Cheese Glaze (Optional):
- 4 ounces softened cream cheese
- 1 cup powdered sugar
- 2-3 tablespoons milk or cream
- 1 teaspoon vanilla extract
Substitution Options
If you don’t have buttermilk, mix 1 cup of regular milk with 1 tablespoon of lemon juice or vinegar—let it sit for 5 minutes. For a dairy-free option, use plant-based butter and almond milk. Instead of red dye, try beetroot powder for a natural alternative. And if you’re short on time, skip the glaze and dust the cake with powdered sugar instead.
Step-by-Step Preparation
Step 1: Preheat and Prep
Start by preheating your oven to 163°C (325°F). Grease and flour a large tube pan (about 12 cups). This ensures the cake comes out clean without sticking. Pro tip: Use a pastry brush to spread the butter evenly inside the pan—it makes a big difference!
Step 2: Cream Butter and Sugar
In a large mixing bowl, beat the softened butter and sugar together for 5-6 minutes until light and fluffy. You’ll notice the mixture turning pale yellow and almost doubling in volume. This step is crucial because it creates air pockets that make the cake super soft.
Step 3: Add Eggs and Flavorings
Crack the eggs one by one into the bowl, mixing well after each addition. Stir in the vanilla extract and vinegar. Don’t worry if the batter looks curdled—it’s supposed to! The vinegar helps activate the baking soda later.
Step 4: Combine Dry Ingredients
In another bowl, whisk together the sifted cake flour, cocoa powder, baking soda, and salt. Sifting prevents lumps and aerates the flour, giving the cake its signature texture. Chef’s tip: Measure your flour correctly by spooning it into the measuring cup and leveling it off.
Step 5: Mix in Buttermilk and Dye
Gradually add the dry ingredients to the wet mixture, alternating with the buttermilk. Begin and end with the flour mixture. In a small bowl, combine the buttermilk with the red food coloring, then fold it into the batter. Watch the transformation—it’s like magic!
Step 6: Bake to Perfection
Pour the batter into the prepared pan and smooth the top. Bake for 75-85 minutes, checking at 70 minutes. Insert a toothpick into the center—if it comes out clean, it’s done. Let the cake cool in the pan for 15 minutes before unmolding.
Step 7: Finish With Glaze
If using the cream cheese glaze, mix all the ingredients until smooth. Drizzle it over the cooled cake for a decadent finish. The contrast between the tangy glaze and the rich cake is pure bliss.
Timing Breakdown
Prep Time: 20 minutes
Cooking Time: 75-85 minutes
Resting Time: 15 minutes
Total Time: Approximately 2 hours
Chef’s Secret
To intensify the red color, let the batter rest for 10 minutes before baking. This allows the dye to fully incorporate and deepen the hue.
Extra Info
Did you know that red velvet cakes were originally brown? The red color we associate with them today came from the reaction between cocoa powder and acidic ingredients like vinegar and buttermilk. Modern recipes often use food coloring to achieve that iconic shade.
Necessary Equipment
- Large mixing bowls
- Electric hand mixer or stand mixer
- Sifter or fine-mesh sieve
- Tubed cake pan
- Pastry brush
- Toothpick or cake tester
Storage Tips
Store the Irresistibly Soft Red Velvet Cake in an airtight container at room temperature for up to 3 days. To extend its shelf life, refrigerate it for up to a week. Bring it back to room temperature before serving for the best flavor and texture.
If you live in a humid area, keep the cake in the fridge to prevent it from becoming soggy. Cover it tightly with plastic wrap to avoid absorbing odors from other foods.
For long-term storage, freeze slices wrapped individually in plastic wrap and placed in a freezer-safe bag. They’ll stay fresh for up to 3 months. Thaw overnight in the fridge before enjoying.
Tips and Advice
- Always bring your eggs and dairy to room temperature—they blend better.
- Don’t overmix the batter once you add the flour; it can make the cake dense.
- Use high-quality cocoa powder for richer flavor.
Presentation Ideas
Serve the cake on a vintage cake stand for a touch of elegance. Garnish with fresh berries or edible flowers for a pop of color. Dust powdered sugar around the base for a snowy effect, especially during the holidays.
Healthier Alternatives
- Gluten-Free Version: Swap cake flour with a gluten-free flour blend.
- Low-Sugar Option: Replace granulated sugar with coconut sugar or stevia.
- Vegan Twist: Use vegan butter, flax eggs, and almond milk.
- Less Sweet: Reduce sugar by 1/4 cup and skip the glaze.
- Oil-Based: Substitute butter with vegetable oil for a lighter texture.
- Protein-Packed: Add a scoop of vanilla protein powder to the batter.
Common Mistakes to Avoid
Mistake 1: Overmixing the Batter
Overmixing can lead to a dense cake instead of a light and airy one. Mix just until the ingredients come together. Pro tip: Stop mixing as soon as you no longer see streaks of flour.
Mistake 2: Skipping Room Temperature Ingredients
Cold ingredients won’t emulsify properly, resulting in uneven texture. Take them out of the fridge at least 30 minutes before starting.
Mistake 3: Using Too Little Food Coloring
For a vibrant red color, don’t skimp on the dye. Gel-based coloring is more concentrated than liquid, so you’ll need less.
Mistake 4: Opening the Oven Door Too Often
Peeking too much can cause the cake to sink. Resist the urge and check only when the minimum baking time has passed.
FAQs About Irresistibly Soft Red Velvet Cake
Can I Make This Cake Without Food Coloring?
Yes, you can use beetroot powder or simply omit the coloring altogether. Keep in mind the cake will have a muted reddish-brown hue.
What Can I Use Instead of Buttermilk?
Mix regular milk with a tablespoon of vinegar or lemon juice. Let it sit for 5 minutes to thicken.
How Do I Know When the Cake Is Done?
Insert a toothpick into the center. If it comes out clean or with a few crumbs, it’s ready. Avoid overbaking, as the cake may dry out.
Can I Freeze This Cake?
Absolutely! Wrap individual slices in plastic wrap and store them in a freezer-safe bag for up to 3 months.
Why Does My Cake Have a Metallic Taste?
This could be due to old baking soda or excessive amounts of it. Always check expiration dates and measure carefully.
Can I Make This Recipe Gluten-Free?
Yes, replace the cake flour with a gluten-free flour blend designed for baking.
How Long Will This Cake Last?
At room temperature, it stays fresh for 3 days. Refrigerated, it lasts up to a week.
Can I Use a Different Pan Size?
Yes, adjust the baking time accordingly. Smaller pans will require less time, while larger ones may need more.
Is This Cake Suitable for Vegans?
With substitutions like flax eggs and plant-based butter, it can easily become vegan-friendly.
Why Didn’t My Cake Turn Out Red?
Double-check the amount of food coloring used. Also, ensure you’re using red dye and not pink, which won’t give the same result.
Final Thoughts
Baking an Irresistibly Soft Red Velvet Cake is more than just following a recipe—it’s creating memories. Whether you’re sharing it with loved ones or savoring a slice alone, this cake promises joy in every bite. So grab your apron, gather your ingredients, and let’s get baking!
Irresistibly Soft Red Velvet Cake
Ingredients
Equipment
Method
- Preheat your oven to 163°C (325°F) and grease and flour a large tube pan.
- In a large mixing bowl, beat the softened butter and sugar together for 5-6 minutes until light and fluffy.
- Add the eggs one by one, mixing well after each addition; stir in vanilla extract and vinegar.
- In another bowl, whisk together sifted cake flour, cocoa powder, baking soda, and salt.
- Gradually add the dry ingredients to the wet mixture, alternating with the buttermilk.
- Fold in the red food coloring mixed with buttermilk.
- Pour the batter into the prepared pan and bake for 75-85 minutes, checking at 70 minutes for doneness.
- If using, mix cream cheese glaze ingredients until smooth and drizzle over the cooled cake.