Picture this: it’s a warm summer evening, your friends are due in 30 minutes, and you promised dessert. Panic? Not this time! I whipped up this No-Bake Chocolate Mint Cheesecake Delight on a whim last year during a heatwave, when turning on the oven felt like volunteering for a sauna. My kids dubbed it “Magic Mint Cake,” and honestly—it kind of is. Creamy, cool, with a crunch at the base and swirls of freshness that taste like a candy cane kissed a brownie. And zero baking required. Let me walk you through my go-to showstopper that’s as easy as it is unforgettable.
The Sweet Story Behind This No-Bake Chocolate Mint Cheesecake Delight
Cheesecake traces back to ancient Greece—yes, really!—but the no-bake version we adore today became popular in mid-20th century America, when refrigerators became common and convenience ruled the kitchen. Adding mint and chocolate? That’s pure modern genius. Think of it as the love child of a Thin Mint cookie and a New York cheesecake, chilling (literally) in your fridge. I first saw a similar recipe in my grandma’s 1970s dessert binder, but she used crushed Oreos and a jiggly gelatin base. I upgraded it to whipped cream and real cream cheese for that ultra-smooth, rich texture we crave today.
Why You’ll Absolutely Love This No-Bake Chocolate Mint Cheesecake
This dessert is a triple threat: easy, impressive, and refreshingly delicious. No oven means no stress on hot days or tiny kitchens. The contrast of the chocolatey crust, cool minty filling, and melty chocolate chips creates a flavor party in every bite. Plus, it’s a crowd-pleaser that looks like you spent hours—even though you probably spent less than 20 minutes prepping. My 7-year-old niece helped me make it last Christmas, and she still brags that she “baked” cheesecake. (Shh… we didn’t correct her!)
Perfect Moments for a No-Bake Chocolate Mint Cheesecake Delight
- Summer BBQs or pool parties (it stays cool and cuts through smoky flavors)
- Holiday gatherings (hello, Christmas dessert that’s not pie!)
- Last-minute dinner parties (fridge does the work while you relax)
- Birthday treats for mint-choc lovers (pair with vanilla ice cream!)
- “Just because” sweet cravings (we’ve all been there at 9 p.m.)
Ingredients You’ll Need
For the Base:
- 1½ cups chocolate cookie crumbs (about 20 Oreo cookies, filling included)
- ⅓ cup melted butter
For the Filling:
- 16 oz (450 g) full-fat cream cheese, softened
- 1 cup powdered sugar
- 1 teaspoon mint extract
- 2 cups whipped cream (or 1½ cups heavy cream, whipped to stiff peaks)
- Green food coloring (optional, for marbled effect)
- ½ cup chocolate chips or chopped chocolate
For Decoration:
- Extra whipped cream
- Mint-flavored gummies or fresh mint leaves
- Chocolate shavings or sprinkles (optional)
Smart Substitution Options
- Cookie crumbs: Use graham crackers + 2 tbsp cocoa powder if avoiding chocolate cookies.
- Mint extract: Swap with 2 tbsp finely chopped fresh mint (blended into cream cheese), but flavor will be milder.
- Heavy cream: Use store-bought whipped topping (like Cool Whip), but texture will be lighter and sweeter.
- Butter: Coconut oil works for dairy-free, but adds a slight coconut taste.
- Sugar: Replace with powdered erythritol for a low-sugar version—just note it may alter creaminess slightly.
Step-by-Step Preparation
Step 1: Build the Base
Pour those chocolate cookie crumbs into a bowl—smell that rich cocoa and nostalgia! Stir in melted butter until it looks like wet sand. Press this mixture firmly into the bottom of a 9-inch springform pan (or pie dish). Don’t be gentle—pack it tight so it holds together when sliced. Pop it in the fridge for 15 minutes while you tackle the filling. Pro tip: Use the bottom of a measuring cup to press evenly—it’s faster and gives a smooth surface.
Step 2: Whip Up the Filling
In a large bowl, beat softened cream cheese and powdered sugar until silky and lump-free. This is where the magic starts—add that mint extract and breathe in! It smells like a winter wonderland in July. If you’re going for the marbled look, mix in 2–3 drops of green food coloring into half the mixture. Then, gently fold in the whipped cream using a spatula—no rough stirring! You want it light, airy, and cloud-like. Finally, stir in most of the chocolate chips, reserving some for topping.
Step 3: Assemble with Style
Pour the creamy filling over your chilled crust. If you used green coloring, now’s the fun part: swirl it with a toothpick or skewer in lazy figure-eights. Watch as green rivers cut through white cream—it’s edible art! Don’t overdo it, though; a few elegant swirls beat a muddy mix. Tap the pan lightly on the counter to release air bubbles. Chef’s tip: Run a warm knife around the edge after pouring to prevent cracks as it sets.
Step 4: Chill to Perfection
Cover the pan with plastic wrap (to avoid fridge smells) and let it rest in the refrigerator for at least 4 hours—but overnight is best. This isn’t just “waiting”; it’s when the filling firms up, flavors meld, and that mint-chocolate harmony deepens. Trust me, the patience pays off. I once tried cutting into it after 2 hours… messy disaster! Wait. It’s worth it.
Step 5: Decorate and Serve
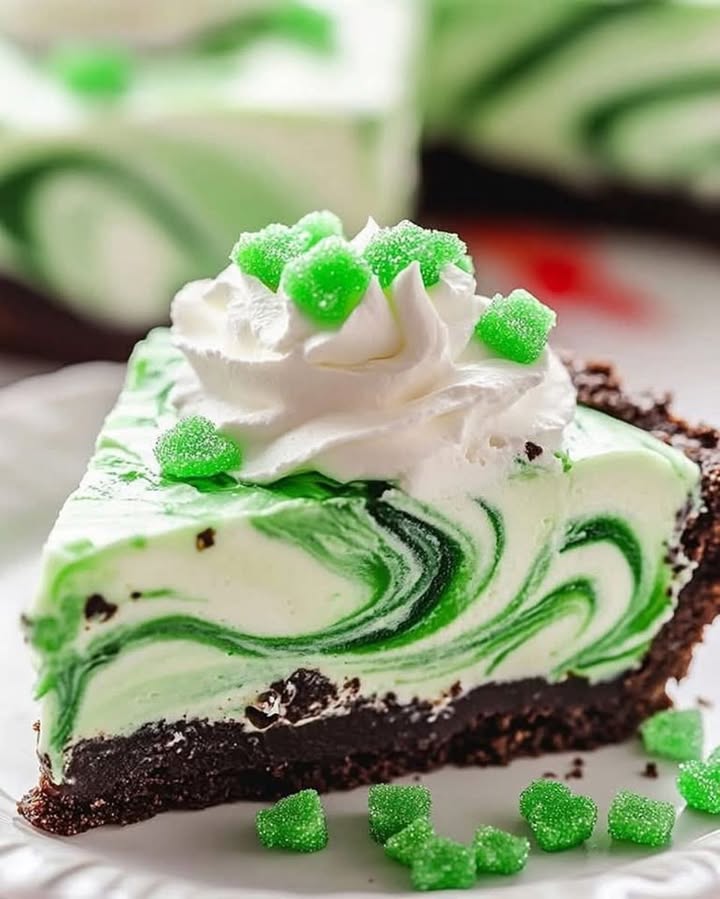
Just before serving, pipe or spoon dollops of fresh whipped cream around the edges. Scatter mint gummies or real mint leaves for that pop of color and freshness. Finish with extra chocolate chips or shavings for crunch. Run a hot knife under warm water, wipe dry, and slice cleanly—each piece should hold its shape with a glossy sheen. Serve on chilled plates for extra wow factor!
Timing at a Glance
- Prep time: 20 minutes
- Chill time: 4 hours (or overnight)
- Total time: 4 hours 20 minutes
- Serves: 10–12 people
Chef’s Secret: The Cream Cheese Trick
Always let your cream cheese sit at room temperature for 30–60 minutes before mixing. Cold cream cheese = lumpy filling. If you forget (like I often do!), cut it into cubes and microwave in 10-second bursts until soft—but not melted! Smooth filling starts with soft cheese. Also, sift the powdered sugar to avoid graininess. These tiny steps make a huge difference in texture.
Fun Fact to Impress Your Guests
Mint and chocolate became a famous duo thanks to the York Peppermint Pattie, launched in 1940. But ancient Romans used mint to freshen breath after meals—so pairing mint with rich foods is actually centuries old! This cheesecake is a modern twist on a timeless combo. Serve it and say, “Caesar would’ve approved!”
Necessary Equipment
- 9-inch springform pan (or deep pie dish)
- Electric hand mixer or stand mixer
- Rubber spatula
- Measuring cups and spoons
- Plastic wrap
- Knife for slicing (dipped in hot water for clean cuts)
How to Store Your No-Bake Chocolate Mint Cheesecake
This dessert keeps beautifully in the fridge for up to 5 days. Always cover it tightly with plastic wrap or store in an airtight container. The crust may soften slightly over time, but the flavor actually gets better after day two as the mint infuses deeper into the cream.
Want to make it ahead? Freeze it! Wrap the whole cheesecake (without fresh toppings) in two layers of plastic wrap and one of foil. It freezes well for up to 2 months. Thaw overnight in the fridge before decorating and serving. Avoid freezing with whipped cream topping—it turns watery.
Never leave it out at room temperature for more than 2 hours, especially in warm weather. Cream cheese is perishable, and food safety matters—even for dessert! If your kitchen is hot, keep serving time short and return leftovers to the fridge ASAP.
Tips and Expert Advice
- Use full-fat cream cheese—low-fat versions can make the filling too runny.
- Whip your own cream instead of store-bought for richer, less sweet results.
- Add chocolate chips while the filling is still slightly warm if you want them to melt into marbled streaks.
- For a vegan version, use dairy-free cream cheese, coconut cream, and vegan cookies (see variations below).
- Chill your mixing bowl before whipping cream—it whips faster and holds peaks longer.
Stunning Presentation Ideas
- Serve individual portions in mini mason jars for parties.
- Dust the top with edible gold shimmer for holiday glam.
- Drizzle with melted dark chocolate in zigzags before adding mint leaves.
- Garnish with crushed peppermint candies for a festive crunch.
- Place on a cake stand with scattered chocolate coins around the base.
Healthier & Creative Variations
Love this No-Bake Chocolate Mint Cheesecake Delight but want to try something new? Here are six tasty twists:
1. Vegan Chocolate Mint Cheesecake
Swap cream cheese for cashew-based vegan cream cheese, use coconut cream instead of dairy whipped cream, and press crushed vegan chocolate cookies with coconut oil. Sweeten with maple syrup powder. Chill as usual—it’s just as creamy!
2. Keto-Friendly Version
Use almond flour + cocoa powder + melted butter for the base. Sweeten filling with powdered erythritol or monk fruit. Use sugar-free chocolate chips. Keep mint extract (it’s carb-free!). A guilt-free indulgence!
3. Gluten-Free Option
Pick certified gluten-free chocolate cookies (like Kinnikinnick) or make your own crust with GF oats, cocoa, and dates. Ensure all other ingredients are GF-labeled to avoid cross-contamination.
4. Protein-Packed Cheesecake
Add 2 scoops of unflavored or vanilla whey protein to the filling. Reduce sugar slightly. Use Greek yogurt blended with cream cheese for extra protein. Great post-workout treat!
5. White Chocolate Raspberry Swirl
Replace mint with ½ cup raspberry puree swirled into the filling. Use white chocolate chips instead of dark. Keep the chocolate crust for contrast. Elegant and fruity!
6. Coffee-Infused Mint Cheesecake
Add 1 tsp instant espresso powder to the crust mixture. Keep the mint filling but add a mocha drizzle on top. Perfect for coffee lovers who enjoy a cool finish.
Common Mistakes to Avoid
Mistake 1: Using Cold Cream Cheese
When cream cheese is straight from the fridge, it won’t blend smoothly with sugar—it turns lumpy and grainy. This ruins the silky texture we dream of. Always let it soften on the counter for at least 30 minutes. If you’re in a rush, cut it into small cubes; they warm up faster. A smooth base filling ensures your No-Bake Chocolate Mint Cheesecake Delight stays luxurious and velvety.
Mistake 2: Overmixing the Whipped Cream
Folding whipped cream into cream cheese is delicate work. Stir too hard or too long, and you’ll deflate those airy peaks, leaving your cheesecake dense instead of fluffy. Use a spatula and gentle figure-eight motions. Stop as soon as no white streaks remain. Remember: you’re coaxing, not crushing!
Mistake 3: Skipping the Chill Time
Impatience is real—we’ve all been there. But cutting into this cheesecake too soon means a soupy mess instead of clean slices. The chilling time isn’t optional; it’s when the structure sets. Plan ahead! Make it the night before, and wake up to dessert glory. Your future self (and guests) will thank you.
Mistake 4: Using Too Much Mint Extract
Mint extract is potent! Just 1 teaspoon gives that refreshing zing. Add 2 or more, and you’ll taste toothpaste, not dessert. Always start with 1 tsp, taste, then add a few drops if needed. Remember: you can’t take it out once it’s in. When in doubt, less is more.
Mistake 5: Not Packing the Crust Firmly
A loose crust crumbles when you slice the cake, leaving sad crumbs instead of neat layers. Press that cookie-butter mix down hard—use the back of a spoon or a flat-bottomed cup. Chill it before adding filling so it firms up. A solid base = picture-perfect slices every time.
Frequently Asked Questions
Can I make this cheesecake without a springform pan?
Absolutely! Use a deep pie dish, 8×8 inch square pan, or even individual ramekins. Just line the dish with parchment paper if it’s not springform, so you can lift the cake out cleanly. For ramekins, reduce chill time to 3 hours. The taste stays just as amazing—only the shape changes.
How do I get clean slices every time?
Warm your knife under hot water, wipe it dry, then slice smoothly in one motion. Clean and rewarm the knife between cuts. This melts through the chocolate and cream without dragging or crumbling. It’s the secret to those Instagram-worthy slices everyone loves.
Can I use fresh mint instead of extract?
You can, but it won’t give the same bold flavor. Fresh mint leaves blended into cream cheese add subtle herbal notes but lack the punchy coolness of extract. If you try it, use 2–3 tbsp finely chopped mint and blend well. For true mint lovers, extract is still your best bet.
Why did my cheesecake crack?
No-bake cheesecakes rarely crack—but if yours did, it’s likely from air bubbles or rapid temperature changes. Tap the pan after pouring to release bubbles. Always chill slowly in the fridge, not freezer. Also, avoid stirring too vigorously when mixing, as trapped air can expand and cause tiny cracks.
Can I use store-bought whipped cream?
Yes, but choose a high-quality brand like Cool Whip or homemade-style tubs. Avoid aerosol whipped cream—it’s too light and watery. Fold it in gently, and note that the texture will be softer and sweeter than using freshly whipped heavy cream. Still delicious, just different!
How far in advance can I make this?
You can prepare it up to 3 days ahead and keep it covered in the fridge. Decorate only right before serving—whipped cream and fresh mint lose their perkiness if added too early. If freezing, do so without toppings and thaw overnight. Perfect for stress-free entertaining!
Is this recipe kid-friendly to make?
Yes! Kids love pressing the crust, swirling the colors, and adding sprinkles. Supervise with the mixer and knife, but let them handle the fun parts. My twins helped mix and decorate—it became their favorite “cooking project.” Baking without heat is safe and exciting for little hands.
Can I reduce the sugar?
Definitely. Start by using ¾ cup powdered sugar instead of 1 cup. Taste the mixture before adding whipped cream. You can also use half powdered sugar and half monk fruit blend. Keep in mind: sugar also adds texture, so reducing too much may make the filling softer.
Why use powdered sugar instead of granulated?
Powdered sugar dissolves instantly into cream cheese, giving a smooth texture. Granulated sugar stays grainy unless blended for minutes—which can overwork the mixture. Plus, powdered sugar contains a bit of cornstarch, which helps stabilize the filling. It’s the secret to that velvety mouthfeel!
What’s the best chocolate to use?
Semi-sweet chocolate chips work great for balance. For deeper flavor, use chopped dark chocolate (60–70% cocoa). Avoid milk chocolate—it can make the filling too sweet. And never use chocolate bars with stabilizers (like some candy bars); they don’t melt or blend well. Stick to baking chocolate for best results.
Final Thoughts
This No-Bake Chocolate Mint Cheesecake Delight isn’t just dessert—it’s your secret weapon for effortless entertaining, spontaneous sweet cravings, and making memories in the kitchen. Cool, creamy, and bursting with flavor, it proves you don’t need an oven to create magic. So grab those cookies, soften that cream cheese, and let your fridge do the heavy lifting. One slice, and you’ll be hooked—just like my family. Go ahead, make it tonight. Your future self (and your guests) will be smiling with minty-fresh joy.
No-Bake Chocolate Mint Cheesecake Delight
Ingredients
Equipment
Method
- Pour chocolate cookie crumbs into a bowl and stir in melted butter until it resembles wet sand.
- Press the mixture firmly into the bottom of a 9-inch springform pan and refrigerate for 15 minutes.
- In a large bowl, beat softened cream cheese and powdered sugar until smooth, then add mint extract.
- Mix in green food coloring if desired; then gently fold in whipped cream until combined.
- Stir in most of the chocolate chips, reserving some for topping.
- Pour the filling over the chilled crust and create swirls if using colored filling.
- Tap the pan lightly on the counter to release air bubbles.
- Cover with plastic wrap and chill in the refrigerator for at least 4 hours or overnight.
- Before serving, decorate with whipped cream, mint gummies, and chocolate chips or shavings.
- Use a warm knife to slice the cheesecake for clean cuts.