Why This Fluffy Marble Cake Delight is a Must-Try
There’s something magical about cutting into a warm slice of marble cake. The swirls of chocolate and vanilla feel like a hug from the inside out. I remember baking this Fluffy Marble Cake Delight for my niece’s birthday last year. She’s picky, but one bite had her asking for seconds—and thirds! This giant, spongy cake is not just easy to make; it’s also a crowd-pleaser. Whether you’re new to baking or an old pro, this recipe will have you creating perfection every time.
A Little History Behind Marble Cake
Marble cake has been around for over a century, with its origins tracing back to 19th-century Germany. It was one of the first cakes to combine flavors in such a creative way. Back then, bakers used molasses or coffee to create the dark swirls instead of cocoa powder. Fast forward to today, and we’ve got endless variations—some with nuts, others with cream fillings. But my favorite? A classic, no-frills version that lets the flavors shine.
Why You’ll Fall in Love with This Recipe
This Fluffy Marble Cake Delight stands out because it’s simple yet spectacular. The texture is light and airy, while the flavors are rich and comforting. Plus, it’s foolproof! Even if you’ve never baked before, this recipe guides you step-by-step. And trust me, there’s nothing quite like the smell of vanilla and chocolate wafting through your kitchen as this cake bakes.
Perfect Occasions for This Cake
This cake fits so many moments. Serve it at birthday parties, family gatherings, or even casual Sunday brunches. I love making it for potlucks because it always disappears fast. It’s also perfect for cozy evenings when you need a sweet treat to share with friends over coffee.
Ingredients
- 3 large eggs at room temperature
- 1 cup of sugar
- ½ cup of vegetable oil
- 1 cup of warm milk
- 2 cups of all-purpose wheat flour
- 1 teaspoon of baking powder
- 1 teaspoon of vanilla essence
- 3 tablespoons of unsweetened cocoa powder
Substitution Options
If you don’t have vegetable oil, melted butter works just fine. For a dairy-free option, swap the warm milk with almond or oat milk. Instead of all-purpose flour, you can use whole wheat flour, though the texture might be slightly denser. If you prefer a sweeter cocoa swirl, mix a tablespoon of sugar into the cocoa powder.
Step 1: Beat the Eggs and Sugar
Step 1: Start by beating the eggs and sugar together until they’re thick, creamy, and pale yellow. This usually takes about 5 minutes with a hand mixer. The mixture should look almost fluffy, like soft peaks forming on whipped cream. Pro tip: Make sure your eggs are at room temperature—it helps them incorporate better and gives the cake more lift.
Step 2: Add Oil and Milk
Step 2: Slowly pour in the vegetable oil and warm milk while continuing to mix. These liquids bind everything together and keep the cake moist. As you blend, notice how the batter becomes smoother and glossier. It’s like watching clouds form in a bowl—soft, inviting, and full of promise!
Step 3: Incorporate Dry Ingredients
Step 3: Sift the flour and baking powder into the wet ingredients. Add the vanilla essence too. Gently fold everything together until you get a uniform batter. Be careful not to overmix; otherwise, the cake could turn tough. The batter should flow easily, like pancake batter, but still hold its shape slightly.
Step 4: Divide and Add Cocoa Powder
Step 4: Split the batter into two bowls. To one half, stir in the cocoa powder until fully blended. Now you have your chocolate and vanilla layers ready to go. Chef’s tip: Use a whisk to avoid lumps in the chocolate batter. This ensures those beautiful swirls later.
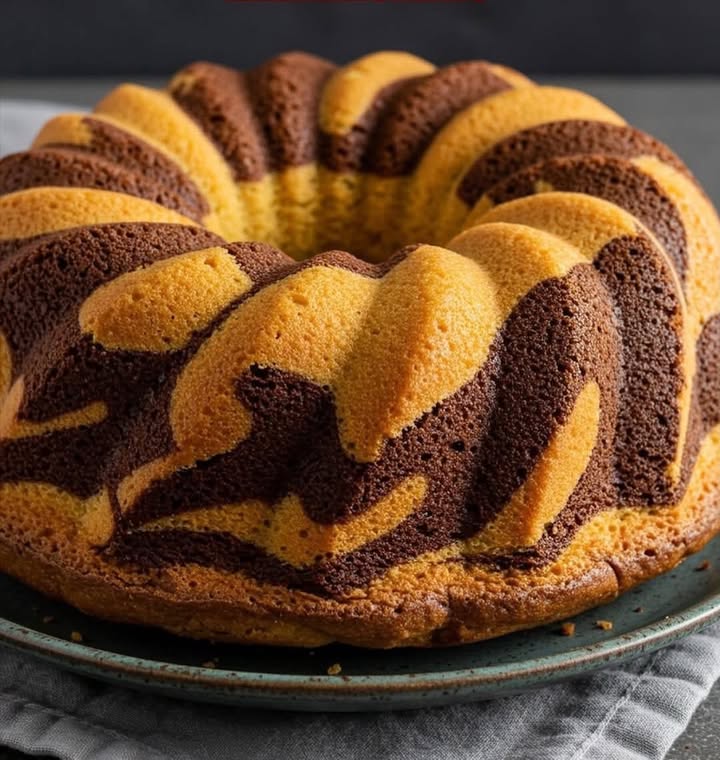
Step 5: Create the Marble Effect
Step 5: Grease and flour your baking pan generously. Then, alternate spoonfuls of white and chocolate batter into the pan. Once filled, take a knife or skewer and gently swirl it through the batter to create the marbled pattern. Don’t overdo it—you want distinct swirls, not a muddy mix.
Step 6: Bake to Perfection
Step 6: Pop the cake into a preheated oven at 180°C (350°F) for 40–45 minutes. Keep an eye on it during the last few minutes. Insert a toothpick into the center—if it comes out clean, your cake is done. Let it cool completely before unmolding. Patience pays off here!
Timing
Prep Time: 20 minutes | Cooking Time: 45 minutes | Resting Time: 30 minutes | Total Time: 1 hour 35 minutes
Chef’s Secret
To enhance the vanilla flavor, scrape the seeds from a real vanilla pod into the batter instead of using essence. It adds a luxurious touch that everyone will notice.
Extra Info
Did you know that marble cake was originally called “Harlequin cake”? Its checkerboard design symbolized balance and harmony—a lovely metaphor for blending different flavors.
Necessary Equipment
- Mixing bowls
- Hand mixer or whisk
- Baking pan (9-inch round or square)
- Spatula
- Oven
Storage Tips
Store your Fluffy Marble Cake Delight in an airtight container at room temperature for up to 3 days. If you live in a hot climate, refrigerate it to extend freshness. Just bring it back to room temperature before serving. For longer storage, wrap slices individually in plastic wrap and freeze for up to a month.
When freezing, label the packages with the date so you know how long they’ve been stored. Thaw frozen slices overnight in the fridge or at room temperature for a couple of hours.
Avoid stacking unfrozen cakes directly on top of each other, as this can cause them to lose their shape or become soggy.
Tips and Advice
For extra height, separate the egg whites and beat them into stiff peaks before folding them back into the batter. Always preheat your oven—it makes a huge difference. Lastly, resist opening the oven door while the cake is baking. Temperature fluctuations can cause it to sink.
Presentation Ideas
- Dust with powdered sugar for a rustic look.
- Top with fresh berries for a pop of color.
- Serve with a dollop of whipped cream or ice cream.
Healthier Alternatives
Here are six ways to tweak this recipe for a healthier twist:
- Gluten-Free: Replace all-purpose flour with almond or coconut flour.
- Low-Sugar: Use a sugar substitute like stevia or monk fruit.
- Vegan: Swap eggs with flaxseed meal mixed with water.
- Protein-Packed: Add a scoop of protein powder to the batter.
- Fruit-Infused: Mix in mashed bananas or applesauce for natural sweetness.
- Nutty Swirl: Fold chopped nuts into the chocolate batter for added crunch.
Common Mistakes to Avoid
Mistake 1: Overmixing the Batter
Overmixing leads to a dense cake. Mix just until the ingredients come together. Think of it as folding laundry—not kneading dough!
Mistake 2: Skipping Room Temperature Ingredients
Cold eggs and milk won’t emulsify properly, affecting the cake’s texture. Set them out an hour before starting.
Mistake 3: Opening the Oven Too Soon
Opening the oven door releases heat, which can collapse the cake. Wait at least 30 minutes before checking.
FAQ
Can I use self-rising flour?
Yes, but omit the baking powder since self-rising flour already contains it. Adjust accordingly to avoid over-leavening.
How do I prevent the cake from sticking to the pan?
Grease the pan thoroughly with butter or oil, then dust it with flour. Alternatively, line the bottom with parchment paper.
Why did my cake crack on top?
A cracked surface is normal due to expansion during baking. To minimize cracks, tap the pan gently before placing it in the oven to release air bubbles.
What if my toothpick isn’t clean?
Return the cake to the oven for another 5–10 minutes. Check again until the toothpick comes out clean.
Can I double the recipe?
Absolutely! Just ensure your mixing bowls and pans are large enough to accommodate the increased quantities.
Why does my cake taste eggy?
This happens if the eggs aren’t beaten long enough. Spend extra time whipping them with the sugar for a lighter flavor.
How do I fix sunken cake?
Sunken cakes often result from underbaking or removing them too soon. Leave the cake in the oven until fully set and let it cool in the pan for stability.
Can I add frosting?
Of course! Cream cheese or chocolate ganache pairs beautifully with this cake. Spread it evenly once the cake cools.
Is this cake kid-friendly?
Definitely! Kids love the fun swirls and balanced flavors. Plus, it’s easy to customize with sprinkles or toppings.
Why is my cake dry?
Dry cakes happen when overbaked or if too much flour is used. Measure flour carefully and check doneness early.
Final Thoughts
Baking this Fluffy Marble Cake Delight is like creating edible art. With its stunning swirls and melt-in-your-mouth texture, it’s bound to become a family favorite. So grab your apron, gather your ingredients, and let’s bake something unforgettable together. Happy baking!
Fluffy Marble Cake Delight
Ingredients
Equipment
Method
- Beat the eggs and sugar together until thick, creamy, and pale yellow.
- Slowly mix in the vegetable oil and warm milk until smooth.
- Sift the flour and baking powder into the wet ingredients and add the vanilla essence. Fold gently until just combined.
- Divide the batter into two bowls and mix cocoa powder into one half.
- Grease and flour your baking pan. Alternate spoonfuls of vanilla and chocolate batter in the pan and swirl gently with a knife or skewer.
- Bake in a preheated oven at 180°C (350°F) for 40–45 minutes, or until a toothpick inserted comes out clean. Let it cool completely before unmolding.