Start Your Day with Deliciously Easy School Muffins
There’s something magical about the smell of freshly baked muffins wafting through the kitchen early in the morning. I remember the first time I made these Deliciously Easy School Muffins for my kids. They were running late, but the second they caught a whiff of buttery goodness mixed with a hint of vanilla and chocolate, their grumpy faces lit up like sunshine. These muffins are not just tasty; they’re quick to whip up and perfect for busy school mornings or even weekend treats. Whether you’re a baking newbie or a seasoned home chef, this recipe is your new best friend.
A Little History Behind These Sweet Treats
Muffins have been around for centuries, with roots tracing back to Europe. Originally dense and plain, they’ve evolved into fluffy, flavorful bites enjoyed worldwide. In the U.S., muffins became popular as grab-and-go breakfast items in the 1950s. My grandmother used to make them with whatever she had on hand—apples, berries, or even leftover chocolate chips. This recipe takes inspiration from those humble beginnings while adding a modern twist with colorful toppings and optional chocolate variants. It’s simple yet versatile, making it a timeless classic for families everywhere.
Why You’ll Love This Recipe
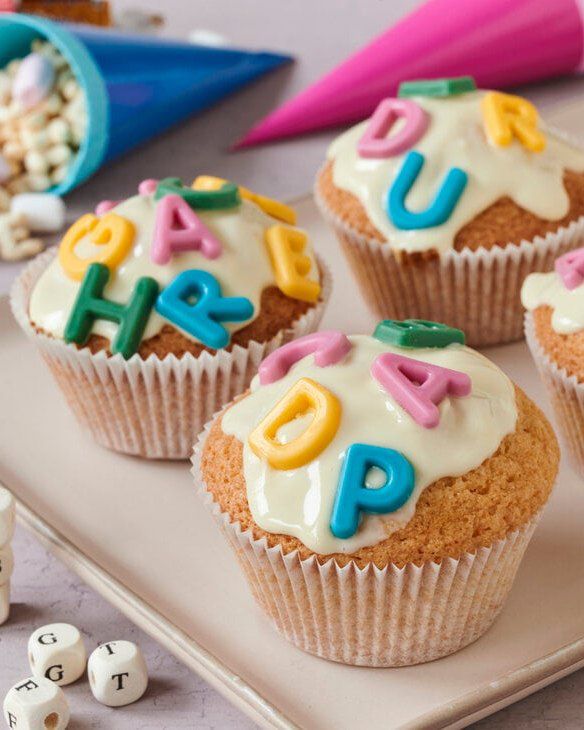
This Deliciously Easy School Muffins recipe is all about balance. The buttery dough has just the right amount of sweetness, thanks to vanilla sugar and a pinch of salt. Plus, the glaze adds a tangy zing that complements the rich flavors perfectly. And let’s not forget the fun factor—kids adore decorating them with chocolate letters or colorful sprinkles! Best of all? You can prep the batter in under 15 minutes. Who wouldn’t love a stress-free recipe that brings smiles to everyone’s faces?
Perfect Occasions to Bake These Muffins
These muffins shine at breakfast tables, lunchboxes, and birthday parties alike. Pack them in your kiddo’s lunchbox for a sweet surprise, or serve them during brunch gatherings with friends. They’re also great for bake sales, potlucks, or even rainy-day baking sessions when you need something cheerful to lift spirits. Trust me, once you try them, you’ll find excuses to bake them again and again!
Ingredients
Here’s what you’ll need to make these Deliciously Easy School Muffins:
For the Dough:
- 180 g soft butter
- 150 g sugar
- 1 pack bourbon vanilla sugar
- 1 pinch of salt
- 3 medium eggs
- 200 g wheat flour Type 405
- 1 teaspoon baking powder
For the Glaze:
- 3 tablespoons lemon juice
- 150 g powdered sugar
- 100 g colorful chocolate letters or sprinkles
For the Chocolate Variant:
- 50 g grated dark chocolate
- 1 tablespoon baked cocoa
- 1 tablespoon milk
- 100 g whole milk couverture
Substitution Options
If you don’t have some ingredients handy, no worries! Here are easy swaps:
- Butter: Use margarine or coconut oil for a dairy-free option.
- Eggs: Replace each egg with 1 tablespoon ground flaxseed mixed with 3 tablespoons water for a vegan version.
- Bourbon vanilla sugar: Substitute with regular vanilla extract (1 teaspoon).
- Wheat flour: Swap with gluten-free flour if needed.
- Powdered sugar: Make your own by blending granulated sugar until fine.
Feel free to experiment based on what’s in your pantry!
Step 1: Preheat and Prep
First things first, turn on your oven to 180°C (or 160°C for fan-assisted ovens). Grab your trusty muffin tin and line it with paper cases. I always recommend using parchment liners because they prevent sticking and make cleanup a breeze. Pro tip: If you want extra golden tops, lightly grease the top rim of each mold. It gives the muffins a lovely finish without over-browning.
Step 2: Mix the Dough
In a large mixing bowl, combine the softened butter, sugar, vanilla sugar, and a pinch of salt. Whip this mixture with a hand mixer until it turns light and airy. Crack in the eggs one by one, beating well after each addition. The batter should look smooth and creamy, almost like a cloud. Now, sift in the flour and baking powder, folding gently until everything comes together. Don’t overmix—it’s okay if there are tiny lumps. Divide the dough evenly among the molds, filling them about two-thirds full.
Step 3: Bake Like a Pro
Pop the tray into the preheated oven and bake for about 25 minutes. Keep an eye on them; you’ll know they’re done when they spring back to a gentle touch or a toothpick inserted comes out clean. As they bake, your kitchen will fill with the most amazing aroma—a mix of buttery warmth and subtle sweetness. Let the muffins cool completely before moving on to the fun part: decorating!
Step 4: Add the Finishing Touches
Squeeze fresh lemon juice into a bowl and whisk it with powdered sugar until smooth. Adjust the consistency by adding more juice—a little goes a long way—to create a thick, pourable glaze. Drizzle it generously over the cooled muffins and sprinkle colorful chocolate letters or other toppings. For the chocolate variant, melt the couverture slowly over a double boiler, then spoon a teaspoon onto each muffin. Decorate with flair—it’s your chance to get creative!
Chef’s Tip
To enhance the flavor, let the batter rest for 10 minutes before baking. This allows the flour to hydrate fully, resulting in softer, fluffier muffins. Also, don’t skip the pinch of salt—it enhances the sweetness and balances the overall taste.
Timing
Here’s how long you’ll spend creating these delights:
- Prep Time: 15 minutes
- Cooking Time: 25 minutes
- Resting/Cooling Time: 20 minutes
- Total Time: 1 hour
Not bad for a batch of 12 scrumptious muffins, right?
Extra Info
Did you know that muffins were originally savory? Early recipes featured meat or vegetables stuffed inside bread-like dough. Over time, bakers started experimenting with sweet versions, leading to the dessert-style muffins we love today. Fun fact: Adding citrus zest to the batter boosts freshness, so feel free to toss in some lemon or orange zest next time!
Necessary Equipment
You won’t need fancy gadgets for this recipe. Just grab:
- A muffin tin
- Parchment paper or cupcake liners
- A hand mixer or whisk
- A mixing bowl
- An oven-safe spatula
- A cooling rack
Simple tools, big results!
Storage Tips
Once cooled, store your muffins in an airtight container to keep them fresh. They’ll stay soft and delicious for up to three days at room temperature. If you live in a warm climate, pop them in the fridge to extend their shelf life. For longer storage, freeze individual muffins wrapped in cling film. Simply thaw overnight at room temperature or zap in the microwave for 20 seconds.
Pro tip: Place a slice of bread in the container with the muffins. The bread absorbs excess moisture, keeping the muffins fresher for longer.
If you’re planning ahead, consider doubling the recipe and freezing half. That way, you’ll always have a stash ready for busy mornings or unexpected guests.
Tips and Advice
Want to take your muffins to the next level? Try these tricks:
- Fold in mini chocolate chips or dried fruit for added texture.
- Brush the tops with melted butter before glazing for extra shine.
- Use a piping bag to drizzle the glaze neatly.
- Don’t overfill the molds—this prevents domed tops from cracking.
Little tweaks make a big difference!
Presentation Ideas
Make your muffins Instagram-worthy with these ideas:
- Arrange them on a tiered cake stand for a bakery vibe.
- Dust edges with edible glitter for sparkle.
- Create themed designs using seasonal toppings like heart-shaped sprinkles for Valentine’s Day.
- Serve them alongside hot chocolate or coffee for a cozy treat.
Presentation matters—it makes people feel special!
Healthier Alternatives
If you’re looking to lighten up this recipe, here are six variations to try:
1. Whole Grain Muffins
Swap wheat flour for whole grain flour to boost fiber content.
2. Low-Sugar Option
Reduce sugar by half and add mashed bananas or applesauce for natural sweetness.
3. Vegan Delight
Replace eggs with flax eggs and use plant-based butter.
4. Protein-Packed
Add a scoop of protein powder to the batter for an energy boost.
5. Gluten-Free Goodness
Use almond flour or a gluten-free blend instead of regular flour.
6. Dairy-Free Dream
Opt for coconut oil and oat milk for a lactose-free version.
Common Mistakes to Avoid
Mistake 1: Overmixing the Batter
Overmixing leads to tough, dense muffins. Stir just until combined to keep them light and airy.
Mistake 2: Skipping Rest Time
Letting the batter rest improves texture. Patience pays off here!
Mistake 3: Overbaking
Keep an eye on the timer. Overbaked muffins dry out quickly. Test with a toothpick to ensure perfection.
Mistake 4: Using Cold Ingredients
Always use room-temperature butter and eggs for smoother batter and better rise.
Mistake 5: Overloading Toppings
Too many decorations can weigh down the muffins. Less is more!
FAQ
Can I make these muffins ahead of time?
Absolutely! Prepare the batter the night before, cover it, and refrigerate. In the morning, simply spoon it into molds and bake as instructed.
What type of flour works best?
All-purpose wheat flour (Type 405) is ideal, but you can substitute with alternatives like spelt or whole grain for different textures.
How do I stop the glaze from cracking?
Ensure the muffins are completely cool before applying the glaze. Warmth causes cracks.
Can I use bottled lemon juice?
Fresh lemon juice tastes better, but bottled works in a pinch. Just check for added preservatives.
Why did my muffins sink in the middle?
This happens due to underbaking or opening the oven door too soon. Resist peeking until the minimum time is up!
Are these suitable for vegans?
Yes, with minor adjustments like swapping eggs and butter for plant-based options.
Can I freeze the finished muffins?
Definitely. Wrap individually and freeze for up to three months.
Do I need a mixer?
Nope! A good old-fashioned whisk works wonders, though a mixer speeds things up.
Why is my batter too thick?
Add a splash of milk to loosen it slightly. Batters vary depending on ingredient brands.
How can I make them sweeter?
Increase the sugar slightly or add a dollop of honey to the batter.
Final Thoughts
These Deliciously Easy School Muffins are proof that simplicity doesn’t mean boring. Bursting with flavor, endlessly customizable, and ready in no time, they’re sure to become a staple in your household. Whether you’re packing lunchboxes, hosting guests, or treating yourself, this recipe delivers joy in every bite. So grab your apron, gather the kids, and start baking—you’ve got this!