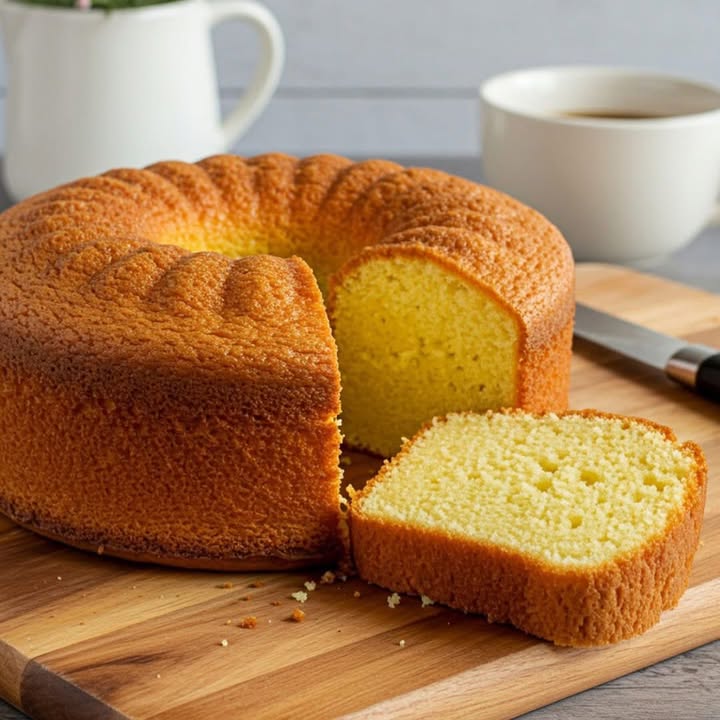
Imagine the Aroma of a Perfectly Fluffy Cake Filling Your Kitchen
There’s something magical about the smell of a freshly baked cake wafting through the house. It’s cozy, nostalgic, and downright irresistible. I remember the first time I tried making this Blender Magic Perfectly Fluffy Cake. My blender was old and cranky, but it didn’t matter. The result? A spongy, golden cake that melted in my mouth and left everyone asking for seconds. What makes this recipe so special is its simplicity—you don’t need fancy tools or hours of prep. Just toss everything into your blender, and voilà! It’s perfect for family gatherings, coffee breaks, or even as a little side hustle.
A Little History Behind This Blender Wonder
Cakes have been around for centuries, but the idea of using a blender to whip up a batter is relatively modern. Back in the day, bakers spent hours mixing by hand, which wasn’t exactly a walk in the park. I stumbled upon this recipe while visiting my aunt. She swore by her “no-fuss” blender method, claiming it saved her during busy family events. After testing it myself, I realized she wasn’t exaggerating. This cake has become a staple in my home because it’s quick, foolproof, and always turns out perfect.
Why You’ll Love This Recipe
This Blender Magic Perfectly Fluffy Cake is a dream come true for anyone who loves baking but hates the hassle. The texture is light and airy, with just the right amount of sweetness. Plus, it’s versatile! You can enjoy it plain, dress it up with frosting, or add a citrus twist for extra zing. Whether you’re a beginner or a seasoned baker, this recipe will quickly become your go-to. Trust me, once you try it, you won’t look back.
Perfect Occasions to Whip Up This Cake
This cake is perfect for any occasion—or no occasion at all! Bring it to a family brunch, serve it with afternoon tea, or slice it up for dessert after dinner. I’ve even taken it to potlucks, where it disappeared faster than I could blink. If you’re feeling entrepreneurial, this cake is also great for selling at bake sales or local markets. Its simple charm and delicious flavor make it a crowd-pleaser every time.
Ingredients List
- 5 eggs
- 65 g of butter at room temperature
- 2 cups of all-purpose wheat flour
- 2 cups of sugar
- 1 cup of milk
- 1 teaspoon of baking powder
- 1 teaspoon of vanilla essence
Substitution Options
Not everyone has the same ingredients on hand, and that’s okay! Here are some easy swaps:
- Butter: Use margarine or coconut oil for a dairy-free option.
- Milk: Substitute with almond milk, oat milk, or any plant-based alternative.
- Sugar: Swap for brown sugar or a sugar substitute if you’re cutting down on refined sugar.
- Vanilla Essence: Vanilla extract works just as well, or try almond extract for a nutty twist.
Preparation Section
Step 1: Blend the Base Ingredients
Start by cracking the eggs into your blender. Add the softened butter, milk, sugar, and vanilla essence. Blend until the mixture turns creamy and smooth. You’ll notice how the colors blend together into a pale yellow liquid that smells heavenly. Pro tip: Make sure your butter is truly at room temperature—it blends much better and avoids lumps.
Step 2: Incorporate the Dry Ingredients
In a separate bowl, sift the flour and baking powder to remove any clumps. Gradually add these dry ingredients to the blender, blending on low speed. This step ensures the batter stays light and airy. Imagine the soft hum of the blender as it transforms the mix into a velvety batter, ready to rise into a fluffy masterpiece.
Step 3: Prepare the Mold
Grease your baking mold generously with butter or oil, then dust it lightly with flour. Pour the blended batter into the mold, smoothing the top with a spatula. The golden-yellow batter should fill the mold about halfway, leaving room for the cake to rise beautifully in the oven.
Step 4: Bake to Perfection
Preheat your oven to 180°C (350°F). Place the mold in the center rack and bake for 40-45 minutes. Keep an eye on it; the cake is done when a toothpick inserted into the center comes out clean. As it bakes, your kitchen will fill with the warm, inviting aroma of vanilla and butter—a true comfort scent.
Step 5: Cool and Serve
Once baked, let the cake cool in the mold for about 10 minutes before unmolding it onto a wire rack. Allow it to cool completely before slicing. The anticipation is half the fun! Finally, cut a slice and savor the soft, spongy texture that melts in your mouth.
Chef’s Tip
For an extra burst of flavor, zest a lemon or orange directly into the blender. The citrus oils will infuse the batter with a refreshing tang that pairs beautifully with the sweetness.
Timing
- Prep Time: 10 minutes
- Cooking Time: 40-45 minutes
- Cooling Time: 15 minutes
- Total Time: About 1 hour and 5 minutes
Chef’s Secret
Here’s a little secret: Don’t open the oven door too early while the cake is baking. The sudden rush of cold air can cause it to sink. Patience is key!
Extra Info
Did you know that vanilla essence was once considered a luxury item? In the 19th century, only the wealthy could afford it. Thankfully, today it’s accessible to all, making our cakes taste even better.
Necessary Equipment
To make this cake, you’ll need:
- A blender
- A mixing bowl
- A baking mold
- An oven
- A spatula
Storage Tips
Storing this cake properly ensures it stays fresh and delicious. First, let it cool completely before wrapping it in plastic wrap or placing it in an airtight container. This prevents it from drying out. If you live in a humid area, store it in the refrigerator to keep it from becoming soggy. For longer storage, freeze slices individually wrapped in parchment paper. When you’re ready to enjoy, simply thaw at room temperature.
Tips and Advice
Always sift your flour and baking powder. This small step makes a big difference in achieving a light and airy texture. Also, don’t overmix the batter—just blend until everything is combined. Overmixing can lead to a dense cake instead of a fluffy one.
Presentation Ideas
Dress up your cake with a dusting of powdered sugar or a drizzle of chocolate sauce. Fresh berries on top add a pop of color and freshness. For a rustic touch, serve slices on wooden boards with a dollop of whipped cream.
Healthier Alternatives
If you’re looking to lighten up this recipe, here are six variations:
- Low-Sugar Option: Replace sugar with a sugar substitute like stevia or monk fruit.
- Gluten-Free: Use almond flour or a gluten-free flour blend.
- Vegan: Swap eggs with flaxseed meal mixed with water, and use plant-based milk and butter.
- Protein-Packed: Add a scoop of vanilla protein powder to the batter.
- Fruit-Infused: Fold in mashed bananas or grated apples for natural sweetness.
- Spiced Version: Add cinnamon or nutmeg for a warm, spiced flavor.
Common Mistakes to Avoid
Mistake 1: Skipping the Sifting Process
Sifting might seem like an extra step, but it’s crucial for a lump-free batter. Without it, you risk ending up with a dense cake. Take the time to sift—it’s worth it!
Mistake 2: Overfilling the Mold
Pouring too much batter into the mold can cause it to overflow in the oven. Stick to filling it halfway to give the cake room to rise.
Mistake 3: Opening the Oven Too Soon
Resist the urge to peek! Opening the oven door too early lets heat escape, which can affect the cake’s rise. Set a timer and trust the process.
FAQ
Can I use a stand mixer instead of a blender?
Absolutely! While a blender makes this recipe super easy, a stand mixer works just fine. Just follow the same steps for combining the ingredients.
How do I know when the cake is fully baked?
Insert a toothpick into the center of the cake. If it comes out clean, the cake is ready. If there’s wet batter on the toothpick, bake for a few more minutes.
Can I freeze this cake?
Yes, this cake freezes beautifully. Wrap individual slices in plastic wrap and store them in a freezer-safe bag for up to three months.
What size mold should I use?
A standard 9-inch round or square mold works perfectly for this recipe. Adjust cooking time slightly if using a different size.
Can I add frosting?
Of course! This cake pairs wonderfully with buttercream, cream cheese frosting, or even a simple glaze.
Why did my cake sink in the middle?
This usually happens if the cake isn’t fully baked or if you opened the oven door too soon. Make sure to bake it long enough and avoid disturbances.
Is this recipe kid-friendly?
Definitely! Kids love helping with the blending and pouring. Plus, they’ll adore eating the finished product.
Can I make this recipe in advance?
Yes, you can bake it a day ahead and store it in an airtight container. It tastes just as good the next day.
How do I prevent the cake from sticking to the mold?
Grease the mold thoroughly and dust it with flour. Alternatively, line the bottom with parchment paper for extra insurance.
Can I double the recipe?
Sure thing! Just make sure your blender and mold can handle the increased quantities. Otherwise, bake in batches.
Final Thoughts
This Blender Magic Perfectly Fluffy Cake is more than just a recipe—it’s a celebration of simplicity and flavor. Whether you’re baking for loved ones or treating yourself, this cake never disappoints. So grab your blender, gather your ingredients, and get ready to create a little magic in your kitchen. Happy baking!
Blender Magic Perfectly Fluffy Cake
Ingredients
Equipment
Method
- Crack the eggs into your blender and add the softened butter, milk, sugar, and vanilla essence.
- Blend until the mixture turns creamy and smooth.
- In a separate bowl, sift the flour and baking powder to remove clumps.
- Gradually add the dry ingredients to the blender, blending on low speed to keep the batter light and airy.
- Grease your baking mold with butter or oil and dust it lightly with flour.
- Pour the blended batter into the mold, smoothing the top with a spatula.
- Preheat your oven to 180°C (350°F) and bake for 40-45 minutes.
- Once baked, let the cake cool in the mold for about 10 minutes before unmolding it onto a wire rack.
- Allow it to cool completely before slicing.