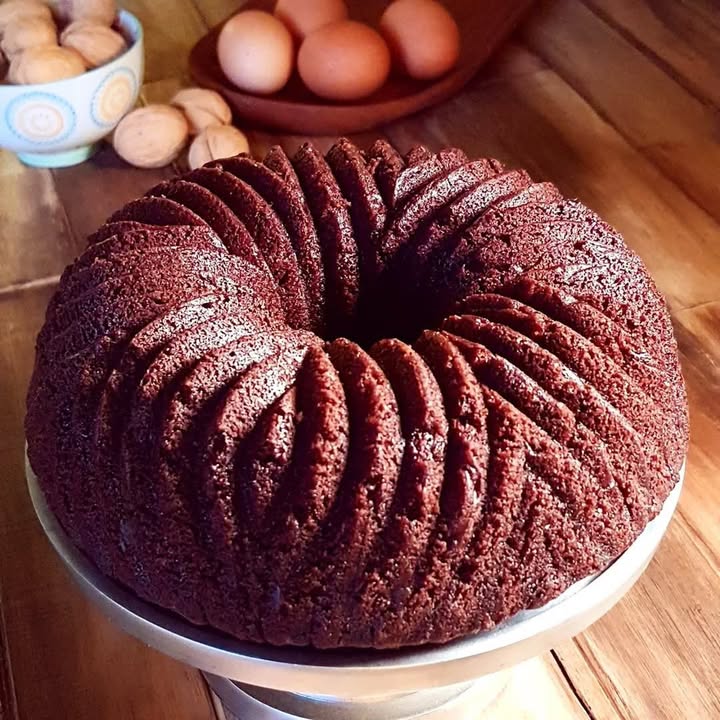
Why This Irresistibly Fluffy Chocolate Cake Will Win Your Heart
Picture this: a slice of warm, spongy chocolate cake melting in your mouth, paired with a steaming cup of coffee. Sounds dreamy, right? I first made this Irresistibly Fluffy Chocolate Cake for my best friend’s birthday, and it was such a hit that I’ve baked it countless times since. It’s simple, rich, and perfect for any occasion—or no occasion at all! Whether you’re a beginner or a seasoned baker, this recipe will become your go-to dessert.
A Little History Behind the Cake
This cake is inspired by classic European chocolate desserts, where simplicity meets indulgence. Over time, home bakers added their own twists, like vanilla essence or a splash of warm milk, to make it even more irresistible. I remember my grandmother making something similar when I was little. She always said, “A good cake doesn’t need fancy decorations—just love.” And she was right. This cake proves that quality ingredients and care are all you need.
Why You’ll Love This Recipe
First off, it’s foolproof. Even if you’ve never baked before, you can pull this off. The texture is light yet decadent, thanks to the melted chocolate and beaten eggs. Plus, it uses pantry staples, so you don’t need to run to the store. Whether you’re craving a midnight snack or planning a party, this cake fits the bill. Trust me, once you try it, you’ll be hooked!
Perfect Occasions to Bake This Cake
This Irresistibly Fluffy Chocolate Cake is versatile. Serve it at birthdays, family gatherings, or cozy Sunday brunches. It’s also perfect for impressing guests or surprising someone special. Honestly, there’s no wrong time to bake it. I’ve served it with candles for celebrations and plain on random Tuesdays—it works every time!
Ingredients
- 200 g semisweet chocolate
- 150 g butter
- 3 eggs
- 200 g sugar
- 150 g all-purpose flour
- 1 tsp vanilla essence
- 1 pinch of salt
- 1/2 cup warm milk
Substitution Options
If you’re out of an ingredient or want to tweak the flavor, here are some swaps:
- Semisweet chocolate: Use dark or milk chocolate for a richer or sweeter taste.
- Butter: Margarine or coconut oil works fine.
- Eggs: For a vegan version, try flax eggs (1 tbsp ground flaxseed + 3 tbsp water per egg).
- Sugar: Substitute with brown sugar or honey for a deeper flavor.
- Milk: Any plant-based milk, like almond or oat, does the trick.
Preparation
Step 1: Melt the Chocolate and Butter
To start, melt the chocolate and butter together. You can do this over a double boiler or in the microwave. If using the microwave, heat them in 30-second bursts, stirring in between. Keep an eye on it—the chocolate burns easily, and we don’t want that! Once smooth and glossy, set it aside to cool slightly. The smell of melting chocolate is pure magic, isn’t it?
Step 2: Beat the Eggs and Sugar
In a mixing bowl, beat the eggs and sugar until they’re pale and fluffy. This step is crucial because it adds air to the batter, giving the cake its signature spongy texture. Use an electric mixer if you have one—it makes life easier. Watch as the mixture transforms from yellow to almost white. Isn’t it satisfying?
Pro tip: Make sure your eggs are at room temperature for better volume.
Step 3: Combine Wet Ingredients
Now, pour the melted chocolate into the egg mixture. Add the vanilla essence and warm milk too. Gently fold everything together with a spatula. The batter will turn into a beautiful, velvety brown color. Be gentle—you don’t want to lose all those lovely air bubbles you created earlier.
Step 4: Sift and Fold in Dry Ingredients
Sift the flour and salt into the wet mixture. Folding is key here; use enveloping motions to keep the batter light. Overmixing can make the cake dense, and we’re aiming for fluffy perfection. Imagine how proud you’ll feel slicing into this masterpiece later!
Step 5: Pour Into a Mold
Grease and flour a round baking pan (about 20-22 cm). Pour the batter evenly into the mold. Tap it gently on the counter to remove air pockets. Doesn’t it look gorgeous already? That glossy surface promises greatness.
Step 6: Bake to Perfection
Bake in a preheated oven at 170°C for 35-40 minutes. To check if it’s done, insert a toothpick into the center. If it comes out clean, you’re golden! Let the cake cool before unmolding. The aroma wafting through your kitchen will drive everyone wild.
Chef’s tip: Don’t open the oven door too early—it can cause the cake to sink.
Timing
Here’s a quick breakdown of the timing:
- Prep time: 15 minutes
- Cooking time: 40 minutes
- Total time: 55 minutes
Easy peasy, right?
Chef’s Secret
For an extra touch, brush the cooled cake with a thin layer of apricot jam. It adds a subtle sweetness and gives the cake a professional finish. Your guests won’t know what’s different, but they’ll definitely notice!
Extra Info
Did you know that chocolate has mood-boosting properties? That’s why this cake isn’t just delicious—it’s practically medicinal! Whenever I’m feeling down, baking (and eating) this cake lifts my spirits instantly. Food really is love.
Necessary Equipment
You’ll need:
- Mixing bowls
- Electric mixer or whisk
- Spatula
- Baking pan (20-22 cm)
- Oven
Nothing fancy—just basic kitchen tools.
Storage
This cake stays fresh for up to three days if stored properly. Wrap it tightly in plastic wrap or place it in an airtight container. Keep it at room temperature for short-term storage or refrigerate it for longer shelf life.
If freezing, slice the cake first. Wrap each piece individually in parchment paper, then foil. When you’re ready to enjoy, thaw at room temperature. Freezing extends its life to a month, which is great for meal prep.
Reheat slices in the microwave for 10-15 seconds to bring back that fresh-from-the-oven feel.
Tips and Advice
– Always sift your flour to avoid lumps.
– Use high-quality chocolate for the best flavor.
– Let the cake cool completely before slicing—it holds together better.
– Experiment with toppings like whipped cream or berries for variety.
Presentation Tips
Dust the cake with powdered sugar for a chic look. Add fresh raspberries or mint leaves for color. Drizzle melted chocolate on top for extra pizzazz. Presentation matters, even if you’re eating it alone!
Healthier Alternatives
Want a lighter twist? Try these variations:
- Gluten-Free: Swap all-purpose flour with almond or oat flour.
- Vegan: Replace eggs with flax eggs and use dairy-free butter.
- Low-Sugar: Cut sugar by half and add mashed bananas for natural sweetness.
- Protein-Packed: Mix in protein powder or Greek yogurt.
- Spiced: Add cinnamon or chili powder for a kick.
- Fruit-Infused: Stir in chopped cherries or orange zest.
Common Mistakes to Avoid
Mistake 1: Overmixing the Batter
Overmixing leads to a dense cake. Mix just until combined. Think of folding as hugging the batter—not wrestling it!
Mistake 2: Opening the Oven Too Soon
Peeking too early can cause the cake to collapse. Patience is key. Trust the process and wait until the timer goes off.
Mistake 3: Skipping the Toothpick Test
Don’t guess if the cake is done. Stick a toothpick in—if it comes out clean, it’s ready. Otherwise, give it a few more minutes.
FAQ
Can I make this cake gluten-free?
Absolutely! Just replace the all-purpose flour with almond flour or another gluten-free alternative. The texture might vary slightly, but it’ll still taste amazing.
How long does the cake last?
Stored properly, it lasts up to three days at room temperature or a week in the fridge. Freeze individual slices for longer storage.
Can I add nuts?
Yes! Walnuts or hazelnuts pair beautifully with chocolate. Fold them in during Step 4.
What if I don’t have a mixer?
No worries! A whisk and some elbow grease work just fine. It might take a bit longer, but the effort is worth it.
Is this recipe kid-friendly?
Definitely! Kids love helping with easy recipes like this one. Plus, they’ll adore the end result.
Can I double the recipe?
Of course! Just adjust the quantities accordingly and use two pans or bake in batches.
Why is my cake dry?
Dry cakes often happen due to overbaking. Stick to the recommended time and test with a toothpick to avoid this issue.
Can I use cocoa powder instead of chocolate?
While possible, the texture may differ. Stick to real chocolate for the fluffiest results.
Do I need to grease the pan?
Yes! Greasing and flouring prevent sticking. Nonstick spray works too.
Can I serve it warm?
Heck yes! Warm cake with a scoop of ice cream is heavenly.
Final Thoughts
Baking this Irresistibly Fluffy Chocolate Cake is a joy. It’s simple, rewarding, and guaranteed to bring smiles. Whether you’re celebrating or simply treating yourself, this cake delivers. So grab your apron, gather your ingredients, and let’s get baking. Happy cooking, friends!
Irresistibly Fluffy Chocolate Cake
Ingredients
Equipment
Method
- Melt the chocolate and butter together over a double boiler or in the microwave.
- Beat the eggs and sugar together until pale and fluffy in a mixing bowl.
- Pour the melted chocolate into the egg mixture and add the vanilla essence and warm milk.
- Sift the flour and salt into the wet mixture and gently fold together.
- Grease and flour a round baking pan (20-22 cm) and pour the batter evenly into it.
- Bake in a preheated oven at 170°C for 35-40 minutes, checking with a toothpick for doneness.