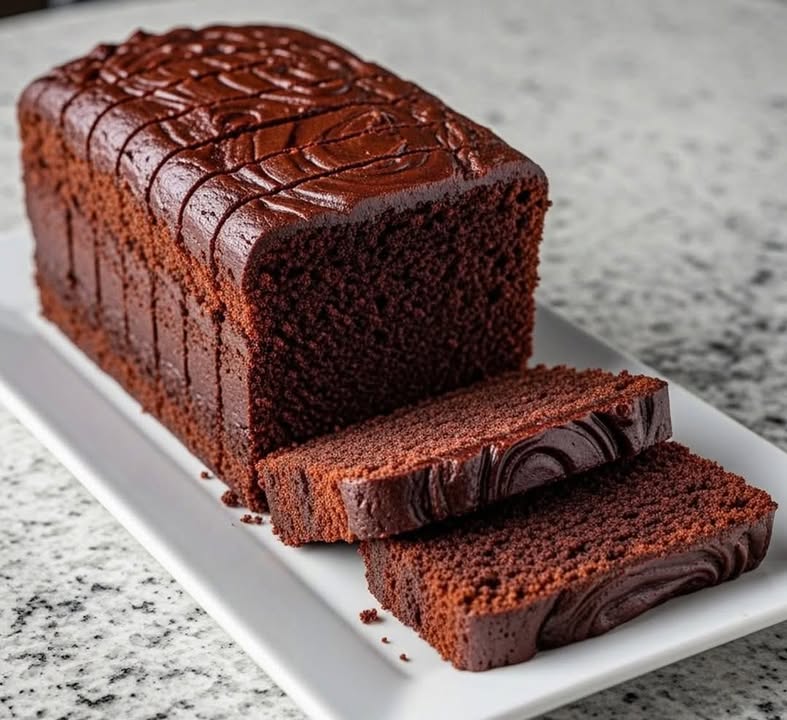
Decadent Wet Chocolate Cake Bliss: A Slice of Heaven
There’s something magical about a chocolate cake that’s so moist it practically melts in your mouth. I remember the first time I baked this Decadent Wet Chocolate Cake Bliss. It was for my niece’s birthday, and let me tell you, the room went silent when everyone took their first bite. That’s how good it is! This cake isn’t just a dessert; it’s an experience. Whether you’re celebrating a special occasion or simply craving something sweet, this recipe will leave you and your loved ones speechless.
A Little History Behind the Cake
Chocolate cakes have been around for centuries, but the idea of a “wet” cake gained popularity in the mid-20th century. The secret lies in its rich, velvety texture, achieved by balancing wet and dry ingredients perfectly. My version is inspired by both traditional sponge cakes and modern baking techniques. Over the years, I’ve tweaked the recipe to make it foolproof, even for beginner bakers. Trust me, once you try this, you’ll never go back to boxed mixes!
Why You’ll Love This Recipe
This Decadent Wet Chocolate Cake Bliss is everything you want in a chocolate cake: rich, indulgent, and oh-so-chocolatey. The best part? It’s surprisingly easy to make. No fancy equipment or advanced skills are required. Plus, the aroma of cocoa filling your kitchen while it bakes is enough to make anyone smile. Whether you’re a seasoned baker or a newbie, this recipe will quickly become a favorite.
Perfect Occasions to Bake This Cake
From birthdays to holiday gatherings, this cake fits every celebration. I love serving it at family dinners because it feels like a warm hug in dessert form. It’s also perfect for potlucks, baby showers, or even as a thoughtful gift for a friend. And let’s not forget those random Tuesday nights when you just need a little pick-me-up. Pair it with ganache, whipped cream, or enjoy it plain—it’s versatile and always delightful.
Ingredients
- 400 g Wheat flour
- 30 g Cocoa powder
- 12 g Baking powder
- 8 g Bicarbonate
- 3 g Salt
- 300 ml Milk
- 15 ml White vinegar
- 4 Eggs
- 400 g Sugar
- 1 tsp Vanilla Essence
- 250 ml Oil
Substitution Options
If you’re out of certain ingredients, don’t worry! Here are some swaps:
- Wheat flour: Use all-purpose flour instead.
- Cocoa powder: Swap with dark cocoa for a deeper flavor.
- Milk: Substitute almond or oat milk for a dairy-free option.
- Eggs: Try flax eggs (1 tbsp ground flaxseed + 3 tbsp water per egg).
- Oil: Melted butter works too, though oil keeps the cake extra moist.
Preparation Section
Step 1: Mix the Dry Ingredients
Start by combining all your dry ingredients—flour, cocoa powder, baking powder, bicarbonate, and salt—in a large bowl. Whisk them together until they’re evenly distributed. This step ensures every bite has that perfect balance of flavors. Pro tip: Sift the cocoa powder to avoid lumps and give your cake a smoother texture.
Step 2: Beat the Eggs and Sugar
In another bowl, beat the eggs for two minutes using a hand mixer. Gradually add the sugar while continuing to beat until the mixture triples in volume. You’ll notice it becoming pale yellow and fluffy, which adds airiness to the cake. Imagine clouds of sweetness forming right before your eyes!
Step 3: Combine Wet Ingredients
Now it’s time to mix the wet ingredients. Add the oil, milk mixed with vinegar, and vanilla essence to the egg-sugar mixture. Blend for another two minutes until everything is smooth and glossy. The vinegar might sound strange, but it reacts with the bicarbonate to create a tender crumb. Trust me, it works wonders!
Step 4: Incorporate Dry Ingredients
Fold the reserved dry ingredients into the wet mixture bit by bit. Use a spatula and mix gently in an enveloping motion to keep the batter light. Overmixing can lead to a dense cake, and we’re aiming for that melt-in-your-mouth texture. Picture folding a delicate blanket over your ingredients.
Step 5: Pour and Bake
Pour the batter into prepared molds lined with baking paper. Smooth the top with a spatula for an even finish. Pop it into the oven preheated to 180°C and bake for approximately 45 minutes. To check if it’s done, insert a toothpick—it should come out clean. The smell of warm chocolate wafting through your home? Priceless.
Chef’s Tip
For an extra touch of decadence, brush the cooled cake layers with simple syrup infused with coffee. Coffee enhances the chocolate flavor without making the cake taste like coffee. It’s a trick professional bakers swear by!
Timing
Prep Time: 20 minutes
Cooking Time: 45 minutes
Total Time: 1 hour 5 minutes
Extra Info
Did you know cocoa powder contains antioxidants? So technically, eating this cake is good for you… right? Okay, maybe not entirely true, but it’s fun to think so!
Necessary Equipment
You’ll need a few basic tools: mixing bowls, a whisk or electric mixer, measuring cups/spoons, baking molds, parchment paper, and an oven. Nothing fancy, just reliable kitchen staples.
Storage
To store this cake, wrap it tightly in plastic wrap or place it in an airtight container. Keep it at room temperature for up to three days. For longer storage, refrigerate it for up to a week. If freezing, slice the cake first and freeze individual portions for up to three months.
When thawing frozen slices, let them sit at room temperature for about an hour. They’ll taste as fresh as the day you baked them.
Avoid storing the cake uncovered, as it can dry out. Moisture is key to maintaining that signature “wet” texture.
Tips and Advice
– Always measure your ingredients accurately.
– Don’t skip sifting the cocoa powder—it makes a difference.
– Let the cake cool completely before slicing to prevent crumbling.
– Experiment with fillings like caramel or fruit compote for added flair.
Presentation Tips
Dust the cake with powdered sugar for a classic look. Drizzle melted chocolate or ganache over the top for elegance. Add fresh berries or mint leaves for a pop of color. Serve on a pretty plate to elevate the presentation further.
Healthier Alternative Recipes
Want to lighten things up? Try these variations:
1. Replace sugar with coconut sugar for lower glycemic impact.
2. Use whole wheat flour for added fiber.
3. Swap oil with unsweetened applesauce to reduce fat.
4. Make it gluten-free by using almond flour.
5. Opt for stevia-based sweeteners for fewer calories.
6. Add mashed bananas for natural sweetness and moisture.
Common Mistakes to Avoid
Mistake 1: Overmixing the Batter
Overmixing leads to a tough, dense cake. Mix only until the ingredients are combined. Remember, gentle folding is your friend here. Pro tip: Stop mixing as soon as you no longer see streaks of flour.
Mistake 2: Skipping the Vinegar
The vinegar might seem odd, but it reacts with the bicarbonate to create a soft, airy crumb. Leaving it out results in a denser cake. Embrace the science of baking!
Mistake 3: Opening the Oven Too Soon
Resist the urge to peek during baking. Opening the oven door too early can cause the cake to sink. Patience pays off in baking!
FAQ
Can I use Dutch-processed cocoa?
Yes, but note that Dutch-processed cocoa doesn’t react with bicarbonate as strongly. Consider adding a pinch of baking powder for lift.
How do I prevent the cake from sticking?
Line your molds with parchment paper and lightly grease them. This double layer ensures easy removal.
What if my cake sinks in the middle?
Sinking usually happens due to underbaking or opening the oven too soon. Ensure the cake passes the toothpick test before removing it.
Can I make this vegan?
Absolutely! Use flax eggs and plant-based milk. The texture may vary slightly, but it’ll still be delicious.
Why is my cake dry?
Dryness often results from overbaking or incorrect ingredient ratios. Stick to the recipe measurements and timing for best results.
Is this cake kid-friendly?
Of course! Kids adore its rich chocolate flavor. Just supervise younger ones during preparation.
Can I freeze leftovers?
Yes, freeze slices individually for quick treats later. Thaw at room temperature before serving.
What’s the best way to serve this cake?
Serve it slightly warmed with a dollop of whipped cream or ice cream for an indulgent treat.
How long does the cake last?
Stored properly, it stays fresh for up to three days at room temperature or a week in the fridge.
Can I add nuts or chips?
Definitely! Fold in chocolate chips or chopped nuts during Step 4 for added crunch and flavor.
Final Thoughts
Baking this Decadent Wet Chocolate Cake Bliss is more than just following a recipe—it’s creating memories. Whether you’re sharing it with loved ones or enjoying a quiet moment alone, this cake promises pure joy. So grab your apron, gather your ingredients, and get ready to fall in love with chocolate all over again. Happy baking!
Decadent Wet Chocolate Cake Bliss
Ingredients
Equipment
Method
- Mix all dry ingredients (flour, cocoa powder, baking powder, bicarbonate, salt) in a large bowl and whisk until evenly distributed.
- Beat the eggs in another bowl for two minutes, gradually adding sugar until the mixture triples in volume.
- Combine wet ingredients (oil, milk mixed with vinegar, vanilla essence) with the egg-sugar mixture and blend until smooth.
- Gently fold the dry ingredients into the wet mixture bit by bit using a spatula to keep the batter light.
- Pour the batter into prepared molds lined with baking paper, smooth the top, and bake in a preheated oven at 180°C for approximately 45 minutes.