Why This Decadent Triple Chocolate Indulgence is a Must-Try
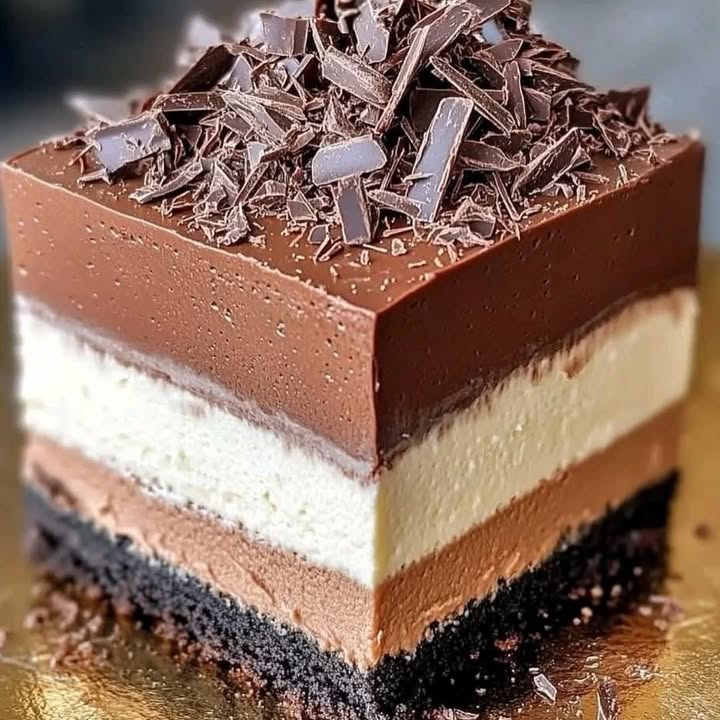
Picture this: it’s Saturday night, and you’re craving something that screams indulgence. Something rich, creamy, and utterly unforgettable. That’s when I stumbled upon the magic of Decadent Triple Chocolate Indulgence, a cake so dreamy it feels like a warm hug for your taste buds. With its velvety layers of dark, milk, and white chocolate mousse nestled on a crunchy cookie base, this dessert is nothing short of heavenly. I first made it for my best friend’s birthday, and let me tell you, it was love at first bite. Everyone kept asking for seconds—and thirds!
A Little Sweet History
Mousse cakes have been around for centuries, with their airy texture and luxurious flavors winning hearts everywhere. The French are credited with perfecting chocolate mousse in the 18th century, but this triple-layered version is a modern twist. Each layer builds on the next, creating a symphony of chocolatey goodness. My kids call it “the ultimate chocolate mountain,” and honestly, they’re not wrong. It’s a showstopper that’s surprisingly easy to make once you get the hang of it.
Why You’ll Love This Recipe
What’s not to love? The Decadent Triple Chocolate Indulgence combines three types of chocolate into one stunning dessert. It’s perfect for chocoholics who can’t decide between dark, milk, or white chocolate because, well, why choose? Plus, despite its fancy appearance, it’s beginner-friendly. The ingredients are simple, and the process is straightforward. And trust me, the reaction you’ll get when you serve this beauty is priceless.
Perfect Occasions for This Cake
This cake shines at any celebration—birthdays, anniversaries, holidays, or even “just because” days. I’ve served it at dinner parties, potlucks, and family gatherings, and it never fails to impress. It’s also a fantastic gift for someone special. Wrap it up in a pretty box, and you’ve got yourself a homemade present worth savoring.
Ingredients
- Base:
- 1 cup chocolate cookie crumbs
- 2 tbsp melted butter
- Dark Chocolate Mousse:
- 200g dark chocolate, chopped
- 2/3 cup heavy cream, heated
- 1 cup heavy cream, whipped
- Milk Chocolate Mousse:
- 200g milk chocolate, chopped
- 2/3 cup heavy cream, heated
- 1 cup heavy cream, whipped
- White Chocolate Mousse:
- 200g white chocolate, chopped
- 2/3 cup heavy cream, heated
- 1 cup heavy cream, whipped
- 1 tsp vanilla extract
- Garnish:
- Chocolate shavings
Substitution Options
If you’re feeling adventurous or need alternatives, here are some ideas:
- Swap chocolate cookies for graham crackers in the base.
- Use coconut cream instead of heavy cream for a dairy-free option.
- Replace white chocolate with caramel-flavored chips for a fun twist.
Step 1: Preparing the Base
Start by mixing your chocolate cookie crumbs with melted butter. The mixture should resemble wet sand—it’s sticky enough to hold together but still crumbly. Press it firmly into a 16 cm springform pan, making sure it’s even. Chill it while you work on the mousse layers. Pro tip: Use the bottom of a glass to press the crumbs down for a smooth finish.
Step 2: Making the Dark Chocolate Mousse
Heat your cream until it’s hot but not boiling. Pour it over the chopped dark chocolate and let it sit for a minute before stirring. Watch as the chocolate melts into a glossy, silky pool. Once cooled slightly, fold in the whipped cream gently to keep the airy texture intact. Pro tip: If the chocolate mixture splits, whisk in a splash of cold cream to bring it back together.
Step 3: Assembling the Layers
Pour the milk chocolate mousse over the chilled base and spread it evenly. Pop it in the fridge for 1-2 hours to set. Repeat with the white chocolate mousse, then the dark chocolate mousse, chilling each layer thoroughly. Patience is key here—the resting time ensures clean, defined layers. Chef’s tip: Cover the pan with plastic wrap to prevent any fridge odors from sneaking in.
Timing
This cake requires a bit of patience. Prep time takes about 30 minutes, but chilling each layer adds several hours to the process. Plan for at least 6 hours of resting time (or overnight) before serving. Total time: around 7-8 hours. Trust me, it’s worth the wait.
Chef’s Secret
When whipping cream, make sure your bowl and beaters are cold. Pop them in the fridge for 10 minutes beforehand—it helps the cream whip faster and hold its shape better.
Extra Info
Did you know that white chocolate isn’t technically chocolate? It contains no cocoa solids, just cocoa butter, sugar, and milk. But don’t let that fool you—it’s just as delicious in this cake!
Necessary Equipment
- 16 cm springform pan
- Mixing bowls
- Whisk or electric mixer
- Spatula
- Measuring cups and spoons
Storage
Once assembled, store the cake in the fridge, covered with plastic wrap or foil. It stays fresh for up to 3 days. For longer storage, freeze individual slices wrapped tightly in parchment paper and placed in an airtight container. Thaw in the fridge before serving.
Freezing is a lifesaver if you want to prep ahead. Just remember to add the garnish after thawing to keep it looking fresh. Avoid leaving the cake out at room temperature for more than 2 hours, as the mousse can soften too much.
If you’re transporting it, carry it in a cooler bag with ice packs to keep it chilled. No one likes a melty masterpiece!
Tips and Advice
- Chill your tools and bowls before whipping cream for best results.
- Use high-quality chocolate—it makes a noticeable difference in flavor.
- Don’t rush the chilling process. Properly set layers ensure a beautiful slice.
Presentation Tips
- Garnish with chocolate curls or sprinkles for extra flair.
- Serve on a decorative plate with a dusting of cocoa powder.
- Add fresh berries for a pop of color and contrast.
Healthier Alternative Recipes
Craving a lighter version? Try these swaps:
- Low-Sugar Option: Use sugar-free chocolate and sweetened whipped cream.
- Vegan Twist: Substitute plant-based cream and vegan chocolate.
- Gluten-Free Base: Opt for gluten-free cookies or nuts in the crust.
- Fruit Layer: Add a thin layer of raspberry coulis between the mousses.
- Protein Boost: Mix protein powder into the mousse for a fitness-friendly treat.
- Mini Cakes: Make individual servings using ramekins for portion control.
Mistake 1: Skipping the Chilling Time
Rushing through the chilling steps can lead to messy layers that slide apart. Always chill each layer fully before adding the next. Pro tip: Set a timer to remind yourself when it’s ready.
Mistake 2: Overmixing the Mousse
Overmixing deflates the whipped cream, leaving you with dense mousse instead of light and fluffy layers. Fold gently and stop as soon as everything is combined.
Mistake 3: Using Low-Quality Chocolate
Cheap chocolate often contains additives that affect the texture and taste. Splurge on good-quality chocolate for the best results.
FAQ
Can I make this cake ahead of time?
Absolutely! In fact, it’s better made a day in advance since the flavors meld beautifully overnight. Just keep it refrigerated and decorate right before serving.
How do I prevent the layers from mixing?
Make sure each layer is completely set before adding the next. A quick test is to touch the surface lightly—if it feels firm, you’re good to go.
What can I use instead of a springform pan?
A regular round cake pan works too, but line it with parchment paper for easy removal. Alternatively, use a silicone mold for flexibility.
Can I freeze this cake?
Yes! Freeze whole or sliced portions, tightly wrapped, for up to a month. Thaw in the fridge overnight before enjoying.
Why did my mousse split?
This happens if the chocolate gets too hot or the cream is too cold. Rewarm gently and whisk in a little extra cream to smooth it out.
Is there a shortcut for the whipped cream?
Store-bought whipped topping works in a pinch, though homemade always tastes better. Just ensure it’s stable enough to hold its shape.
Can I use different chocolates?
Of course! Experiment with semi-sweet, bittersweet, or flavored chocolates to suit your preference.
How do I shave chocolate for garnish?
Use a vegetable peeler on a bar of chocolate. Room-temperature chocolate shaves easier than cold chocolate.
What size pan should I use?
A 16 cm springform pan is ideal, but you can adjust the recipe for larger pans if needed. Just increase the quantities proportionally.
Can kids help with this recipe?
Definitely! Kids love crushing cookies for the base and decorating with chocolate shavings. It’s a fun way to bond in the kitchen.
Final Thoughts
The Decadent Triple Chocolate Indulgence is more than just a cake—it’s a celebration of flavor, texture, and pure joy. Whether you’re baking for a special occasion or simply treating yourself, this recipe promises to deliver smiles all around. So grab your apron, gather your ingredients, and let’s create something magical together. Your taste buds will thank you!
Decadent Triple Chocolate Indulgence
Ingredients
Equipment
Method
- Mix chocolate cookie crumbs with melted butter and press into a 16 cm springform pan. Chill.
- Heat heavy cream until hot but not boiling, pour over dark chocolate, allow to sit, and stir until smooth. Fold in whipped cream gently.
- Pour milk chocolate mousse over the chilled base and spread evenly. Chill for 1-2 hours to set.
- Repeat with the white chocolate mousse and then the dark chocolate mousse, chilling each layer thoroughly.