Why These Irresistible Homemade Chocolate Chip Cookies Are a Must-Try
There’s something magical about the smell of freshly baked cookies wafting through the house. It’s like a warm hug for your soul. I remember the first time I made these Irresistible Homemade Chocolate Chip Cookies. My kitchen turned into a bakery, and my family couldn’t stop raving about them. Whether you’re baking for loved ones or selling them at a local market, this recipe is a guaranteed winner. Let me walk you through why this cookie recipe stands out and how it can become your go-to dessert.
A Little History Behind the Cookie Craze
Chocolate chip cookies have been stealing hearts since Ruth Wakefield accidentally invented them in the 1930s. She ran out of baker’s chocolate and tossed in chunks of semi-sweet chocolate instead. The rest, as they say, is history! Over the years, bakers have added their own twists, but nothing beats the classic combination of buttery dough, gooey chocolate, and a sprinkle of nostalgia. This version is my take on that timeless treat, with just the right balance of crisp edges and soft centers.
Why You’ll Love This Recipe
This recipe is simple enough for beginners yet impressive enough to wow seasoned bakers. The dough comes together quickly, and the ingredients are pantry staples you likely already have. Plus, these Irresistible Homemade Chocolate Chip Cookies are versatile. Add nuts for crunch, swap chocolate types for variety, or even freeze the dough for later. They’re perfect for satisfying cravings, gifting, or turning into a small side hustle!
Perfect Occasions to Bake These Cookies
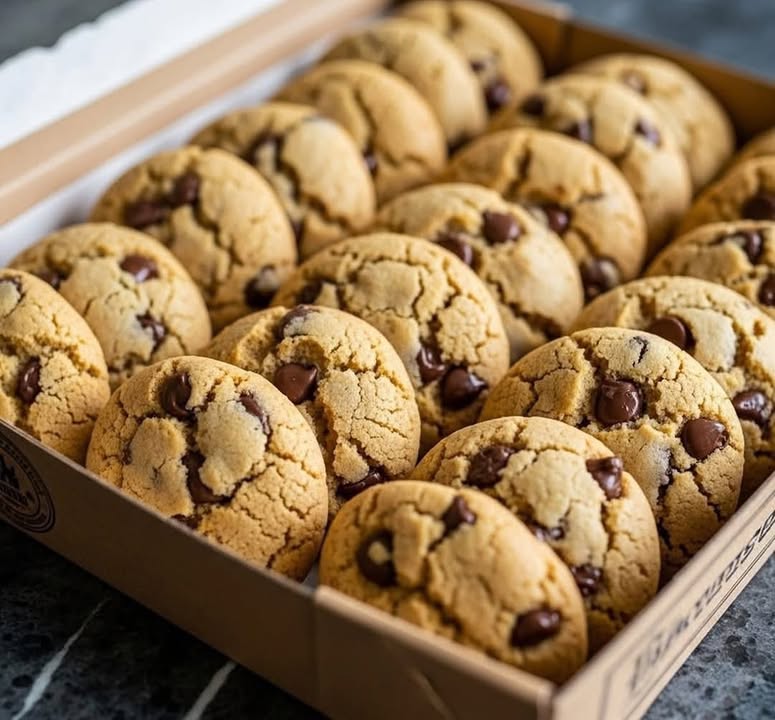
Whether it’s a cozy movie night, a bake sale, or a holiday gathering, these cookies fit every occasion. I love packing them in cute boxes as gifts during festive seasons. They’re also a hit at kids’ parties or office potlucks. Honestly, any day is a good day to bake these beauties—because who can resist a warm, gooey cookie straight from the oven?
Ingredients You’ll Need
- 250 g unsalted softened butter
- 200 g blond sugar
- 150 g white sugar
- 2 large eggs
- 2 teaspoons vanilla extract
- 420 g all-purpose flour
- 1 teaspoon baking soda
- 1 teaspoon salt
- 300 g chocolate chips
- Optional: 100 g chopped nuts
Substitution Options for Dietary Needs
If you’re looking to tweak this recipe, here are some easy swaps:
- Butter: Use coconut oil or margarine for a dairy-free option.
- Sugar: Swap white sugar for coconut sugar if you want a deeper flavor.
- Eggs: Replace each egg with 1 tablespoon ground flaxseed mixed with 3 tablespoons water for a vegan version.
- Flour: Try gluten-free flour blends if needed.
- Chocolate chips: Opt for dark, milk, or dairy-free chocolate depending on your preference.
Step 1: Creaming Butter and Sugars
The first step is all about creating that dreamy base. Grab your mixer and beat the softened butter with both sugars until light and fluffy—about 3 minutes. This process traps air into the mixture, giving your cookies their signature texture. Imagine the butter turning pale yellow and the sugars dissolving slightly, leaving behind a creamy canvas ready for the next steps. Pro tip: Make sure your butter isn’t too hard or too melted; room temperature is key.
Step 2: Adding Eggs and Vanilla
Now it’s time to add the eggs one by one, followed by the vanilla extract. This step binds everything together while adding depth of flavor. As you mix, notice how the batter starts to look glossy and smooth. Vanilla is the unsung hero here—it elevates the sweetness without overpowering. Pro tip: Crack your eggs into a separate bowl first to avoid shell mishaps.
Step 3: Mixing Dry Ingredients
Gently stir in the flour, baking soda, and salt. Be careful not to overmix, as this can make your cookies tough. The dough should come together in a soft, slightly sticky mass. Picture the dry ingredients slowly disappearing into the wet, forming a cohesive blend. Chef’s tip: Sift your flour and baking soda to prevent lumps and ensure even distribution.
Step 4: Incorporating Chocolate Chips (and Nuts)
Fold in those glorious chocolate chips—and nuts, if you’re using them. This is where the fun begins! Watch as the dark specks of chocolate dot the dough, promising bursts of melty goodness in every bite. If you’re feeling adventurous, try mixing different types of chocolate for a unique twist. Pro tip: Reserve a handful of chocolate chips to press onto the tops of your cookie balls before baking for an Instagram-worthy finish.
Step 5: Shaping the Dough
Use a spoon or cookie scoop to form balls of dough weighing around 60-70 grams each. Place them on a tray lined with parchment paper, spacing them apart since they’ll spread during baking. Rolling the dough between your palms gives it that perfect round shape. Pro tip: For uniform cookies, weigh each ball to keep sizes consistent.
Step 6: Chilling the Dough
Pop the tray into the fridge for 30 minutes. Chilling firms up the dough, preventing excessive spreading and enhancing the flavors. Trust me, patience pays off here. While waiting, imagine the butter solidifying slightly, locking in all those delicious aromas. Chef’s tip: If you’re short on time, freeze the dough for 15 minutes instead.
Step 7: Baking to Perfection
Preheat your oven to 180°C (350°F) and bake the cookies for 12-14 minutes. Keep an eye on them—they’re done when the edges turn golden brown but the centers remain soft. That slight jiggle in the middle? It’s what makes these cookies so irresistible. Pro tip: Rotate the tray halfway through baking for even browning.
Step 8: Cooling Down
Let the cookies cool on the tray for 5 minutes before transferring them to a wire rack. This resting period allows them to set properly. As they cool, watch the chocolate pools firm up slightly, creating that iconic gooey-chewy texture. Pro tip: Don’t skip this step; moving them too soon can cause breakage.
Timing Breakdown
| Stage | Time |
|---|---|
| Preparation | 15 minutes |
| Chilling | 30 minutes |
| Baking | 12-14 minutes per batch |
| Total | About 1 hour |
Chef’s Secret for Extra Flavor
Here’s a little trick I learned: toast your nuts before adding them to the dough. Spread them on a baking sheet and roast at 180°C (350°F) for 5-7 minutes. This enhances their nutty aroma and adds another layer of flavor to your cookies. Your taste buds will thank you!
An Interesting Fact About Chocolate Chips
Did you know that chocolate chips were originally designed not to melt completely? Their unique shape helps them hold up better during baking, ensuring pockets of chocolate in every bite. Isn’t that clever?
Necessary Equipment
- Mixer (hand or stand)
- Baking trays
- Parchment paper
- Cooling rack
- Measuring cups and spoons
- Cookie scoop or spoon
Storage Tips for Long-Lasting Freshness
Store your Irresistible Homemade Chocolate Chip Cookies in an airtight container at room temperature for up to 45 days. To maintain freshness, place a slice of bread inside the container. The cookies will absorb moisture from the bread, staying soft longer. Alternatively, freeze baked cookies in a zip-top bag for up to 2 months. Simply thaw at room temperature when ready to enjoy.
If you prefer to freeze raw dough, portion it into balls and freeze on a tray before transferring to a freezer-safe bag. When you’re craving fresh-baked cookies, pop them straight from the freezer into the oven—just add a couple of extra minutes to the baking time.
For maximum flavor, bring frozen cookies to room temperature before serving. This restores their texture and lets the chocolate shine.
Tips and Advice for Perfect Results
- Don’t overbake! Pull the cookies out when the centers still look slightly underdone.
- Use a kitchen scale for precise measurements, especially for flour.
- Experiment with different chocolates—dark, milk, or white—for varied tastes.
- Always chill the dough; it improves texture and flavor.
- Press extra chocolate chips on top before baking for a bakery-style look.
Presentation Ideas
- Serve cookies on a rustic wooden board for a charming touch.
- Wrap individual cookies in cellophane bags tied with ribbon for gifting.
- Pair them with a glass of cold milk or a hot cup of coffee for a cozy vibe.
- Create a cookie tower display at parties using cake stands.
- Dust powdered sugar lightly over the tops for a festive appearance.
- Package them in decorative tins for holiday gifts.
Healthier Alternatives
Looking to lighten up this indulgent treat? Here are six variations:
- Whole Wheat Flour: Substitute half the all-purpose flour with whole wheat for added fiber.
- Reduced Sugar: Cut back on sugar by 25% without sacrificing sweetness.
- Dark Chocolate: Use dark chocolate chips with at least 70% cocoa content for antioxidants.
- Oatmeal Base: Add rolled oats to the dough for a chewier texture and nutritional boost.
- No Butter Option: Swap butter for mashed ripe bananas or avocado for a healthier fat source.
- Vegan Version: Combine flax eggs, coconut oil, and dairy-free chocolate for a plant-based delight.
Mistake 1: Overmixing the Dough
Overmixing activates gluten, leading to dense, tough cookies. Once the flour is incorporated, stop mixing. A few streaks of flour are okay—they’ll disappear once you fold in the chocolate chips. Practical tip: Stir gently with a spatula toward the end to minimize gluten development.
Mistake 2: Skipping the Chill Time
Skipping the chilling step results in flat, greasy cookies. Chilling firms up the butter, which prevents excessive spreading. If you’re in a hurry, freeze the dough for 15 minutes as a quick fix. Practical tip: Always chill dough for best results.
Mistake 3: Overbaking
Overbaked cookies lose their soft, chewy texture. Remove them from the oven when the edges are golden but the centers are still slightly soft. They’ll continue to cook on the tray. Practical tip: Set a timer and check early to avoid disaster.
Mistake 4: Using Cold Butter
Cold butter won’t cream properly, resulting in dense cookies. Softened butter creates that airy texture we all love. Leave it out for an hour before starting or microwave it briefly in 5-second intervals. Practical tip: Test softness by pressing lightly; it should give without resistance.
Mistake 5: Crowding the Tray
Crowded cookies spread into each other, ruining their shape. Space them at least 2 inches apart to allow room for expansion. Practical tip: Use multiple trays if necessary to avoid overcrowding.
FAQ Section
Can I use brown sugar instead of blond sugar?
Absolutely! Brown sugar works beautifully and adds a hint of molasses flavor. Just note that it may make your cookies slightly darker and chewier than blond sugar would.
How do I know when the cookies are done?
Look for golden edges and a soft center. The cookies will firm up as they cool, so don’t wait for the entire surface to turn brown. Trust your instincts—if they smell amazing, they’re probably ready!
Can I freeze the dough?
Yes! Freeze scooped dough balls on a tray, then transfer to a bag. Bake directly from frozen, adding 1-2 extra minutes to the cooking time. It’s a lifesaver for impromptu cravings.
What if I don’t have vanilla extract?
Vanilla enhances flavor, but you can omit it if needed. Alternatively, try almond extract or a pinch of cinnamon for a unique twist.
Why did my cookies spread too much?
Spreading issues often stem from warm butter or lack of chilling. Ensure your butter is softened, not melted, and always chill the dough before baking.
Can I reduce the sugar?
You can cut sugar by up to 25%, but be aware that it affects texture and browning. For best results, stick close to the original amounts.
Do I need a mixer?
Nope! While a mixer speeds things up, you can mix by hand with a sturdy whisk and spatula. It takes a bit more effort but yields equally delicious results.
How many cookies does this recipe make?
This recipe makes about 20-24 large cookies, depending on how big you roll them. Adjust sizes based on your preference.
Can I double the recipe?
Definitely! Doubling is easy—just multiply all ingredients by two. Perfect for bigger batches or sharing with friends.
Are these cookies kid-friendly?
Absolutely! Kids adore these cookies, and they’re simple enough for young bakers to help with. Just supervise the oven part.
Final Thoughts on Irresistible Homemade Chocolate Chip Cookies
These Irresistible Homemade Chocolate Chip Cookies are more than just a dessert—they’re a labor of love. From the creamy dough to the gooey chocolate centers, every bite is pure joy. Whether you’re baking for family, friends, or potential customers, this recipe delivers. So grab your apron, preheat that oven, and get ready to create memories one cookie at a time. Happy baking!
Irresistible Homemade Chocolate Chip Cookies
Ingredients
Equipment
Method
- Cream the softened butter with both sugars until light and fluffy—about 3 minutes.
- Add the eggs one by one, followed by the vanilla extract, mixing until smooth.
- Gently stir in the flour, baking soda, and salt until just combined.
- Fold in the chocolate chips and nuts (if using).
- Form balls of dough weighing around 60-70 grams each and place them on a parchment-lined tray.
- Chill the tray in the fridge for 30 minutes.
- Preheat the oven to 180°C (350°F) and bake the cookies for 12-14 minutes.
- Allow cookies to cool on the tray for 5 minutes before transferring to a wire rack.