Why This No-Bake Lemon Dream Delight Will Make Your Day
There’s something magical about a dessert that doesn’t require an oven. Picture this: it’s a hot summer afternoon, and you’re craving something sweet, tangy, and refreshing. That’s when I stumbled upon this No-Bake Lemon Dream Delight. Creamy, zesty, and oh-so-satisfying, it’s the kind of treat that makes everyone smile. My family couldn’t stop raving about it after I served it at a casual weekend gathering. Trust me, once you try it, you’ll want to make it again and again.
A Little History Behind This Zesty Treat
This dessert is inspired by traditional no-bake cakes from Latin America, where simplicity meets bold flavors. Back in the day, these desserts were often made with whatever ingredients were on hand—cookies, milk, and citrus fruits. Over time, people added their own twists, like using condensed milk for extra creaminess or swapping lemons for limes. I remember my grandmother making something similar during family reunions. She’d say, “The secret is in the layers.” Her version was rustic, but this modern take elevates the experience with a perfect balance of sweetness and acidity.
Why You’ll Love This Recipe
What’s not to love? This No-Bake Lemon Dream Delight is easy to prepare, requires no fancy equipment, and tastes like sunshine on a plate. The creamy lemon filling pairs beautifully with crunchy cookie layers, creating a delightful contrast in every bite. Plus, it’s a great way to impress your guests without breaking a sweat. Whether you’re a seasoned baker or a kitchen newbie, this recipe will feel like a warm hug.
Perfect Occasions to Prepare This Recipe
This dessert shines at casual get-togethers, potlucks, or even as a surprise treat for your family. It’s perfect for summer barbecues when you want something light and refreshing. I’ve also served it at birthday parties, baby showers, and holiday dinners. Its vibrant yellow hue and zesty aroma make it a showstopper. And let’s not forget—it’s a lifesaver when you’re short on time but still want to serve something special.
Ingredients
- 4 lemons (green or yellow)
- 200 ml of condensed milk
- 200 ml of milk cream
- 1 package of Maria cookies
Substitution Options
If you can’t find Maria cookies, you can use graham crackers or digestive biscuits instead. For a dairy-free version, swap the condensed milk and milk cream with coconut cream or almond-based alternatives. Lime juice works just as well if you prefer a slightly different citrus flavor. Feel free to experiment based on what you have in your pantry!
Step 1: Texture Cookies
Start by crushing the cookies into small pieces—not dust! You want them to retain some crunch because they’ll add texture to your cake. I like to place the cookies in a ziplock bag and gently crush them with a rolling pin. Pro tip: Leave a few larger chunks for an extra satisfying bite. Spread the crushed cookies evenly at the bottom of your mold to create the first layer. The aroma of the cookies combined with the anticipation of what’s coming next is enough to make anyone hungry.
Step 2: Perfect Lemon Cream
Squeeze the lemons and strain the juice to remove any seeds or pulp. Now comes the fun part: beating the lemon juice with condensed milk and milk cream until you achieve a thick, creamy consistency. This step transforms simple ingredients into pure magic. Watch how the mixture turns a pale yellow color, almost glowing with zestiness. Chef’s tip: Use a hand mixer for best results, and don’t rush the process. The longer you beat, the fluffier your cream will be.
Step 3: Layers and More Layers
In your chosen mold, alternate between layers of crushed cookies and lemon cream. Start with a layer of cookies, followed by a generous spread of cream, and repeat until the mold is full. End with a smooth layer of cream on top for a polished look. As you build each layer, notice how the colors contrast beautifully—the golden cookies against the creamy yellow filling. It’s like creating edible art!
Step 4: Cold and Presentation
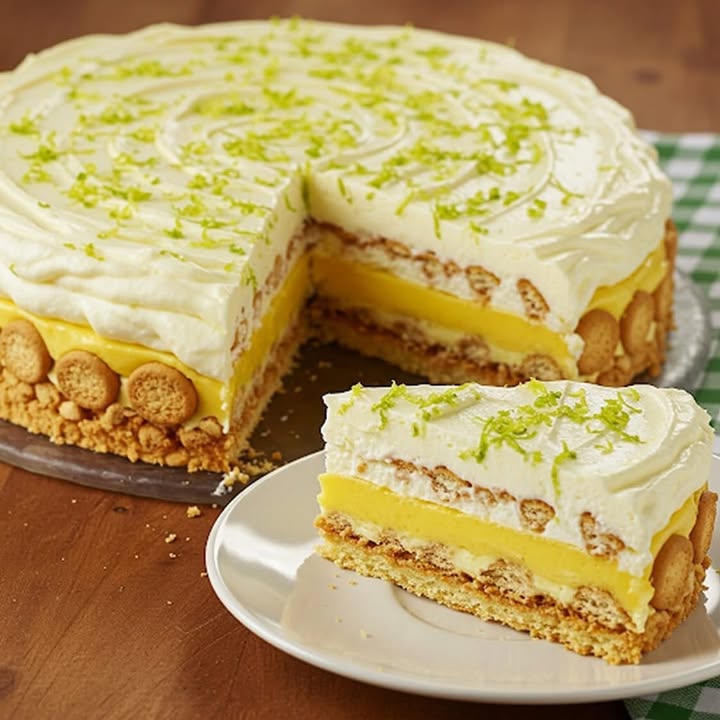
Once assembled, refrigerate the cake for at least 3 hours. This resting period allows the flavors to meld together and the layers to set. When ready to serve, garnish with lemon zest and a sprinkle of crushed cookies for a finishing touch. The cold temperature enhances the refreshing quality of the dessert, making it irresistible on a warm day.
Timing
Prep time: 20 minutes
Cooking time: None (no-bake!)
Resting time: 3 hours
Total time: Approximately 3 hours and 20 minutes
Chef’s Secret
For an extra burst of flavor, rub the zest of one lemon into the sugar before mixing it with the cream. This technique releases the essential oils in the zest, intensifying the citrus aroma.
Extra Info
Did you know that lemons are packed with vitamin C and antioxidants? They not only brighten up desserts but also offer health benefits. Fun fact: Lemons are believed to have originated in Asia and were brought to Europe by Crusaders in the 12th century.
Necessary Equipment
- Mixing bowls
- Hand mixer or whisk
- Zester or grater
- Mold or cake pan
- Ziplock bag and rolling pin (for crushing cookies)
Storage
To store leftovers, cover the cake tightly with plastic wrap or transfer it to an airtight container. Keep it in the refrigerator for up to 3 days. The flavors deepen over time, so it might taste even better the next day. Avoid freezing, as the texture of the cream may change upon thawing. If serving outdoors, keep the cake chilled in a cooler to maintain its freshness.
When reheating isn’t an option, this dessert stays perfectly stable in the fridge. Just make sure no moisture gets in, as soggy cookies can ruin the experience. Finally, always check for signs of spoilage, such as off smells or unusual textures, before enjoying leftovers.
Tips and Advice
Use fresh lemons for the best flavor. Bottled lemon juice lacks the same brightness and aroma. Also, chill your mixing bowl and beaters before whipping the cream—it helps achieve a thicker consistency. Lastly, don’t skip the resting time; it’s crucial for setting the layers.
Presentation Tips
- Garnish with thin lemon slices for a decorative touch.
- Dust powdered sugar lightly over the top for elegance.
- Serve on colorful plates to enhance visual appeal.
Healthier Alternative Recipes
1. Low-Sugar Version: Replace condensed milk with sugar-free syrup and use low-fat milk cream.
2. Gluten-Free Option: Substitute Maria cookies with gluten-free biscuits.
3. Vegan Twist: Use plant-based cream and cookies.
4. Berry Bliss: Add mashed raspberries or strawberries to the cream.
5. Chocolate Lover’s Dream: Mix cocoa powder into the cream.
6. Tropical Escape: Swap lemons for passion fruit or mango puree.
Mistake 1: Using Stale Cookies
Stale cookies can ruin the texture of your cake. Always check the expiration date and opt for fresh ones. Pro tip: Store cookies in an airtight container to keep them crisp.
Mistake 2: Skipping the Straining Step
Forgetting to strain the lemon juice can leave unwanted seeds or pulp in your cream. Take the extra minute to ensure a smooth filling.
Mistake 3: Rushing the Resting Time
Patience pays off here. Cutting into the cake too soon can result in messy layers. Let it chill properly for the best results.
FAQ
Can I use bottled lemon juice?
While possible, fresh lemon juice offers superior flavor and aroma. Bottled versions tend to lack the same vibrancy.
How do I prevent the cookies from getting soggy?
Ensure the lemon cream is thick enough and assemble the cake quickly to minimize exposure to moisture.
Is this recipe suitable for kids?
Absolutely! Kids love the sweet-tart combination and crunchy texture. Just monitor for allergies.
Can I freeze this dessert?
Freezing isn’t recommended, as the cream may separate upon thawing. Stick to refrigeration for storage.
What size mold should I use?
A standard 8×8-inch square mold or round cake pan works perfectly.
How long does it last in the fridge?
Up to 3 days if stored properly in an airtight container.
Can I add alcohol to the cream?
Yes! A splash of limoncello or vodka adds a sophisticated twist.
What if I don’t have a hand mixer?
No worries! A whisk and some elbow grease will do the job, though it may take longer.
Can I make individual servings?
Definitely! Use small cups or jars for portion-controlled delights.
Why is my cream not thickening?
Make sure your ingredients are cold and beat them thoroughly. Adding a pinch of salt can sometimes help stabilize the mixture.
Final Thoughts
This No-Bake Lemon Dream Delight is proof that simplicity can lead to extraordinary results. With its creamy texture, zesty flavor, and effortless preparation, it’s a dessert that truly conquers hearts. So grab those lemons, roll up your sleeves, and let’s create something unforgettable together. Your taste buds—and your friends—will thank you!
No-Bake Lemon Dream Delight
Ingredients
Equipment
Method
- Crush the cookies into small pieces, ensuring some retain crunch.
- Squeeze the lemons and strain the juice to remove seeds and pulp.
- Beat the lemon juice with condensed milk and milk cream until thick and creamy.
- In a mold, alternate layers of crushed cookies and lemon cream until full, ending with cream on top.
- Refrigerate for at least 3 hours to allow flavors to meld and layers to set.
- Garnish with lemon zest and crushed cookies before serving.