An Irresistible Combo: Coconut Chocolate Bliss Dessert That Disappeared Before Dinner!
You know that moment when you sneak a bite of something so good, you almost feel guilty? That’s exactly what happened the first time I made this coconut and chocolate dessert. My kids were supposed to “test” it for a school bake sale—but it vanished before I could even pack it! One spoonful of that creamy coconut layer swirled with rich, velvety chocolate, and suddenly, my kitchen was silent… except for the happy hums of satisfied taste buds. This Coconut Chocolate Bliss Dessert is pure magic—simple enough for a weeknight treat but fancy enough to wow guests.
The Sweet Story Behind Coconut Chocolate Bliss Dessert
This dreamy dessert is inspired by classic Latin American sweets like *brigadeiro* and *beijinho*, where condensed milk is the star. In Brazil, coconut candies have been family favorites for generations. Over time, home cooks started layering them with chocolate for an extra indulgence—and boom! A new legend was born. My version? It’s a love letter to those traditions, but with a no-bake twist and a creamy sour cream finish that makes it extra smooth. I first tasted something similar at my aunt’s house during a summer carnival party—and I’ve been chasing that flavor ever since!
Why You’ll Absolutely Fall for This Coconut Chocolate Bliss Dessert
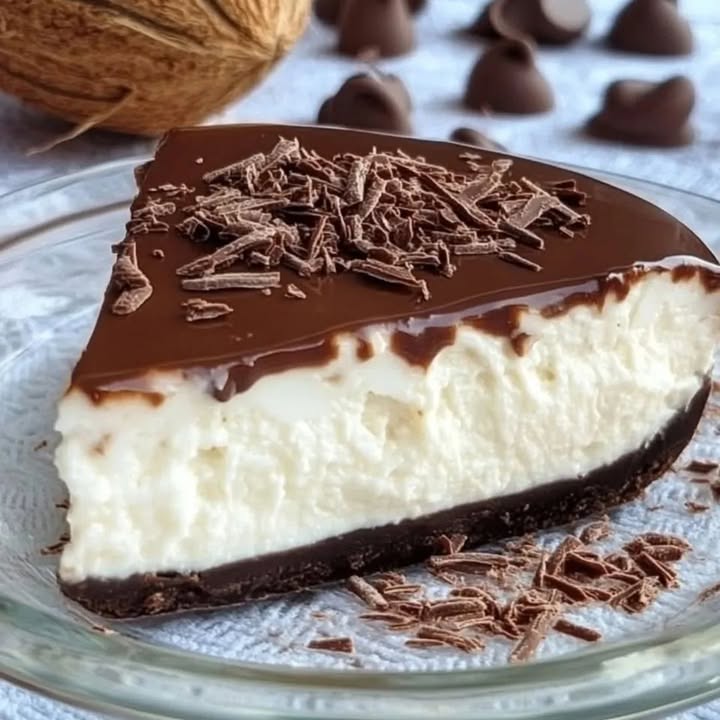
Let’s be real: life’s too short for boring desserts. This one delivers luxurious texture, tropical flavor, and minimal effort. The coconut layer is rich and chewy—like a fudge-meets-macaroon situation—while the chocolate layer melts in your mouth with a silky richness. Plus, it’s ready in just 20 minutes of active time (the rest is chill time—literally!). No oven, no fancy techniques, just pure joy in a dish.
Perfect Moments to Serve This Coconut Chocolate Bliss Dessert
Whether it’s a last-minute potluck, a birthday party, or just “I survived Monday” night—this dessert fits right in. I’ve served it at baby showers (guests asked for the recipe twice!), holiday gatherings (it pairs beautifully with peppermint tea), and even as a sweet surprise after a backyard BBQ. It’s also a hit with teens and kids—easy to cut into squares and serve with a dollop of whipped cream for extra flair.
Ingredients You’ll Need
- Coconut layer:
- 1 can (14 oz) sweetened condensed milk
- 200 ml coconut milk (full-fat for best texture)
- 1 tablespoon unsalted butter
- 1 cup grated coconut (fresh is dreamy, but unsweetened desiccated works too)
- Chocolate layer:
- 200 g dark or milk chocolate, finely chopped
- 200 g sour cream (or thick Greek yogurt as a lighter swap)
Easy Ingredient Swaps (Because Life Happens!)
- No coconut milk? Use regular milk—but add 1 extra tablespoon of butter for richness.
- All out of sour cream? Full-fat Greek yogurt gives a similar tang and creaminess.
- Prefer dairy-free? Use coconut condensed milk and dairy-free chocolate—just check labels!
- Sweet tooth too strong? Swap half the dark chocolate for semi-sweet to balance the sweetness.
How to Make Your Coconut Chocolate Bliss Dessert
Step 1: Cook the Coconut Layer
In a medium saucepan, combine the condensed milk, coconut milk, butter, and grated coconut. Place over medium heat and stir constantly with a wooden spoon—it smells like a tropical vacation already! Keep stirring until the mixture thickens and pulls away from the bottom of the pan, about 8–10 minutes. You’ll know it’s ready when it holds its shape like soft fudge. Pour it into a lined or greased 8×8-inch dish and spread it evenly with a spatula. Pro tip: Use parchment paper so you can lift the whole dessert out later for clean slices!
Step 2: Melt the Chocolate
While the coconut layer cools, chop your chocolate into small, even pieces. Melt it gently—either in a double boiler (a heatproof bowl over simmering water) or in 30-second bursts in the microwave, stirring between each. Don’t rush this! Overheating makes chocolate grainy. Once smooth and glossy, stir in the sour cream until fully blended. The mixture should become silky and pourable—like melted chocolate mousse!
Step 3: Layer and Chill
Pour the warm chocolate mixture over the cooled coconut layer. Tilt the dish gently or use an offset spatula to spread it into an even coat. Don’t worry if it’s not perfect—rustic charm is part of its beauty! Pop it into the fridge for at least 2 hours, or until firm to the touch. Chef’s tip: For extra flair, sprinkle toasted coconut flakes or chocolate shavings on top right after pouring the chocolate layer—they’ll stick perfectly as it sets.
Timing Breakdown
- Prep time: 10 minutes
- Cooking time: 10 minutes
- Chilling time: 2 hours (minimum)
- Total time: 2 hours 20 minutes
- Servings: 10 generous squares
Chef’s Secret Trick
Add a pinch of sea salt to the chocolate layer right before pouring. It cuts through the sweetness and makes the coconut flavor pop even more. Trust me—it’s the difference between “yum” and “WOW!”
Fun Fact About This Dessert
Coconut and chocolate have been flavor soulmates since the 1920s, when candy makers first combined them in Mounds and Almond Joy bars. But long before that, Indigenous communities in the Caribbean and Southeast Asia used coconut and cacao in ceremonial drinks! So in a way, you’re making ancient magic—with a modern twist.
Necessary Equipment
- Medium saucepan
- Wooden spoon or silicone spatula
- 8×8-inch square dish (glass or metal)
- Parchment paper (highly recommended)
- Heatproof bowl (for melting chocolate)
- Offset spatula or butter knife
How to Store Your Coconut Chocolate Bliss Dessert
Keep it covered in the fridge for up to 5 days. I like to wrap the whole dish in plastic or transfer cut pieces to an airtight container. The layers stay firm, and the flavor actually deepens after a day!
If you’re prepping ahead, this dessert freezes beautifully. Wrap individual squares in parchment and store in a freezer bag for up to 2 months. Thaw in the fridge overnight before serving.
Avoid leaving it at room temperature for more than 1 hour—especially in warm weather. The chocolate layer can soften quickly, and while it’s still safe to eat, it won’t hold its shape for clean slices.
Tips to Make It Even Better
- Toast your coconut flakes before mixing them in for a nutty depth.
- Use high-quality chocolate (at least 60% cocoa for dark) for the best melt and flavor.
- Let the coconut layer cool completely before adding chocolate—otherwise, it might mix and blur the layers.
- Add a splash of vanilla extract to the coconut mixture for extra warmth.
Presentation Ideas That Wow
- Cut into neat squares and stack two on a mini spoon for bite-sized elegance.
- Serve with a drizzle of caramel or a dusting of cocoa powder.
- Top each piece with a single edible flower or mint leaf for color.
- Layer it in mini dessert cups for a parfait-style treat.
6 Healthier Twists on Coconut Chocolate Bliss Dessert
Want to lighten it up without losing flavor? Try these fun variations:
- Dairy-Free Dream: Use coconut condensed milk, full-fat coconut cream instead of sour cream, and dairy-free chocolate. Still rich, totally plant-based!
- Low-Sugar Version: Swap regular condensed milk for a sugar-free version (like Lakanto), use unsweetened coconut, and opt for 85% dark chocolate.
- Protein-Packed: Stir 1–2 tablespoons of unflavored collagen or vanilla protein powder into the chocolate layer—it thickens it nicely and adds staying power.
- Gluten-Free Friendly: Naturally gluten-free! Just double-check chocolate labels for hidden additives.
- Vegan Delight: Combine coconut condensed milk, coconut yogurt, and vegan chocolate. Chill and enjoy guilt-free!
- Mini Jars: Layer in small mason jars for portion control—and they make adorable gifts!
Common Mistakes to Avoid
Mistake 1: Not Stirring the Coconut Mixture Constantly
If you walk away while cooking the coconut layer, it can scorch on the bottom—ruining both flavor and texture. Condensed milk burns easily! Stay close and stir nonstop with a wooden spoon or heatproof spatula. Pro tip: Keep the heat at medium—not high—even if you’re in a hurry.
Mistake 2: Pouring Chocolate on a Warm Coconut Base
Hot coconut layer + melted chocolate = muddy layers and a soft mess. Always let the coconut layer cool to room temperature (about 20–30 minutes) before adding the chocolate. Patience here means clean, beautiful layers later!
Mistake 3: Using Low-Fat or Watery Coconut Milk
“Lite” coconut milk has too much water and won’t give you that luscious, creamy texture. Go for full-fat canned coconut milk—it separates naturally; just stir it well before measuring. The fat = flavor and thickness!
Mistake 4: Skipping the Chill Time
Two hours might feel like forever, but this dessert needs time to set. If you cut too soon, it’ll be gooey and slide apart. Plan ahead—or make it the night before! It actually tastes better after resting overnight.
Mistake 5: Over-Mixing the Chocolate Layer
Once you add sour cream to melted chocolate, stir gently until just combined. Over-mixing can cause the chocolate to seize or become grainy. Fold it like you’re folding whipped cream—soft and slow!
Frequently Asked Questions
Can I use sweetened shredded coconut instead of unsweetened?
You can, but be warned: sweetened coconut adds extra sugar, which may make the dessert overly sweet—especially with condensed milk already in the mix. If you must use it, reduce the condensed milk by 2 tablespoons or balance with extra dark chocolate.
How do I know when the coconut layer is done cooking?
It’s ready when the mixture thickens enough to hold its shape briefly on the spoon and pulls cleanly away from the bottom of the pan as you stir. It should look glossy and leave a trail that doesn’t immediately fill in. Don’t undercook—it’ll be too runny!
Can I make this dessert ahead of time?
Absolutely! In fact, it’s better the next day. The flavors meld, and the texture firms up beautifully. Just cover it tightly and refrigerate for up to 2 days before serving. Add decorations like coconut flakes right before serving to keep them crisp.
What if my chocolate seizes when I add sour cream?
That usually happens if the chocolate is too hot or the sour cream is cold. Always let melted chocolate cool slightly (to warm, not hot) before mixing in room-temperature sour cream. If it seizes, try adding 1 teaspoon of warm coconut oil and stir gently—it often rescues it!
Can I use white chocolate instead of dark or milk?
Yes! White chocolate gives a sweeter, creamier top layer. But make sure it’s real white chocolate (with cocoa butter), not “white chips” made with palm oil—they don’t melt the same way. Pair it with toasted coconut for extra contrast.
Is this dessert gluten-free?
Yes—naturally! None of the core ingredients contain gluten. However, always check your chocolate and condensed milk labels if you’re highly sensitive, as some brands may process in shared facilities.
Can I double the recipe?
Sure! Just use a 9×13-inch dish instead. Cooking time for the coconut layer may increase slightly—watch for that pull-away texture. The chocolate layer scales easily—just keep the 1:1 ratio of chocolate to sour cream.
Why is my dessert too soft after 2 hours?
It might be your fridge temperature (should be at or below 40°F) or too much moisture in the coconut layer. Make sure you cooked it long enough to thicken. If it’s still soft, chill for another hour—it usually firms up!
Can I add nuts or fruit?
Lightly! A sprinkle of chopped toasted almonds or a few dried cranberries on top adds nice texture. But avoid juicy fruits—they’ll make the layers soggy. Stick to dry or toasted add-ins for best results.
What’s the best way to cut clean slices?
Use a sharp knife dipped in hot water, then wiped dry between cuts. This melts through the chocolate cleanly without dragging the layers. Also, let the dessert sit at room temp for 5 minutes before slicing—it’s easier to cut when not ice-cold.
Final Sweet Thoughts
This Coconut Chocolate Bliss Dessert is more than just a recipe—it’s a hug in food form. It’s the kind of treat that brings people together, sparks “Can I have the recipe?” texts, and disappears faster than you can say “second helping.” Whether you’re a busy parent, a dessert newbie, or a seasoned baker, this one’s foolproof, flexible, and full of flavor. So go ahead—whip it up, chill it out, and get ready for happy faces around your table. Your taste buds (and your guests) will thank you!
Coconut Chocolate Bliss Dessert
Ingredients
Equipment
Method
- In a medium saucepan, combine the condensed milk, coconut milk, butter, and grated coconut. Place over medium heat and stir constantly until thickened (about 8–10 minutes).
- Pour the coconut mixture into a lined or greased 8x8-inch dish and spread evenly.
- While the coconut layer cools, melt the chocolate in a heatproof bowl over simmering water or in the microwave, stirring until smooth.
- Stir in the sour cream until fully blended into the chocolate mixture.
- Pour the chocolate mixture over the cooled coconut layer and spread evenly.
- Refrigerate for at least 2 hours or until firm.